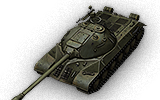
IS-3
IS-3

Mouse over "
[Client Values; Actual values in
| 2,568,500 |
| 1450340 HP Hit Points |
| 48.68/50.5625.35/53.9 t Weight Limit |
- Commander (Radio Operator)
- Gunner
- Driver
- Loader
| 650700 hp Engine Power |
| 38/15 km/h Speed Limit |
| 2730 deg/s Traverse |
| 13.3527.61 hp/t Power/Wt Ratio |
| NoNo Pivot |
| // mm Hull Armor |
| 175/120/100249/172/100 mm Turret Armor |
AP/APCR/HE
AP/APCR/HE Shells |
1025/4800/608
1025/4800/608 Shell Cost |
| 390/390/530390/390/530 HP Damage |
| 175/217/61225/265/68 mm Penetration |
|
4.08 r/m ▲
4.51 r/m Standard Gun ▲ Rate of Fire Standard Gun |
|
1591.2 ▲
Standard Gun
▼
Standard Gun
▲
1758.9 Standard Gun ▲
Standard Gun
▼
Standard Gun
▲ Damage Per Minute Standard Gun |
|
0.46 m ▲
0.4 m With 50% Crew: 0.57 m ▲ Accuracy With 50% Crew: 0.496 m |
| 3.4 s 3.4 s Aim time |
| 2826 deg/s Turret Traverse |
| 360° Gun Arc |
| -5°/+23°-5°/+23° Elevation Arc |
| 2828 rounds Ammo Capacity |
| 1512 % Chance of Fire |
| 330 m 350 m View Range |
| 440 m 730 m Signal Range |
Additional Statistics
(Top Configuration)
Camouflage
- Stationary: 7.1%
- When Moving: 3.7%
- When Firing: 1.4%
Terrain Resistance
- On Hard Ground: 0.96
- On Medium Ground: 1.34
- On Soft Ground: 2.01
Dispersion Change Values
- Turret Contribution
- Rotation: 0.08
- Shot Recoil: 2.88
- Suspension Contribution
- Acceleration: 0.2
- Turning: 0.2
With 100% Crew
VIII
2568500
The IS-3 is a Soviet tier 8 heavy tank.
Mass production of the vehicle started in May 1945. On September 7,1945, IS-3 tanks took part in the Allied Victory Parade through Berlin. A total of 1170 vehicles were manufactured by the end of 1946, when production was canceled. From 1948 through the late 1950s, the tanks underwent a number of modernization refits.
The IS-3 has more agility and speed than the German Pz.Kpfw. Tiger II, and finds itself at home engaging in close-quarters combat. While the frontal hull armor is not as thick as its German counterpart, it more than makes up for as it is sloped and the tank is agile enough to use it effectively. The front of its upgraded turret is also very well armored and has small weak points, making it difficult to penetrate. However, it cannot use this to hull down in common locations because the tank has a low profile and lacks gun depression. Instead, use rises in the ground to engineer yourself extra gun depression, or hull down behind the wrecks of enemy tanks. Another technique the IS-3 excels at is reverse sidescraping; the act of showing its side armor at an extreme angle by parking its back up against hard cover; as the front-mounted turret limits exposure from doing so. However, due to the low profile of the tank, the turret roof or engine deck can often be penetrated in this position. In addition, the IS-3 cannot use classic sidescraping techniques due to its pike nose negating the sloping of the frontal armour and forward mounted turret; doing so only exposes the already thin frontal hull at a flatter angle. Despite this, the IS-3 is a devastating tank up front when it is equipped with its top gun, boasting solid alpha damage and high penetration.
The IS-3 leads to the T-10, and the Object 257.
Modules / Available Equipment and Consumables
Modules

Guns
| Tier | Gun | Penetration (mm) |
Damage (HP) |
Rate of fire (rounds/minute) |
Dispersion (m/100m) |
Aiming time (s) |
Weight (kg) |
Price (
| |
|---|---|---|---|---|---|---|---|---|---|
| VII | 100 mm D10T | 175/235/50 | 250/250/330 | 6.82 | 0.42 | 2.9 | 2257 | 78180 | |
| VII | 122 mm D-2-5T | 175/217/61 | 390/390/530 | 4.08 | 0.46 | 3.4 | 2600 | 84980 | |
| VIII | 122 mm D-25T | 175/217/61 | 390/390/530 | 4.88 | 0.46 | 3.4 | 2590 | 125140 | |
| IX | 122 mm BL-9 | 225/265/68 | 390/390/530 | 4.51 | 0.4 | 3.4 | 2790 | 178500 |

Engines
| Tier | Engine | Engine Power (hp) |
Chance of Fire on Impact (%) |
Weight (kg) |
Price (
| |
|---|---|---|---|---|---|---|
| VIII | V-11 | 650 | 15 | 750 | 55270 | |
| IX | V-2-54IS | 700 | 12 | 700 | 79290 |

Suspensions
| Tier | Suspension | Load Limit (т) |
Traverse Speed (gr/sec) |
Rmin | Weight (kg) |
Price (
| |
|---|---|---|---|---|---|---|---|
| VII | IS-3 | 50.56 | 27 | B/2 | 10000 | 17780 | |
| VIII | IS-3M | 53.9 | 30 | B/2 | 10000 | 31450 |

Radios
| Tier | Radio | Signal Range (m) |
Weight (kg) |
Price (
| |
|---|---|---|---|---|---|
| VII | 10RK | 440 | 100 | 18600 | |
| IX | 12RT | 625 | 110 | 33600 | |
| X | R-113 | 730 | 80 | 52200 |
Compatible Equipment


![]()


![]()
![]()
![]()
![]()
![]()
![]()


![]()

![]()

Compatible Consumables
![]()
![]()
![]()
![]()
![]()
![]()
![]()
![]()
![]()
![]()
![]()
![]()
![]()
![]()
![]()
![]()
![]()
![]()
![]()
![]()
![]()
![]()
![]()
![]()
Player Opinion
Pros and Cons
Pros:
- Very tough frontal turret armor. Excellent spaced & internally angled side armor, great at reverse sidescraping
- Good mobility & low profile for a heavy tank. Pike frontal armor can give surprising bounces
- Excellent top gun - high alpha damage with good penetration, gun handling and accuracy
- Tracks on the front hull count as 20mm of armor, bringing effective armor in certain areas up from ~190 to ~230
- Low profile means that face hugging and side hugging Japanese and German heavies can prevent them from hitting you
Cons:
- Noticeably poor view range.
- Big lower plate that can be penetrated by many other tier 8 heavys.
- Weakspot above the gun that has only 30-50mm of armor
- Ammoracked almost frequently
Performance
Low profile, sloped armor, mobility and alpha damage make this tank very useful in all situations, particularly in urban and close-range combat. At this tier the once-fearsome 122 mm D-25T bounces off enemy armor more frequently, so try to get side shots when you can until you can research the BL-9. The upgraded BL-9 gun wreaks havoc on tier 9 tanks and below, boasting very high alpha and penetration for its class but lacking in the fire rate department. The Gun Laying Drive and Vertical Stabilizer are reasonably effective, although the usefulness of these are eclipsed by that of the Gun Rammer and Vents. Due to the horrible accuracy and aim time of the IS-3, taking more than the occasional potshot beyond 300m is not recommended. However, the excellent on-the-move gun handling allows it to snap shots without aiming them at close range. Angled properly, the IS-3's armor will consistently bounce shots from other tier 8's and below, especially from the front. Whilst the front plate is only ~190mm thick in effectiveness, it requires no angling at all, allowing you to charge enemies down to deny them effective shots at you. Be careful at close range, however, as the center turret roof panel is extremely prone to being overmatched, especially against taller tanks, which most heavy tanks you face are.
Its playstyle is well-suited to aggressive force leading and peek-a-booming when at top tier. The IS-3 will find itself at home on urban maps and other maps that allow it to take cover and move to get close to a target. A semi-hull-down position works well at mid-range, covering the somewhat vulnerable frontal armor and forcing shots to be taken on the extremely hard-to-penetrate turret. One thing of note is that unless the IS-3 is angled upward, the lower plate is generally just as strong as, if not stronger than the rest of the frontal hull, preventing it from being used as a weakspot. Thanks to its spaced side armor, it often takes non-damaging shots on the sides, but the tracks tend to get damaged often. Once the 122 mm BL-9 is unlocked, the IS-3 displays truly fearsome power and is among the kings of tier 8 tanks, able to threaten even tier 10's.
It cannot be stressed enough how glorious of a gun the BL-9 is to those used to having only 175mm of penetration. With its 225mm of penetration, the IS-3's top gun one of the highest penetration guns among non-premium tier 8 heavies, eclipsing competitors such as the 110, the O-Ho and T32. Although it is not nearly as accurate as most guns, the IS-3's top gun is still accurate enough to land shots into somewhat small weak spots at closer range, such as the cupola of the AMX M4 mle. 49. However, due to low profile, the cupola of the T29, T34, T30, and even the M103 and Conqueror is quite often impossible to hit. Just don't try out firing most enemies, as they will likely have a better rate of fire than you. With the BL-9, it is even possible to pen the side of most tanks in game, such as the E100's turret, though the premier steel walls of the game such as the E100 and E75 from the front still prove to be very frustrating opponents.
Aiming at flimsy weakspots, as with most heavy tanks, can amplify the effectiveness of the IS-3. Using this method, it is not too difficult at all for you to beat out a multitude of Tier 9 tanks, or skilled players in tier 7s or even tier 8s, as they will not expect you to pummel their weak spots rather than shooting for possibly hidden locations where you know you will pen; this is especially effective against T29s and T34s if they are using plenty of cover or are hiding behind dead tanks.
Enforce your supremacy when at top tier, especially if the opposing team has no IS-3 of their own. With your alpha damage do not be afraid to knock out lower tier medium or light tanks that could prove to be a nuisance first as long as they are within your "brawling ring". Otherwise focus on eliminating other heavies.
When not at top tier, as with the IS, it becomes more rewarding to be "plucky", or clever, especially in T10 games, as if you join your fellow T10 heavies you will be out-alpha'd and creamed by higher tier enemy tanks, especially tanks like the E100 and E75 on flat terrain if you are unable to flank fast enough. But it can become extremely rewarding for you if you are able to get behind a higher tier tank and potentially cripple them.
However, unlike in the IS, you have a ridiculously strong turret, particularly from the front. It is so strong in fact that it should be no surprise that even premium rounds from a Maus or even the much more lethal E100 will just bounce right off your turret like it is nothing. If you have allies with a line of fire on such tanks and have a good position in which you can bounce such shots off of your turret, do not keep your pride from letting your allies knock these tanks out while they are distracted with trying to assert their power upon your tank.
The IS-3, strangely however, has weaker points on its pike nose which skilled players who are aware of them can easily exploit, this makes playing against such players (of which there are many) a slightly poor proposition for the IS-3, as virtually anything with 175mm of penetration or more can easily punch through these weak spots. Try to expose them as infrequently as you can, or if you have to expose them, angle them in a way shells will easily bounce off if enemies are not careful with their aim.
Contrary to popular belief, the little hole on the front of the turret is not a weak-spot, the tracks are very good at eating shots, and the sides and corners have spaced armor, thus making them areas where you can fire at but almost certainly do no damage whatsoever. However, the tracks will get damaged to most side shots, since experienced players know that shooting through the tracks is the best wat to penetrate the side of the IS-3. Also, in coming shells that hit the angled side behind the spaced armor often ricochets towards the tracks, making them more suspectible to taking damage.
Early Research
- The V-2-54IS engine, the 12RT radio, and the 122 mm D-25T gun carry over from the IS and can be installed immediately, putting the IS-3 in a great starting position, research wise.
- If you prefer survivability, you can start by researching the upgraded turret. The extra meters of view range, additional 50 hit points and greatly increased armor and sloping can make a difference. However, do not that this increase in survivability only grants you bonus cursing time due to the woeful inadequacy of the stock gun.
- Alternatively, the fearsome BL-9 next will boost firepower drastically, turning this tank from an opportunist to a grade A brawler. This upgrade provides some much needed penetration, as the 175/217 offered by both D25T guns and the 175/235 from the D10T just do not cut it. Additionally, the BL-9 improves the reticule bloom and overall accuracy of the tank greatly.
- For better terrain resistances and traverse, one can research the upgraded suspension before the top gun or turret, but the added weight capacity isn't necessary.
Crew Training:
With retraining:
First go for the full repair crew, since you are a brawler and close combat tank you get tracked often. You don't want to be permatracked in the engagement. Once you reached your full first skill, drop the commanders repair for sixth sense and safe stowage for the loader. Than for the second skill, pick repairs for the commander and loader, snap shot for the gunner and off road driving for the driver. After reaching the second skill. Drop all for: Brother In Arms (BIA) first skill, second skills: Commander sixth sense and loader safe stowage, gunner and driver repairs. Train the third skill the same as you did with the second skill. After reaching three skills you can go with your commander for jack of all trades, gunner Deadeye, driver controlled impact for ramming, and the loader the Intuition.
Without retraining:
First go for sixth sense on the commander, safe stowage on the loader and repairs on the other two crew members. After that you pick all 4 crew members BIA. For the third skill, the commander trains repairs (or jack of all trades, depends on your choice), gunner smooth ride, the driver off-road driving and the loader repairs.
Suggested Equipment
![]()
![]()
![]()
![]()
External Reviews and Opinions
Gallery


Historical Info
The Iosef Stalin 3, also known as the Joseph Stalin 3 had improved armor layout, and a hemispherical cast turret (resembling an overturned "soup bowl") which became the hallmark of post-war Soviet tanks. While this low, hemispherical turret may have made the IS-3 better protected, it also imposed severe penalties inside the tank by significantly diminishing the working headroom, especially for the loader (Soviet tanks in general are characterized by uncomfortably small interior space compared to Western tanks). The low turret also limited the maximum depression of the main gun, since the gun breech had little room inside the turret to pivot on its vertical axis. As a result, the IS-3 was less able to take advantage of hull-down positions as Western tanks. The IS-3's pointed prow earned it the nickname Shchuka (Pike) by its crews. It weighed slightly less than the IS-2 and stood 30 cm lower.
Firepower
The 122mm A19 main gun was an established field gun as a towed howitzer and not only offering a capable armour piercing capacity at short ranges, it offered a superior bunker bashing capability thanks to the High Explosive rounds it fired. The 122m A19 had been around since the 1930’s and had an established manufacturing infrastructure behind it, which also supported the decision to adopt it as the main gun. Also known as the D25-T, it used Separate Loading ammunition, which limited the amount of shells carried to 28. The HE round or Armour piercing round was loaded in to the breach and then the combustible charge was loaded after, at which point the breach was closed and the gun fired. Two 7.62mm and one 12.7mm MG’s were used as secondary armaments.
The D25-T had an unfortunate tendency to explode, and its gun tube had a relatively short life. During trials on the A19's muzzle brake, the tube exploded, seriously injuring Marshall Kliment Voroshilov in the process; this led to protests against further development of the A-19, but Joseph Stalin intervened and insisted the A-19 be fielded regardless. The 122/40 D25-T also had a short tube life; approximately 200 rounds could be fired out of the main gun before the gun barrel wore out.
Despite these problems, the IS-3's main gun possessed an impressive amount of firepower. The D25-T could throw a 122mm APBC round 2000m and potentially penetrate up to 129mm of RHA steel. At 500m, the A-19's BR-471B APBC could penetrate up to 157mm.
Service History
The IS-3 came too late to see action in World War II. Though some older sources claim that the tank saw action at the end of the war in Europe, there are no official reports to confirm this. It is now generally accepted that the tank saw no action against the Germans, although one regiment may have been deployed against the Japanese in Manchuria.
In post-war conflicts, the IS-3 saw combat with the Soviet Army during the 1956 invasion of Hungary, and the Prague Spring in 1968.
Starting in 1960, the IS-3 was slightly modernized as the IS-3M, in a manner similar to the IS-2M. The Egyptian Army acquired about 100 IS-3M tanks in all from the Soviet Union. During the Six Day War, a single regiment of IS-3M tanks was stationed with the 7th Infantry Division at Rafah; the 125th Tank Brigade of the 6th Mechanized Division at Kuntilla was also equipped with about 60 IS-3M tanks.
Israeli infantry and paratrooper units had considerable difficulty with the IS-3M when it was encountered due to its thick armour, which shrugged off hits from normal infantry anti-tank weapons such as the Bazooka. Even the 90 mm AP shell fired by the main gun of the Israeli Defense Force (IDF) M48 Patton tanks could not penetrate the frontal armour of the IS-3s at normal battle ranges. However, due to the IS-3's much thinner flank armor, Israeli Patton and Centurion Tanks had little trouble penetrating the sides of the IS-3 tanks. Captured tanks were subsequently used by the Israeli army as static artillery pieces.
Historical Gallery


Historical Accuracy Errata
Like many Soviet tanks in game, the IS-3 has increased gun depression. In reality it had -3° instead of -5°.
- The 122 mm BL-9 gun was only fitted on the Object 243 (ISU-122-1). Its configuration on the IS-3 is fake.
- The IS-3's engine is considerably more powerful than in reality, with 700 hp compared to the historical 600.