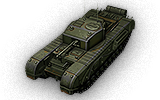
Churchill III
 Churchill III

Mouse over "
[Client Values; Actual values in
| 1,500 |
| 920184 HP Hit Points |
| 39.71/41.9518.84/41.95 t Weight Limit |
- Commander
- Gunner
- Radio Operator
- Driver
- Loader
| 374374 hp Engine Power |
| 28/14 km/h Speed Limit |
| 2020 deg/s Traverse |
| 9.4219.85 hp/t Power/Wt Ratio |
| NoNo Pivot |
| // mm Hull Armor |
| 88/88/76.288/88/76.2 mm Turret Armor |
AP/APCR
AP/APCR Shells |
45/2400
45/2400 Shell Cost |
| 75/75/75/75/ HP Damage |
| 110/180/110/180/ mm Penetration |
|
26.25 r/m ▲
26.25 r/m Standard Gun ▲ Rate of Fire Standard Gun |
|
1968.75 ▲
Standard Gun
▼
1968.75 Standard Gun
▲
Standard Gun
▼ Damage Per Minute Standard Gun
|
|
0.43 m ▲
0.43 m With 50% Crew: 0.533 m ▲ Accuracy With 50% Crew: 0.533 m |
| 2.286 s 2.286 s Aim time |
| 3434 deg/s Turret Traverse |
| 360° Gun Arc |
| -6°/+12°-6°/+12° Elevation Arc |
| 170170 rounds Ammo Capacity |
| 1515 % Chance of Fire |
| 350 m 350 m View Range |
| 570 m 570 m Signal Range |
V
1500
The Churchill III is a Soviet tier 5 premium heavy tank.
A British tank supplied to the U.S.S.R. under Lend-Lease. The U.S.S.R. received a total of 301 vehicles, with some lost at sea during transport to Murmansk.
The Churchill is one of the most popular Tier V premium tanks, which boasts a rapid rate of fire, large hit point pool, and good armor that reliably deflects shots from most tanks of its tier and lower. It fares best against light and medium tanks of Tiers V and below that it can puncture to death rapidly -- with a gun rammer, vents, and a good crew the reload can be around 1.9 seconds. A well-known advantage of the Churchill III is that it generates large amounts of experience, which makes the Churchill III a very popular crew trainer.
Modules / Available Equipment and Consumables
Modules

Guns
| Tier | Gun | Penetration (mm) |
Damage (HP) |
Rate of fire (rounds/minute) |
Dispersion (m/100m) |
Aiming time (s) |
Weight (kg) |
Price (
| |
|---|---|---|---|---|---|---|---|---|---|
| IV | QF 6-pdr Mk. V | 110/180 | 75/75 | 26.25 | 0.43 | 2.29 | 450 | 22250 |

Engines
| Tier | Engine | Engine Power (hp) |
Chance of Fire on Impact (%) |
Weight (kg) |
Price (
| |
|---|---|---|---|---|---|---|
| V | Bedford Twin-Six | 374 | 15 | 1531 | 18000 |

Suspensions
| Tier | Suspension | Load Limit (т) |
Traverse Speed (gr/sec) |
Rmin | Weight (kg) |
Price (
| |
|---|---|---|---|---|---|---|---|
| V | Churchill | 41.95 | 20 | B/2 | 9000 | 4150 |

Radios
| Tier | Radio | Signal Range (m) |
Weight (kg) |
Price (
| |
|---|---|---|---|---|---|
| IX | WS No. 19R | 570 | 110 | 29400 |
Compatible Equipment

![]()


![]()
![]()
![]()
![]()
![]()


![]()

![]()

Compatible Consumables
![]()
![]()
![]()
![]()
![]()
![]()
![]()
![]()
![]()
![]()
![]()
![]()
![]()
![]()
![]()
![]()
![]()
![]()
![]()
![]()
![]()
![]()
![]()
Player Opinion
Pros and Cons
Pros:
- Excellent rate of fire
- Excellent premium APCR rounds with high shell velocity and penetration
- Good durability - nice frontal armor and large hitpoint pool
- Preferetial MM, on its own this tank will never see Tier VII opponents
- Standard rounds and repair bills are very cheap, good credit earner
Cons:
- Abysmal alpha damage for a heavy tank
- Poor accuracy
- Large and sluggish, vulnerable to flanking and artillery
- Weak turret armor
- Poor gun depression
Performance
The Churchill III is a decent heavy tank but is slower than most others. This tank makes up for its slow traverse speed with the fast fire of its gun. The Churchill III's gun is virtually transformed into a machine gun when equipped with a Tank Gun Rammer, making it have a two-second reload with a 50% crew; if you can get your crew to 100% you can have less than a two-second reload time. Aiming at delicate areas of enemy tanks and having the Dead Eye skill can devastate opponents. The Churchill is also one of the few tanks that maintains decent accuracy when firing on the move. Furthermore, despite a relatively poor accuracy shots tend to go down the center of the aim circle.
Lights and mediums of your own tier fear the Churchill III's firepower, but Tier V - VI heavies are to be avoided. The KV-1 can be a problem, unless you can get at close range and hammer his driver's hatch. Similar situation with the T1 Heavy Tank and BDR G1 B. The AT 2 should be absolutely avoided; same goes for the T-150. A KV-2 can one-shot a Churchill without breaking a sweat, even though you can use the reload time of the gun to hammer it and the 122mm gun on the KV-85 takes out more than half of your tank per shot, but if you can get to its flanks they are quite weak and hitting it repeatedly can end up setting it on fire.
The low damage and high rate of fire call for you to do module damage instead of trading shots at range -- try not to engage enemy heavies beyond punching distance. Tracking an enemy in a peek-a-boo position can keep him permanently stuck while dealing consistent damage if you stay out of his gun and keep firing at front wheel. And beware whilst on turret down positions: thanks to the slope on the front hemisphere, you will auto-bounce many small caliber shots, but optical devices will be taken out very frequently if you do this.
With a one-crew-for-each-position crew setup -- Commander/Gunner/Driver/Radio Operator/Loader -- the Churchill III is crew-compatible with three other Soviet premiums: the KV-1 Shielded, KV-220-2, and the newer KV-1SA; the exact same crew can be used in all three tanks without penalty. Non-premium crews that can be plugged in to any of these are the KV-1, KV-1S, and T-150.
The upkeep costs for the Churchill are low and a good match can earn you anything between 10-20,000 credits, sometimes even more. Being a good player in this tank will benefit you greatly.
- Note - This tank generates much more base exp compared to pretty much every other tank in the game. This plays into post-battle rewards, where the Churchill III is all but guaranteed great profits after a good match.
Early Research
Premium tank, requires no additional research
Suggested Equipment
![]()
![]()
![]()
![]()
![]()
Gallery


Historical Info
History
A20
Initially specified before the outbreak of the Second World War, the (General Staff designation) A20 was to be the replacement for the Matilda II and Valentine infantry tanks. The British turned to this tank after a great number of tanks were lost in France. In accordance with British infantry tank doctrine and based on the expected needs of World War I-style trench warfare, the tank was required to be capable of navigating shell-cratered ground, demolishing infantry obstacles such as barbed wire, and attacking fixed enemy defences. For these purposes, great speed and heavy armament was not required. For these purposes, if was heavily armoured, and the tracks ran around the length of the hull for maximum weight distribution and off-road performance.
The vehicle was specified initially to be armed with two QF 2 pounder guns each located in a side sponson, with a coaxial BESA machine gun. A third BESA and a smoke projector would be fitted in the front hull. The specification was revised to prefer a turret with 60 mm of armor to protect against ordinary shells from the German 37 mm gun. Outline drawings were produced based on the A12 Matilda turret and the engine of the Covenanter tank. Detail design and construction of the A20 was given to the Belfast shipbuilders Harland and Wolff, who completed four prototypes by June 1940. During the construction period, the armament was reconsidered; which including fitting either a 6 pounder or a French 75 mm gun in the forward hull. In the end, a 3-inch howitzer was chosen.[2][3] The A20 designs were short-lived however, as at roughly the same time the emergency evacuation of the British Expeditionary Force from Dunkirk occurred.
At 43 tons, with a 300 hp Meadows engine, the A20 had limited power. Vauxhall were approached to see if they could build the A20 and one example was sent to Vauxhall at Luton to see if they could provide an alternative engine. To this end, they developed a flat 12 petrol engine.[4]
A22
With France conquered, the scenario of trench warfare in Northern Europe was no longer applicable and the design was revised by Dr. H.E. Merritt,[note 2] Director of Tank Design at Woolwich Arsenal, based on the combat witnessed in Poland and France. These new specifications, for the A22 or Infantry Tank Mark IV, were given to Vauxhall in June 1940.[5]
With German invasion looking imminent and the United Kingdom having lost most of its military vehicles in the evacuation from France, the War Office specified that the A22 had to enter production within the year. By July 1940, the design was complete and by December of that year the first prototypes were completed. In June 1941, almost exactly a year as specified, the first Churchill tanks began rolling off the production line.
A leaflet from the manufacturer was added to the User Handbook which stated that it had great confidence in the fundamental design of the tank, but that the model had been put into production without time for proper honing and that improvements would be made in time.
- “ ....Fighting vehicles are urgently required, and instructions have been received to proceed with the vehicle as it is rather than hold up production.
All those things which we know are not as they should be will be put right... ”
The document then covered, for each area of the tank affected; the fault, precautions to avoid the fault, and what was being done to correct the problem.
This hasty development had not come without cost though, as there had been little in the way of testing and the Churchill was plagued with mechanical faults. Most apparent was that the Churchill's engine was underpowered and unreliable, and difficult to access for servicing. Another serious shortcoming was the tank's weak armament, the 2 pounder (40 mm) gun, which was improved by the addition of a 3 inch howitzer in the hull (the Mk IICS had the howitzer in the turret) to deliver an HE shell, albeit not on a howitzers usual high trajectory. These flaws contributed to the tank's poor performance in its first use in combat, the disastrous Dieppe Raid in August, 1942. The problem resulted in the howitzer's low traverse and the inadequate main armament.
Production of a turret to carry the QF 6 pounder gun began in 1941, but problems with the plate used in an all-welded design led to an alternative cast turret also being produced. These formed the distinction between Mark III and Mark IV.[6]
The poor performance of the Churchill nearly caused production to be ceased in favor of the upcoming Cromwell tank. It was saved by the successful use of the Mk III at the Second Battle of El Alamein in October 1942.
The second major improvement in the Churchill's design, the Mk VII, was first used in the Battle of Normandy in 1944. The Mk VII improved on the already-heavy armor of the Churchill with a wider chassis and the 75 mm gun which had been introduced on the Mk VI. It was primarily this variant, the A22F, which served through the remainder of the war and was re-designated as the A42 in 1945.
Design
The hull was made up of simple flat plates which were initially bolted together and welded in later models. The hull was split into four compartments; the driver's position at the front, then the fighting compartment including the turret, the engine compartment, and the gearbox compartment. The suspension was fitted under the two large "panniers" on either side of the hull, the the track running over the top. There were eleven bogies on either side, each carrying two 10-inch wheels. Only nine of the bogies were taking the vehicle weight normally, the front coming into play when the vehicle nosed into the ground or against an obstacle, the rear acting, in part, as a track tensioner. Due to the number of wheels, the tank could survive losing several without much in the way of adverse affects, as well as traversing steeper terrain obstacles. As the tracks ran around the panniers, escape hatches in the side could be incorporated into the design. These were retained throughout the revisions of the Churchill and were of particular use when the Churchill was adopted as the AVRE.
The Bedford Vehicles engine was effectively two engines in horizontally opposed configuration ("flat twelve") on a common crankshaft. There were four Solex carburators, each on a separate manifold, that fed three cylinders formed as a single cylinder head. The elements of the engine and ancillary components were laid out so they could be reached for maintenance through the engine deck covers. Air for the engine was drawn from the fighting compartment through air cleaners. Cooling air was drawn into the engine compartment through louvres on the sides, across the radiators and through the engine compartment by a fan driven by the clutch. This fan blew the air over the gearbox and out the rear of the hull. By opening a flap between the fighting compartment and the engine compartment, this airflow could be used to remove fumes produced by firing the armament. The 1,296 cubic inch capacity engine was rated at 350 bhp at 2,000 rpm, delivering 960 lb.ft over an engine speed range of 800 to 1,600 rpm.
The gearbox featured a regenerative steering system that was controlled by a tiller bar instead of the more commonplace brake levers or steering wheel. The tiller was connected, with servo assistance, hydraulicly to the steering brakes. The Churchill was also the first tank to utilise the Merritt-Brown gearbox, which allowed the tank to be steered by changing the relative speeds of the two tracks; this effect became more pronounced with each lower gear, ultimately allowing the tank to perform a "neutral turn" when no gear was engaged: it could fully turn on its own axis. There were final reduction gears, of the planetary type, in the driving wheels.
The first turrets were of cast construction and were rounded in shape, providing sufficient space to accommodate the relatively small 2 pounder gun. To fulfil its role as an infantry support vehicle, the first models were equipped with a 3 inch howitzer in the hull in a layout very similar to the French Char B. This enabled the tank to deliver a useful high-explosive capability while retaining the anti-tank capabilities of the 2 pounder. However, like other multi-gun tanks, it was limited by a poor fire arc: the entire tank had to be turned to change the aim of the hull gun. The Mk II dispensed with the howitzer and replaced it with a bow machine gun, and on the Mk III, the 2 pounder was replaced with the 6 pounder, significantly increasing the tank's anti-tank capabilities. The tank underwent field modification in North Africa with several Churchills being fitted with the 75 mm gun from destroyed M4 Shermans. These "NA75" variants were used in Italy. The use of the 75 mm, which was inferior as an anti-tank weapon to the 6 pounder, but better as an all-around gun, was soon made standard on successive versions.
Churchills made use of the Vickers Tank Periscope MK.IV. In the Mark VII, the driver had two periscopes as well as a vision port in the hull front that could be opened. The hull gunner had a single periscope as well as the sighting telescope on the BESA mounting. In the turret, the gunner and loader each had a single periscope and the commander had two fitted in his hatch cupola.
The armor on the Churchill, often considered its most important trait, was originally specified to a minimum of 16 millimeters (0.63 in) and a maximum of 102 millimeters (4.0 in). This was increased with the Mk VII to a range of 25 millimeters (0.98 in) to 152 millimetrer (6.0 in). Though this armour was considerably thicker than its rivals (including the German Tiger I tank, but not the Tiger II) it was not sloped, reducing its effectiveness. Earlier models were given extra armor by the expedient of welding extra plates on.
On the Mark VII, the hull front armor was made up of a lower angled piece of 5.5 in (140 mm), a nearly flat 2.25 in (57 mm) plate, and a vertical 6 inch plate. The hull sides, were for the most part, 3.75 in (95 mm). The rear was 2 in (51 mm) and the hull top 0.525 in (13.3 mm). The turret of the Mark VII was 6 in (150 mm) to the front and 3.75 in (95 mm) for the other sides. The turret roof was 0.79 (20 mm) thick. Plate was specified as IT 80, the cast sections as IT 90.[7]
The A22F, also known as "Heavy Churchill", was a major revision of the design. The most significant part was the use of welding instead of riveted construction. Welding had been considered earlier for the Churchill, but until its future was assured, this was no more than testing techniques and hulls at the firing ranges. What welding reduced in the overall weight (estimates were around 4%), the thicker armor of the A22F made up for. Welding was also required fewer man-hours in construction. The hull doors changed from square to round, which reduced stresses. A new turret went with the new hull. The sides, which included a flared base to protect the turret ring, were a single casting while the roof, which did not need to be so thick, was a plate fitted to the top.[8]
Since the engines on the Churchill were never up-graded, the tank became increasingly slower as additional armor and armament was equipped and weight increased; while the Mk I weighed 39,118 kg (40 long tons) and the Mk III weighed 39,626 kg, the Mk VII weighed 40,643 kg. This caused a reduction in maximum speed of the tank from its original 26 kilometers per hour (16 mph) down to 20.5 kilometers per hour (12.7 mph). The engines also suffered from many mechanical problems.
Another problem was the tank's relatively small turret that prevented the use of powerful weapons; definitive versions of the tank were armed with either the QF 6 pounder or the derivative QF 75 mm gun, both having reasonable power against armored and soft targets respectively, but with limited performance against the other. Although earlier Churchills could out-gun many contemporary German medium tanks, like the Panzer IV with the short-barrel 75 mm gun and the Panzer III's 50 mm gun with its 6 pounder, and the thick armor of all Churchill models could usually withstand several hits from any German anti-tank gun, late in the war, Germans had 75 mm high-velocity cannons as their main armament and increased protection, against which the Churchill's own guns often lacked sufficient armor penetration to fight back effectively. The Churchill had many variations, including many specialized modifications. The most significant change to the Churchill was that it was up-gunned from a 2 pounder, a 6 pounder, and then 75 mm guns over the course of the war. By the war's end, the late model Churchill Mk VII had exceptional amounts of armor: considerably more than the German Tiger tank. However, the firepower weakness was never fully addressed. The Mark VII turret that was designed for the 75 mm gun was of composite construction: cast with top and bottom plates welded into position.[5]
It is important to note that, despite its weaknesses, the Churchill had a significant advantage that was apparent throughout its career. Due to its multiple bogie suspension, it could cross terrain obstacles that most other tanks of its era could not.[citation needed] This feat served it served well, especially during the fighting in Normandy, and particularly, the capture of Hill 309 between the 30th and 31st July 1944 in operation Bluecoat, conducted by the VIII Corps.
Service history
North Africa
A few Churchills were in use for the Second Battle of El Alamein in October 1942. The six Mk III tanks (with the 6 pounder gun) of "KingForce" went into battle in support of the 7th Motor Brigade. Although all were heavily shelled by German anti-tank guns, only one received more than light damage. One tank was said to have been hit up to 80 times.[9][10]
Kingforce was disbanded afterwards. The Churchills had been sent to Africa to see if they could operate there, and a Tank Brigade ( three tank regiments[note 3]) was sent to Africa, going into action in February.
In one encounter, a Churchill tank got the better of a German heavy tank, a Tiger I, when a shot lodged between the Tiger's turret and turret ring. The crew abandoned the Tiger, which was subsequently captured by the British. As the first Tiger captured by the Western Allies, it was particularly useful, and is now on display at Bovington Tank Museum in the United Kingdom.
Italy
As the mainstay of the Tank Brigades, which operated in support of the infantry, Churchill units were in operation more often than other tank units.[11] The "NA75" conversions of Churchill Mark III to carry the US 75 mm gun were used in Italy. As the Churchill proved to be a better gun platform, the effective range of the 75 mm was increased.
North-West Europe
Churchills saw widespread action in Normandy as well as subsequent operations in the Low Countries and into Germany, such as the fighting in Reichwald during Operation Veritable.
Other theatres
In tests conducted in the Madang by the Australian Army in mid-1944 at the request of Britain's War Office, the Churchill was tested against the M4 Sherman and found it to be, overall, a superior tank for jungle warfare. However the Churchill was not used in the Far East.
Korean War and after
In late 1950, a Churchill Crocodile squadron was sent to Korea. In action against the Chinese, they mostly fought as gun tanks. These were the last use of the Churchill in action by the British. The tank remained in the service of the British Army until 1952 with one, a bridge-layer, remaining in service well into the 1970s.
USSR
The Soviet Union received a total of 301 Churchill Mk III and Mk IV types as part of the Lend-Lease programme.
Irish Army Service
The Irish Army took delivery of three Churchill Mk VI tanks in 1948 and a fourth in 1949. They were rented from the British War Office as trials vehicles until 1954, when they were purchased outright. This purchase was despite the fact that the supply and transport corps workshops, who maintained them, had reported that spares had all but run out.[12] Experiments were carried out involving replacing the existing Bedford engine with a Rolls Royce Merlin engine salvaged from an Irish Air Corps Seafire aircraft. The experiment was not a success, although the reasons are not recorded.[12] By 1967, only one Churchill remained serviceable, and by 1969 all were retired. One remains preserved in the Curragh Camp.
Variants


With number produced
- Churchill I (303) --- Equipped with a 2 pounder gun in the turret (150 rounds), and a coaxial Besa machine gun. There was a 3 inch howitzer in the hull (58 rounds). It was a tank that was noted for poor mechanical reliability. It was the main tank issued to the Canadian forces at Dieppe.
- Churchill Mk II (1,127) --- Replaced the hull howitzer for another machine gun to reduce cost and complexity. Sometimes referred to as Churchill Ia.
- Churchill Mk IICS (Close Support) --- Placed the gun in the hull and the howitzer in the turret, available in very limited numbers. Sometimes called Churchill II.
- Churchill Mk III (675) --- The III was the first major armament overhaul of the series, eliminating the hull howitzer and equipping the tank with a more powerful 6 pounder gun (84 rounds). Unlike early versions, it had a welded turret.
- Churchill Mk IV (1,622) --- The IV was the most numerous Churchill produced, and was virtually identical to the III, the largest change being a return to the less-costly cast turret.
- Churchill Mk V (241) --- A Churchill III / IV which was equipped with a close support 95 mm howitzer in place of the main gun (47 rounds).
- Churchill Mk VI (200) --- Along with several minor improvements, it was produced as standard with the 75 mm Mk V gun. Few were built due to the near release of the VII and current up-gunning of the III / IV.
- Churchill Mk VII (A22F) (1,600 with VIII) --- The second major redesign from previous models, the VII used the 75 mm gun, was wider, and had much more armor. It is sometimes called the Heavy Churchill. This version of the Churchill first saw service in the Battle of Normandy, and was re-designated A42 in 1945.
- Churchill Mk VIII --- A Churchill VII which replaced the main gun with a 95 mm howitzer (47 rounds).
Refitted previous versions:
- Churchill Mk IX --- Churchill III / IV upgraded with turret of the VII. Extra armor added along with gearbox and suspension modifications. If the old 6 pounder had been retained, it would have the additional designation of LT ("Light Turret").
- Churchill Mk X --- The same improvements as for the IX applied to a Mk VI.
- Churchill Mk XI --- Churchill V with extra armor and Mk VIII turret.
- Churchill NA75 (200) --- Churchill III / IV with up-graded weaponry using the turret and mantlet from a destroyed or scrapped Sherman (known as NA 75 from North Africa where the conversions took place), or having their current gun re-bored to 75 mm (III* / IV (75 mm) ) (84 rounds). More IVs were modified than IIIs, and their performance is virtually identical to the VI. To fit the Sherman mantlet required cutting away the front of the Churchill turret before it was welded in place, then the mantlet slot had to be cut away to give sufficient elevation. The Sherman 75 mm gun was designed for a left hand loader and the Churchill, in common with British practice, had a right hand loader. The gun was therefore turned upside down and the firing controls adapted.[13] The conversion of about 200 tanks was carried out between March–June 1944, and the conversion project earned the officer in charge an MBE as well as promotion.
Specialist vehicles
- Churchill Oke (3) --- A Churchill II or III with a flamethrower. The Oke flamethrowing tank was named after its designer, Major J.M. Oke. The design was basically for a Churchill tank fitted with the Ronson flamethrower equipment. A tank containing the flame fuel was fitted at the rear, with a pipe from it leading to the mounting on the front hull to the left, leaving the hull machine gun unobstructed. There were three (named "Boar", "Beetle" and "Bull") present, in the first wave, at Dieppe which were quickly lost,[14] and abandoned.
- Churchill AVRE (Armoured Vehicle Royal Engineers) --- A Churchill III or IV equipped with the Petard, a 290 mm Spigot mortar, throwing the 40 lb (18 kg) "Flying dustbin" with its 28 pound high explosive warhead; a weapon designed for the quick levelling of fortifications developed by MD1. The AVRE was designed after the Canadian defeat at Dieppe, and could also be equipped with numerous other attachments, such as mine flails, fascine rollers, explosive placers, etc. Post war, the Churchill AVRE was re-armed with a breech-loaded low velocity 165mm demolition gun which, was less dangerous for the loader (the hull gunner) as he previously had to stick his head and torso out of the Spigot Mortar armed AVRE to load the Mortar. The crew of six were drawn from the Royal Engineers, except for the driver who came from the Royal Armoured Corps. One of the RE crew was a demolitions NCO sapper responsible for priming the "Flying dustbin" and who led the crew when they dismounted from the tank to place demolition charges ("Wade" charges).
- Churchill ARV (Armoured Recovery Vehicle) --- Mk I - A turretless Mk I with a jib. Mk II - A Churchill with a fixed turret/superstructure with a dummy gun. It was equipped for recovering other tanks from the battlefield. Mounted a front jib with a 7.5 ton capacity, a rear jib rated for 15 tons, and winch that could pull 25 tons. Crew was 3 with enough room to carry the crew of the tank being recovered. Armament was a single Besa machine gun.
- Churchill ARK (Armoured Ramp Carrier) / Churchill Ark Mk II --- A turretless Churchill with ramps at either end and along the body to form a mobile bridge. The Mark 1 had trackways over the tracks for vehicles to drive along. The Mark 2 was an improvised version and crossing vehicles drove directly on the Churchill's tracks. the Link Ark (or "Twin Ark") was two ARKs used side-by-side to give a wide crossing. The ramps on these were folding types giving a longer, 65 ft (20 m), crossing.[15] This was used for the post war Conqueror heavy tank.
- Churchill Crocodile (no more than 800[16]) --- The Crocodile was a Churchill VII which was converted by replacing the hull machine gun with a flamethrower. The fuel was in an armored wheeled trailer towed behind. It could fire several 1 second bursts over 150 yards. The Crocodile was one of "Hobart's Funnies": another vehicle used by the 79th Armoured Division. A working example can still be seen at the Cobbaton Combat Collection in North Devon.[citation needed]
- Gun Carrier, 3in, Mk I, Churchill (A22D) (50) --- A fixed 88 mm (3.5 in) thick superstructure with the gun in a ball mount. The gun was an otherwise obsolete 3 inch anti-aircraft gun. Fifty were built in 1942, but none are known to have been used - the 17 pounder anti-tank gun gave the British the necessary firepower.
- Churchill Flail FV3902 or Toad --- A post-war (1950s) mine-clearing flail tank built on a Churchill chassis.
- Churchill Goat --- A chargelayer like the Double Onion device.
- Churchill Great Eastern --- A much larger longer ramp than the ARK for crossing 60 ft. The ramp was launched into position with rockets. Ten built and two delivered in 1945, but not used in action.[17]
- Churchill Kangaroo --- Churchill hull converted to an APC.
Designs based on chassis
In 1943, an attempt was made to up-gun the Churchill by using Heavy Churchill tanks modified to take a 17 pounder gun, as was done with the Sherman Firefly. This resulted in the Tank, Infantry, Black Prince (A43) in May 1945. Six prototypes were built, but the project was cancelled due to the emergence of the new and less complicated Centurion Mk1 which offered the same armament and armor and had just entered production.
Operators
- Australia retired, replaced with the Centurion tank
- Canada retired, replaced with the Centurion tank
- Ireland retired in 1969, replaced with the Comet tank
- Poland (Polish Armed Forces in the West) retired in 1947, no replacement
- United Kingdom retired, replaced with the Centurion tank
- Soviet Union (Lend-Lease) retired, replaced with IS-3 and T-10 tanks
Historical Gallery


Historical Accuracy Errata
The Bedford Twin-Six engine is more powerful than in reality, with 374 hp compared to the historical 350.
- Actual ammo capacity is 84 rounds, not a whopping 140.
- The Bedford Twin-Six is the same engine on the Churchill I, Churchill VII, Black Prince and Churchill Gun Carrier, yet the horsepower and chance of fire on impact are inconsistent.
- Dramatically worse gun elevation and depression than in reality, -6°/+12° instead of -12°/+20°.