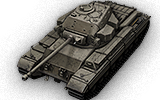
Caernarvon
Caernarvon

Mouse over "
[Client Values; Actual values in
| 2,520,000 |
| 1500400 HP Hit Points |
| 59.18/6026.46/64 t Weight Limit |
- Commander
- Driver
- Gunner
- Loader (Radio Operator)
| 650810 hp Engine Power |
| 34.3/12 km/h Speed Limit |
| 2224 deg/s Traverse |
| 10.9830.61 hp/t Power/Wt Ratio |
| YesYes Pivot |
| // mm Hull Armor |
| 152.4/88.9/88.9254/88.9/88.9 mm Turret Armor |
AP/APCR/HE
AP/APCR/HE Shells |
175/3200/75
660/4400/260 Shell Cost |
| 150/150/190280/280/370 HP Damage |
| 171/239/38220/252/47 mm Penetration |
|
13.33 r/m ▲
9.23 r/m Standard Gun ▲ Rate of Fire Standard Gun |
|
1999.5 ▲
Standard Gun
▼
Standard Gun
▲
2584.4 Standard Gun ▲
Standard Gun
▼
Standard Gun
▲ Damage Per Minute Standard Gun |
|
0.34 m ▲
0.34 m With 50% Crew: 0.421 m ▲ Accuracy With 50% Crew: 0.421 m |
| 2.3 s 2.3 s Aim time |
| 2630 deg/s Turret Traverse |
| 360° Gun Arc |
| -10°/+18°-10°/+18° Elevation Arc |
| 7050 rounds Ammo Capacity |
| 2020 % Chance of Fire |
| 370 m 400 m View Range |
| 550 m 750 m Signal Range |
Additional Statistics
(Top Configuration)
Camouflage
- Stationary: 5.4%
- When Moving: 2.9%
- When Firing: 1.4%
Terrain Resistance
- On Hard Ground: 1.06
- On Medium Ground: 1.25
- On Soft Ground: 2.21
Dispersion Change Values
- Turret Contribution
- Rotation: 0.13
- Shot Recoil: 3.36
- Suspension Contribution
- Acceleration: 0.13
- Turning: 0.13
With 100% Crew
VIII
2520000
The Caernarvon is a British tier 8 heavy tank.
Development of this infantry support tank started in 1944. The first prototype was ready for trials in 1952. A total of 21 tanks were manufactured but never entered service. Some of the vehicles were later converted into Conqueror heavy tanks.
A big change in the British heavy tank line, the Caernarvon marks the beginning of the "Universal Tank" era of the tree. Therefore, its mobility is much better than that of the Black Prince. However the hull armor is not as thick despite being sloped which is something previous tanks lacked. The top gun is an improvement of the one from its predecessor in terms of aim time, accuracy and rate of fire and has an ideal role for hulldown tactics as its large and well-armoured (269.9mm) gun mantlet can eat most shots tier-for-tier with no consequence. This playstyle has been improved with patch 9.20.1 which upgraded the top gun from a twenty pounder to the 32 pounder.
Unfortunately, it takes quite a while to realize this tank's potential if one has not previously unlocked modules on the British Medium tree. This tank has low alpha damage (280) and weak hull armor - therefore it is absolutely crucial to exploit this tank's strengths to the maximum in order to be successful in it, most notably its incredibly high rate of fire combined with tough turret and nice gun depression. When played to its strengths, this tank can indeed be fearsome and after the latest buffs in patch 9.20.1 it is now widely considered to be among the best tier 8 heavy tanks.
The Caernarvon leads to the Conqueror.
Modules / Available Equipment and Consumables
Modules

Guns
| Tier | Gun | Penetration (mm) |
Damage (HP) |
Rate of fire (rounds/minute) |
Dispersion (m/100m) |
Aiming time (s) |
Weight (kg) |
Price (
| |
|---|---|---|---|---|---|---|---|---|---|
| VII | OQF 17-pdr Gun Mk. VII | 171/239/38 | 150/150/190 | 14.29 | 0.34 | 1.9 | 826 | 70000 | |
| VIII | OQF 32-pdr Gun Mk. II | 220/252/47 | 280/280/370 | 9.23 | 0.34 | 2.3 | 2972 | 125000 |

Engines
| Tier | Engine | Engine Power (hp) |
Chance of Fire on Impact (%) |
Weight (kg) |
Price (
| |
|---|---|---|---|---|---|---|
| V | Rolls-Royce Meteor Mk. IVB | 650 | 20 | 744 | 16000 | |
| IX | Rolls-Royce Meteor M120 | 810 | 20 | 744 | 92000 | |
| IX | Rolls-Royce Meteor Mk. IVC | 750 | 20 | 744 | 84000 |

Suspensions
| Tier | Suspension | Load Limit (т) |
Traverse Speed (gr/sec) |
Rmin | Weight (kg) |
Price (
| |
|---|---|---|---|---|---|---|---|
| VII | FV221 | 60 | 22 | 0 | 12000 | 20200 | |
| VIII | FV221A | 64 | 24 | 0 | 12000 | 30500 |

Radios
| Tier | Radio | Signal Range (m) |
Weight (kg) |
Price (
| |
|---|---|---|---|---|---|
| VIII | WS No. 22 | 700 | 40 | 25000 | |
| VIII | WS No. 19 Mk. III | 550 | 40 | 22000 | |
| X | SR C42 | 750 | 40 | 54000 |
Compatible Equipment


![]()


![]()
![]()
![]()
![]()
![]()
![]()


![]()

![]()

Compatible Consumables
![]()
![]()
![]()
![]()
![]()
![]()
![]()
![]()
![]()
![]()
![]()
![]()
![]()
![]()
![]()
![]()
![]()
![]()
![]()
![]()
![]()
![]()
![]()
![]()
Player Opinion
Pros and Cons
Pros:
- Gun has insanely good RoF combined with reasonable penetration and accurate firing on the move, can fire and advance
- Good gun depression combined with strong armor on second turret
- Best DPM of all T8 heavies (near 2700 stock, 3300 max)
- Improved speed over lower tier British heavies and good view range
- Upper frontal armor is well angled and can bounce several shells from same tier tanks
Cons:
- Lower plate is easily hit and penetrated, especially on flat ground, poor roof armor and speed make it an easy target for SPG
- Low traverse speed
- Ammo rack is weak and can be damaged frontally.
- High ammo cost for average alpha rounds
- Poor alpha damage for a heavy tank
Performance
The Caernarvon is a huge departure from the Black Prince in terms of playstyle; this tank is a FULLY dedicated support unit, and requires a different set of tactics. No longer are you able to act as a battering ram, zig-zagging your way up the front with your forward armor more or less exposed. While this tank might be played successfully with something approaching the same maneuvers as the Black Prince, it is let down by its inferior hull, which is this tank's foremost weakness. It is poorly armored, fragile, and with a large silhouette which attracts plenty of artillery fire. The Caernarvon also sports a terrible traverse speed and lackluster acceleration, often making it a pain to position correctly.
However, experienced players will recognize the strengths of its hard turret and incredibly high rate of fire, combined with good gun handling, nice gun depression and excellent accuracy. In practice, you can shoot 2 or sometimes even 3 times before your enemy reloads. Your DPM is higher than many tier 9 tanks, so put this to use. Keeping enemy tanks permatracked is a viable tactic in this tank. Also, deadeye perk can make a great deal of difference to the fight if you pick your shots. DO NOT trade shots in peek-a-boom tactics, as your alpha simply isn't sufficient for this.
Carrying over the support tank philosophy, focused mentality as well as good utilisation of the tanks base strengths when driving the Caernarvon tank with mobility-optimised crew, it is highly effective against multiple targets: the exceptional RoF of the tank allows it to become a thorn in the side of any opponent whom stands in front of an attentive Caernarvon user on any flank with good ridge-lining positions ideally. In a well-utilised ridge-lining position, the Caernarvon's biggest enemy is typically artillery and well-placed shots with high-penetrating guns, as a static target.
This tank should be driven with a great deal of care and attention to detail. Use your slightly tall turret seat to peek over hills and the rear of other tanks' hulls, make plentiful use of cover, and always move a step or two behind the main front. Note that if you are careful about exposing your lower plate Wet Ammo Rack is certainly not required, and picking Safe Stowage perk instead is usually enough. Skilled players will find Coated Optics to improve on your excellent view range or vents to maximize your DPM a bigger benefit.
Early Research
- The WS No. 22 radio carry over from the Black Prince and can be installed immediately.
- FV221A suspension must be researched/mounted before upgrading the turret, but use Improved Hardening equipment instead to get to the turret and gun faster
- Now research the upgraded turret. The extra meters of view range, additional 100 hit points and strong armor make a lot of difference.
- Researching the OQF 32-pdr next will really boost firepower.
- Now research FV221A suspension and it is up to you whether to keep Improved Hardening or replace it with vents or something else
- Research all engines in order. They are all used on Conqueror later and should not be skipped.
- Research SR C42 radio to improve range.
Suggested Equipment
![]()
![]()
![]()
![]()
Gallery


Historical Info
Development history
The chassis was from the A45 Infantry Support Tank, started in 1944 shortly after that of the A41 Centurion. After the war the project was relocated to that of the "Universal Tank" design of the FV 200 series. The 200 series was to have used a common hull for all uses (self-propelled artillery, armoured personnel carrier, three varieties of tank, etc.). One tank type was to be the heavy FV 201 of 55 tonnes, armed with an 83.4 mm gun.
In 1949 it was decided to bring the armament up to 120 mm. As this delayed the project, in 1952 the FV 201 hull was combined with a 17 pounder-armed Centurion Mk 2 turret to give the FV 221 Caernarvon Mark I. Twenty-one were built with the Mk III 20 pounder turret as the Caernavon Mk II. The FV 221 may originally have been intended to be the "Main Battle Tank" member of the FV 201 series, but with the success of the A41 Centurion such a vehicle was no longer required. In either event, the Caernarvon was only used for chassis development work serving in troop trials. In 1955 the first Conqueror was produced. Twenty Mark 1 and 165 Mark 2 Conquerors were built including conversions of Caernavon MkIIs. Production continued until 1959. It had lost much enthusiasm once the Centurion was upgraded to an L7 105 mm gun.
The gun design was American, the same as used on the US M103 heavy tank; with separate charge and projectile, as would also be the case in the Chieftain that followed. The charge was not bagged but in a brass cartridge, which offered some safety advantages, but reduced shell capacity to 35.The armour was very heavy for the time, especially in the front, where it was seven inches (178 mm) in the horizontal plane. Unfortunately, this, along with the weight of the huge turret required to house the large gun and the very large hull volume, made the vehicle very heavy, giving it a relatively low top speed and making it mechanically unreliable. Also, few bridges could support its weight. However, rather like the Second World War Churchill tank, the Conqueror had exceptional terrain handling characteristics and proved to be as capable cross country as the lighter (and on paper slightly faster) Centurion tank.
One feature of particular note was the rotating commander's cupola, which was at the heart of the Conqueror's fire control system, advanced for its time. The commander could align the cupola on a target independently of the turret, measure the range with a Coincidence rangefinder, and then direct the gunner on to the new lay mechanically indicated to him by the cupola. In theory, when the gunner traversed to the new lay he would find the target already under his sights, ready to be engaged. Meanwhile, the commander was free to search for the next target. (The Soviet bloc also used similar devices, such as the TPKU-2 and TKN-3, on all of their post–World War II tanks though theirs did not use a rangefinder.) The system may have been inspired by a similar device, without range finder, installed in WWII German Panzers which was apparently highly successful, but was not repeated in subsequent tanks until an updated electronic version of the same idea appeared in the American M60A2 variant of the Patton series.
Historical Gallery


Historical Accuracy Errata
The Caernarvon's upgraded turret configuration is fictitious.
- Historical OQF 20-pdr gun is missing.
- The 32-pdr gun was only fitted on the Tortoise. Its configuration on the Caernarvon is fake.
- The M120 engine was only fitted on the Conqueror. Its configuration on the Caernarvon is also fake.