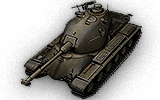
Welcome to Wargaming.net Wiki!
Variants

M-III-Y

Jump to: navigation, search


Ambox_important.png This article requires additional modification.
The design and/or content of this article do not conform to wiki standards.

Missing Content:

  • Gallery
  • Player Opinion: Equipment
  • History


M-III-Y

AnnoA139_M_III_Y.png
Battle Tier
1234567891011
Overview
Mouse over "
Well, the ones further down, of course.
" for more information
[Client Values; Actual values in
Specifically, the mismatch in crew values caused by commander's 10% crew skill bonus. Outside of a crew of 1 commander only, 100% crew is a fiction. The client values, given for 100% crew, will normally be taken into battle with 110% crew skill members aside from specific functions, causing their actual performance to deviate from the expected client value. These differences are taken into account in tooltip boxes.
]
2,600,000  Credits Cost
1400290 HP Hit Points
43.95/4523.54/50 t Weight Limit
Crew
  1. Commander (Radio Operator)
  2. Gunner
  3. Driver
  4. Loader
Mobility
600675 hp Engine Power
40/15 km/h Speed Limit
2628 deg/s Traverse
13.6528.67 hp/t Power/Wt Ratio
YesYes Pivot
Armor
// mm Hull Armor
241.3/76.2/38.1279.4/88.9/38.1 mm Turret Armor
Armament


{{#ifeq:ARMOR_PIERCING_CR|ARMOR_PIERCING||


{{#ifeq:HIGH_EXPLOSIVE|ARMOR_PIERCING||


AP/APCR/HE


{{#ifeq:ARMOR_PIERCING_CR|ARMOR_PIERCING||


{{#ifeq:HIGH_EXPLOSIVE|ARMOR_PIERCING||


AP/APCR/HE
Shells


255/4400/255


1000/4800/680
Shell Cost
240/240/320320/320/420 HP Damage
181/218/45208/245/53 mm Penetration


|


|}}

|


|}}


7.5 r/m 

Standard Gun

Reload Times
Nominal: 8 s
50% Crew: 9.91 s
75% Crew: 8.65 s
100% Crew: 7.67 s
Rammer: 6.9 s
Vents: 7.5 s
Both: 6.75 s
Both and BiA: 6.6 s
Both and Max Crew %: 6.33 s

See Crew, Consumables, or Equipment for more information.


|


|}}

|


|}}


6.74 r/m 

Standard Gun

Reload Times
Nominal: 8.9 s
50% Crew: 11.03 s
75% Crew: 9.63 s
100% Crew: 8.53 s
Rammer: 7.68 s
Vents: 8.34 s
Both: 7.51 s
Both and BiA: 7.34 s
Both and Max Crew %: 7.04 s

See Crew, Consumables, or Equipment for more information.
Rate of Fire


|


|}}

|


|}}


1800

Standard Gun

Using Shell Type 1 (240 Damage):


Theoretical Damage Per Minute
Nominal DPM: 1800
50% Crew: 1452
75% Crew: 1663.2
100% Crew: 1876.8
100% Crew
Vents: 1920
Rammer: 2085.6
Both: 2131.2
Both and BiA: 2179.2
Both and Max Crew %: 2272.8

Advantageous Damage Per Minute
First-shot DPM: 2040
50% Crew: 1692
75% Crew: 1903.2
100% Crew: 2116.8
100% Crew
Rammer: 2325.6
Vents: 2160
Both: 2371.2
Both and BiA: 2419.2
Both and Max Crew %: 2512.8

See here, here, or here for more information.

Standard Gun

Using Shell Type 2 (240 Damage):


Theoretical Damage Per Minute
Nominal DPM: 1800
50% Crew: 1452
75% Crew: 1663.2
100% Crew: 1876.8
100% Crew
Vents: 1920
Rammer: 2085.6
Both: 2131.2
Both and BiA: 2179.2
Both and Max Crew %: 2272.8

Advantageous Damage Per Minute
First-shot DPM: 2040
50% Crew: 1692
75% Crew: 1903.2
100% Crew: 2116.8
100% Crew
Rammer: 2325.6
Vents: 2160
Both: 2371.2
Both and BiA: 2419.2
Both and Max Crew %: 2512.8

See here, here, or here for more information.

Standard Gun

Using Shell Type 3 (320 Damage):
With wholly penetrating hits

Theoretical Damage Per Minute
Nominal DPM: 2400
50% Crew: 1936
75% Crew: 2217.6
100% Crew: 2502.4
100% Crew
Vents: 2560
Rammer: 2780.8
Both: 2841.6
Both and BiA: 2905.6
Both and Max Crew %: 3030.4

Advantageous Damage Per Minute
First-shot DPM: 2720
50% Crew: 2256
75% Crew: 2537.6
100% Crew: 2822.4
100% Crew
Rammer: 3100.8
Vents: 2880
Both: 3161.6
Both and BiA: 3225.6
Both and Max Crew %: 3350.4

See here, here, or here for more information.


|


|}}

|


|}}


2156.8

Standard Gun

Using Shell Type 1 (320 Damage):


Theoretical Damage Per Minute
Nominal DPM: 2156.8
50% Crew: 1740.8
75% Crew: 1993.6
100% Crew: 2249.6
100% Crew
Vents: 2300.8
Rammer: 2499.2
Both: 2556.8
Both and BiA: 2611.2
Both and Max Crew %: 2726.4

Advantageous Damage Per Minute
First-shot DPM: 2476.8
50% Crew: 2060.8
75% Crew: 2313.6
100% Crew: 2569.6
100% Crew
Rammer: 2819.2
Vents: 2620.8
Both: 2876.8
Both and BiA: 2931.2
Both and Max Crew %: 3046.4

See here, here, or here for more information.

Standard Gun

Using Shell Type 2 (320 Damage):


Theoretical Damage Per Minute
Nominal DPM: 2156.8
50% Crew: 1740.8
75% Crew: 1993.6
100% Crew: 2249.6
100% Crew
Vents: 2300.8
Rammer: 2499.2
Both: 2556.8
Both and BiA: 2611.2
Both and Max Crew %: 2726.4

Advantageous Damage Per Minute
First-shot DPM: 2476.8
50% Crew: 2060.8
75% Crew: 2313.6
100% Crew: 2569.6
100% Crew
Rammer: 2819.2
Vents: 2620.8
Both: 2876.8
Both and BiA: 2931.2
Both and Max Crew %: 3046.4

See here, here, or here for more information.

Standard Gun

Using Shell Type 3 (420 Damage):
With wholly penetrating hits

Theoretical Damage Per Minute
Nominal DPM: 2830.8
50% Crew: 2284.8
75% Crew: 2616.6
100% Crew: 2952.6
100% Crew
Vents: 3019.8
Rammer: 3280.2
Both: 3355.8
Both and BiA: 3427.2
Both and Max Crew %: 3578.4

Advantageous Damage Per Minute
First-shot DPM: 3250.8
50% Crew: 2704.8
75% Crew: 3036.6
100% Crew: 3372.6
100% Crew
Rammer: 3700.2
Vents: 3439.8
Both: 3775.8
Both and BiA: 3847.2
Both and Max Crew %: 3998.4

See here, here, or here for more information.
Damage Per Minute


|


|}}


0.41 m 

With 50% Crew: 0.508 m
With 75% Crew: 0.443 m
With 100% Crew: 0.393 m
With BiA: 0.384 m
With BiA and Vents: 0.376 m
Maximum possible: 0.361 m

For more details, see Crew


|


|}}


0.39 m 

With 50% Crew: 0.483 m
With 75% Crew: 0.422 m
With 100% Crew: 0.374 m
With BiA: 0.366 m
With BiA and Vents: 0.358 m
Maximum possible: 0.343 m

For more details, see Crew
Accuracy


|


|}}


2.3 s 

With 50% Crew: 2.849 s
With 75% Crew: 2.488 s
With 100% Crew: 2.205 s
With GLD: 2.005 s
With BiA: 2.157 s
With BiA and Vents: 2.11 s
With both and GLD: 1.918 s
Maximum possible: 1.839 s

For more details, see Crew or Equipment


|


|}}


2.3 s 

With 50% Crew: 2.849 s
With 75% Crew: 2.488 s
With 100% Crew: 2.205 s
With GLD: 2.005 s
With BiA: 2.157 s
With BiA and Vents: 2.11 s
With both and GLD: 1.918 s
Maximum possible: 1.839 s

For more details, see Crew or Equipment
Aim time
2325 deg/s Turret Traverse
360° Gun Arc
-10°/+20°-10°/+20° Elevation Arc
5446 rounds Ammo Capacity
General
2020 % Chance of Fire


380 m 

With 50% Crew: 298.6 m
With 75% Crew: 339.3 m
With 100% Crew: 380 m
With Recon and Situational Awareness: 399.2 m
With Coated Optics: 418 m
With Binocular Telescope: 475 m
Maximum possible: 544 m

For more details, see Skills or Equipment


390 m 

With 50% Crew: 306.4 m
With 75% Crew: 348.2 m
With 100% Crew: 390 m
With Recon and Situational Awareness: 409.7 m
With Coated Optics: 429 m
With Binocular Telescope: 487.5 m
Maximum possible: 558.3 m

For more details, see Skills or Equipment
View Range


|


|}}


410 m 

With 50% Crew: 322.1 m
With 75% Crew: 366.1 m
With 100% Crew: 410 m
With 100% Signal Boost: 492 m
When affected by 100% Relaying: 451 m
Maximum possible: 590 m

For more details, see Skills or Equipment


|


|}}


745 m 

With 50% Crew: 585.3 m
With 75% Crew: 665.2 m
With 100% Crew: 745 m
With 100% Signal Boost: 894 m
When affected by 100% Relaying: 819.5 m
Maximum possible: 1072 m

For more details, see Skills or Equipment
Signal Range
Values are Stock - click for Top


VIII

AnnoA139_M_III_Y.png

2600000

The M-III-Y is an American tier 8 heavy tank.

In June 1953, H.L. Yoh Company Inc. presented seven blueprints of a new tank and proposed designs for several of its components. It was planned to use the AOSI-1195-5 8-cylinder engine. The M-III-Y project included a turret with a small frontal projection, a gun mantlet of original design, suspension with horizontal shock absorbers, and an additional track inside the main one that allowed the vehicle to maintain its maneuverability if the main track was destroyed. The project was suspended. No prototypes were built.

The M-III-Y leads to the M-VI-Y.

Modules / Available Equipment and Consumables

Modules

Ico_gun_alpha.png

Guns

Tier Gun Penetration
(mm)
Damage
(HP)
Rate of fire
(rounds/minute)
Dispersion
(m/100m)
Aiming time
(s)
Weight
(kg)
Price
(Credits)

VIII 90 mm Gun T208 (rifled) 223/290/45 240/240/320 9.38 0.37 2.1 1481 127000
VII 90 mm Gun M41 Y 181/218/45 240/240/320 8.57 0.39 2.2 1075 86000
VIII 105 mm Gun T254 Y III 208/245/53 320/320/420 6.74 0.39 2.3 1123 128000

Ico_engine_alpha.png

Engines

Tier Engine Engine Power
(hp)
Chance of Fire on Impact
(%)
Weight
(kg)
Price
(Credits)

VII Continental AOSI-1195-5 Y III A 600 20 998 38000
VIII Continental AOSI-1195-5 Y III B 675 20 998 48600

Ico_suspension_alpha.png

Suspensions

Tier Suspension Load Limit
(т)
Traverse Speed
(gr/sec)
Rmin Weight
(kg)
Price
(Credits)

VII M-III-Y A 45 26 0 11000 20000
VIII M-III-Y B 50 28 0 11000 33800

Ico_radio_alpha.png

Radios

Tier Radio Signal Range
(m)
Weight
(kg)
Price
(Credits)

VI AN/GRC-3 410 120 21600
X AN/GRC-7 745 120 54000

Compatible Equipment

Low Noise Exhaust System Class 1 Vertical Stabilizer Class 1 Heavy Spall Liner Camouflage Net Class 2 Coated Optics Class 1 Stabilizing Equipment System Experimental Optics Wear-Resistant Gun Laying Drive Improved Configuration Venting System Innovative Loading System Enhanced Gun Laying Drive Class 1 Improved Hardening Class 1 Additional Grousers Class 1 Modified Configuration Class 1 Improved Rotation Mechanism Class 1 Improved Aiming Class 1 Improved Ventilation Class 1 Binocular Telescope Class 1 Gun Rammer Class 1 Turbocharger Class 1 

Compatible Consumables

Stabilizer Greasing Automatic Fire Extinguisher Natural Cover Optical Calibration Case of Cola Aim Tuning Experienced Firefighters 100-octane Gasoline 105-octane Gasoline Manual Fire Extinguisher Pre-Battle Maintenance Vent Purge Large First Aid Kit Large Repair Kit Duty Comes First Shell Organizer Orderly Ammo Rack Focus on Target Increased Focus Small First Aid Kit Small Repair Kit Gearbox Intricacy Steady Hand Combat Course 


Player Opinion

Pros and Cons

Pros:


  • Decent pen on the T208 Rifled 90mm at 223mm
  • Nice shell velocity on the T208 Rifled with 1250 m/s
  • Excellent DPM with the T208 Rifled at 2346 base
  • Solid armour on the top turret with a small weakspot
  • 10 degrees of gun depression


Cons:


  • Subpar mobility at 40 kph
  • T254 YIII 105mm gun is worse in every regard from the T208 with only the minor alpha damage upgrade
  • Low alpha damage at 240 with the T208 Rifled
  • Awful gun handling at .24 when moving
  • Poor turret traverse dispersion at .13 with the T254 YIII, worse than the T208 Rifled's .09


Performance

The M-III-Y largely behaves in practise like a better armoured FCM 50 t or Tank:A117_T26E5 that trades some of the mobility for much more forgiving armour. While the armour isn't anything to brag about, it is an upgrade over the previously mentioned tanks. The M-III-Y can sidescrape quite efficiently with its 88.9mm of side armour though it does have a small weakspot at the turret ring, though the M-III-Y is rarely played and most players will be unaware of that area.

It is heavily advised to check your allies, if your heavies are significantly faster, then you are better off advancing with mediums to provide fire support. The T208 Rifled shouldn't be underestimated, it can perform quite well against mediums tanks though it does struggle against other heavies due to the low alpha damage. The T254 YIII 105mm is a MASSIVE downgrade in most regards from the T208 Rifled. The penetration drops from 223mm to 208mm, the rate of fire is only 7 rounds a minute, and the accuracy goes from .35 to .37. The trade off is that the 105mm gets 320 alpha damage, which is already subpar for a tier 8 heavy tank. Coupled with the low penetration, the 105mm is far more frustrating. The T208 Rifled 90mm gun can put out an impressive number of rounds a minute (nearly 11 with just a rammer and 100% crew) that can catch mediums off guard and allow you to permatrack most enemy heavy tanks, generating mountains of assistance.

The M-III-Y can be a very strong hulldown tank due to the easily hidden weakspot but it falls behind with its mobility and doesn't get a chance to reach a strong hulldown position before most other tanks will. It also struggles in trades, especially with the T254 YIII 105mm, since it needs to hit a target multiple times to get the same effect. In a top tier game against tier 7s, the M-III-Y morphs into a super strong vehicle. The hull armour is very round and can deflect a lot of lower pen rounds with ease, the gun can shred through the lower HP pools consistently with the high penetration, and the mobility is just enough to push through a flank comfortably.


Gallery

History for this tank not found

Historical Gallery


USA
Light Tanks IT1 Cunningham IIM2 Light Tank IIT1E6 IIT2 Light Tank IIT7 Combat Car IIIM22 Locust IIIM3 Stuart IIIMTLS-1G14 IVM5 Stuart VM24 Chaffee VM7 VIM24E2 Super Chaffee VIT21 VIT37 VIIT71 CMCD VIIT71 DA VIIIT92 VIIIM41 Walker Bulldog IXT49 XXM551 Sheridan
Medium Tanks IIT2 Medium Tank IIIConvert. Medium Tank T3 IIIM2 Medium Tank IVT6 Medium IVM3 Lee VM4 Improved VM4A2E4 Sherman VM4A1 Sherman VRam II VIM4A3E8 Fury VIM4A3E8 Thunderbolt VII VIM4A3E8 Sherman VIM4A3E2 Sherman Jumbo VIIT26E3 Eagle 7 VIIT20 VIIT23E3 VIIIT25 Pilot Number 1 VIIITL-1 LPC VIIIT42 VIIIASTRON Rex 105 mm VIIIAMBT VIIIM46 Patton KR VIIIM26 Pershing VIIIT26E4 SuperPershing VIIIT69 VIIIT95E2 IXM46 Patton XM48A5 Patton XM60 XT95E6
Heavy Tanks VT14 VT1 Heavy Tank VIPawlack Tank VIM6 VIIKing Tiger (Captured) VIIM-II-Y VIIT29 VIIIChrysler K VIIIChrysler K GF VIIIT26E5 VIIIT26E5 Patriot VIIIM54 Renegade VIIIT77 VIIIM-III-Y VIIIM-IV-Y VIIIM6A2E1 VIIIT32 VIIIT34 VIIIT34 B IXAE Phase I IXConcept 1B IXM-VI-Y IXM103 IXT54E1 XM-V-Y XT110E5 XT57 Heavy Tank
Tank Destroyers IIT3 HMC IIIT56 GMC IVM8A1 IVT40 VM10 Wolverine VT67 VIT78 VIM18 Hellcat VIM36 Jackson VIIM56 Scorpion VIIT28 Concept VIISuper Hellcat VIIT25/2 VIIT25 AT VIIITS-5 VIIIT28 VIIIT28 Prototype IXT30 IXT95 XT110E3 XT110E4
Self-Propelled Artillery IIT1 HMC IIIT18 HMC IIIM7 Priest IVT82 HMC IVM37 VM41 HMC VIM44 VIIM12 VIIIM40/M43 IXM53/M55 XT92 HMC
Heavy Tanks
USA VT14 VT1 Heavy Tank VIPawlack Tank VIM6 VIIKing Tiger (Captured) VIIM-II-Y VIIT29 VIIIChrysler K VIIIChrysler K GF VIIIT26E5 VIIIT26E5 Patriot VIIIM54 Renegade VIIIT77 VIIIM-III-Y VIIIM-IV-Y VIIIM6A2E1 VIIIT32 VIIIT34 VIIIT34 B IXAE Phase I IXConcept 1B IXM-VI-Y IXM103 IXT54E1 XM-V-Y XT110E5 XT57 Heavy Tank
UK VChurchill I VExcelsior VIChurchill VII VITOG II* VIIBlack Prince VIIFV201 (A45) VIIICharlemagne VIIICaliban VIIIGonsalo VIIICaernarvon VIIICaernarvon Action X IXFV4201 Chieftain Proto IXConqueror XFV215b XSuper Conqueror XT95/FV4201 Chieftain
Germany IVPz.Kpfw. B2 740 (f) IVDurchbruchswagen 2 VITiger 131 VIVK 30.01 (P) VIVK 36.01 (H) VIIVK 45.03 VIITiger I VIITiger (P) VIIIVK 100.01 (P) VIIIVK 168.01 (P) VIIIVK 168.01 Mauerbrecher VIIIVK 75.01 (K) VIIIE 75 TS VIIILöwe VIIITiger II VIIIVK 45.02 (P) Ausf. A IXE 75 IXMäuschen IXVK 45.02 (P) Ausf. B XE 100 XPz.Kpfw. VII XMaus XVK 72.01 (K)
France IVB1 VBDR G1 B VIARL 44 VIIAMX M4 mle. 45 VIIIAMX 50 100 VIIIAMX M4 mle. 49 VIIIAMX M4 mle. 49 Liberté VIIIAMX 65 t VIIISomua SM VIIIFCM 50 t IXAMX 50 120 IXLorraine 50 t IXAMX M4 mle. 51 XAMX 50 B XAMX M4 mle. 54
USSR VChurchill III VKV-220-2 VKV-220-2 Beta Test VKV-1 VKV-1 shielded VIKV-1S VIKV-2 VIKV-2 (R) VIKV-85 VIObject 244 VIT-150 VIIIS VIIKV-3 VIIKV-122 VIIIS-2M VIIIS-2 shielded VIIIS-2 VIIIIS-3 VIIIIS-6 VIIIIS-6 B VIIIKV-5 VIIIKV-4 VIIIIS-5 (Object 730) VIIIIS-3A VIIIIS-3A Peregrine VIIIKirovets-1 VIIIKV-4 Kreslavskiy VIIIObject 252U Defender VIIIObject 252U VIIIIS-M VIIIObject 703 Version II VIIIIS-2-II IXT-10 IXObject 777 Version II IXObject 257 IXObject 705 IXIS-3-II IXST-I XIS-4 XIS-7 XObject 260 XObject 705A XObject 277 XObject 279 early XST-II XObject 780
China VIIIS-2 VIIIWZ-111 VIIIWZ-111 Alpine Tiger VIII110 VIII112 IXWZ-111 model 1-4 IXWZ-114 X113 X113 Beijing Opera XWZ-111 model 5A XWZ-111 Qilin
Japan IIIType 91 Heavy IVType 95 Heavy VO-I Experimental VIHeavy Tank No. VI VIO-I VIIO-Ni VIIIO-Ho IXType 4 Heavy XType 5 Heavy
Czechoslovakia VIIŠkoda T 45 VIIVz. 44-1 VIIIŠkoda T 56 VIIITNH 105/1000 IXTNH T Vz. 51 XVz. 55
Sweden VIIIEmil I VIIIEMIL 1951 VIIIBofors Tornvagn IXEmil II IXStrv K XKranvagn
Italy VIICarro d'assalto P.88 VIIIProgetto CC55 mod. 54 VIIIBisonte C45 IXProgetto C50 mod. 66 XRinoceronte
Poland VII45TP Habicha VIII50TP prototyp VIII53TP Markowskiego IX50TP Tyszkiewicza X60TP Lewandowskiego
ja:Tank:A139 M III Y