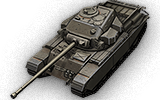
Welcome to Wargaming.net Wiki!
Variants
/
/
Centurion Mk. 7/1

Centurion Mk. 7/1

Jump to: navigation, search


Centurion Mk. 7/1

AnnoGB24_Centurion_Mk3.png
Battle Tier
1234567891011
Overview
Mouse over "
Well, the ones further down, of course.
" for more information
[Client Values; Actual values in
Specifically, the mismatch in crew values caused by commander's 10% crew skill bonus. Outside of a crew of 1 commander only, 100% crew is a fiction. The client values, given for 100% crew, will normally be taken into battle with 110% crew skill members aside from specific functions, causing their actual performance to deviate from the expected client value. These differences are taken into account in tooltip boxes.
]
3,515,000  Credits Cost
1620424 HP Hit Points
51.46/51.524.47/54 t Weight Limit
Crew
  1. Commander
  2. Gunner
  3. Driver
  4. Loader (Radio Operator)
Mobility
650950 hp Engine Power
50/20 km/h Speed Limit
3032 deg/s Traverse
12.6338.82 hp/t Power/Wt Ratio
YesYes Pivot
Armor
// mm Hull Armor
254/88.9/88.9254/88.9/88.9 mm Turret Armor
Armament


{{#ifeq:ARMOR_PIERCING_CR|ARMOR_PIERCING||


{{#ifeq:HIGH_EXPLOSIVE|ARMOR_PIERCING||


AP/APCR/HE


{{#ifeq:HIGH_EXPLOSIVE|ARMOR_PIERCING||


{{#ifeq:HIGH_EXPLOSIVE|ARMOR_PIERCING||


APCR/HE/HE
Shells


680/4400/170


1200/5200/950
Shell Cost
230/230/280390/480/480 HP Damage
226/258/42268/210/105 mm Penetration


|


|}}

|


|}}


10 r/m 

Standard Gun

Reload Times
Nominal: 6 s
50% Crew: 7.43 s
75% Crew: 6.49 s
100% Crew: 5.75 s
Rammer: 5.18 s
Vents: 5.62 s
Both: 5.06 s
Both and BiA: 4.95 s
Both and Max Crew %: 4.75 s

See Crew, Consumables, or Equipment for more information.


|


|}}

|


|}}


5.36 r/m 

Standard Gun

Reload Times
Nominal: 11.2 s
50% Crew: 13.87 s
75% Crew: 12.11 s
100% Crew: 10.74 s
Rammer: 9.67 s
Vents: 10.5 s
Both: 9.45 s
Both and BiA: 9.25 s
Both and Max Crew %: 8.86 s

See Crew, Consumables, or Equipment for more information.
Rate of Fire


|


|}}

|


|}}


2300

Standard Gun

Using Shell Type 1 (230 Damage):


Theoretical Damage Per Minute
Nominal DPM: 2300
50% Crew: 1856.1
75% Crew: 2127.5
100% Crew: 2398.9
100% Crew
Vents: 2451.8
Rammer: 2665.7
Both: 2725.5
Both and BiA: 2785.3
Both and Max Crew %: 2907.2

Advantageous Damage Per Minute
First-shot DPM: 2530
50% Crew: 2086.1
75% Crew: 2357.5
100% Crew: 2628.9
100% Crew
Rammer: 2895.7
Vents: 2681.8
Both: 2955.5
Both and BiA: 3015.3
Both and Max Crew %: 3137.2

See here, here, or here for more information.

Standard Gun

Using Shell Type 2 (230 Damage):


Theoretical Damage Per Minute
Nominal DPM: 2300
50% Crew: 1856.1
75% Crew: 2127.5
100% Crew: 2398.9
100% Crew
Vents: 2451.8
Rammer: 2665.7
Both: 2725.5
Both and BiA: 2785.3
Both and Max Crew %: 2907.2

Advantageous Damage Per Minute
First-shot DPM: 2530
50% Crew: 2086.1
75% Crew: 2357.5
100% Crew: 2628.9
100% Crew
Rammer: 2895.7
Vents: 2681.8
Both: 2955.5
Both and BiA: 3015.3
Both and Max Crew %: 3137.2

See here, here, or here for more information.

Standard Gun

Using Shell Type 3 (280 Damage):
With wholly penetrating hits

Theoretical Damage Per Minute
Nominal DPM: 2800
50% Crew: 2259.6
75% Crew: 2590
100% Crew: 2920.4
100% Crew
Vents: 2984.8
Rammer: 3245.2
Both: 3318
Both and BiA: 3390.8
Both and Max Crew %: 3539.2

Advantageous Damage Per Minute
First-shot DPM: 3080
50% Crew: 2539.6
75% Crew: 2870
100% Crew: 3200.4
100% Crew
Rammer: 3525.2
Vents: 3264.8
Both: 3598
Both and BiA: 3670.8
Both and Max Crew %: 3819.2

See here, here, or here for more information.


|


|}}

|


|}}


2090.4

Standard Gun

Using Shell Type 1 (390 Damage):


Theoretical Damage Per Minute
Nominal DPM: 2090.4
50% Crew: 1688.7
75% Crew: 1934.4
100% Crew: 2180.1
100% Crew
Vents: 2230.8
Rammer: 2421.9
Both: 2476.5
Both and BiA: 2531.1
Both and Max Crew %: 2640.3

Advantageous Damage Per Minute
First-shot DPM: 2480.4
50% Crew: 2078.7
75% Crew: 2324.4
100% Crew: 2570.1
100% Crew
Rammer: 2811.9
Vents: 2620.8
Both: 2866.5
Both and BiA: 2921.1
Both and Max Crew %: 3030.3

See here, here, or here for more information.

Standard Gun

Using Shell Type 2 (480 Damage):
With wholly penetrating hits

Theoretical Damage Per Minute
Nominal DPM: 2572.8
50% Crew: 2078.4
75% Crew: 2380.8
100% Crew: 2683.2
100% Crew
Vents: 2745.6
Rammer: 2980.8
Both: 3048
Both and BiA: 3115.2
Both and Max Crew %: 3249.6

Advantageous Damage Per Minute
First-shot DPM: 3052.8
50% Crew: 2558.4
75% Crew: 2860.8
100% Crew: 3163.2
100% Crew
Rammer: 3460.8
Vents: 3225.6
Both: 3528
Both and BiA: 3595.2
Both and Max Crew %: 3729.6

See here, here, or here for more information.

Standard Gun

Using Shell Type 3 (480 Damage):
With wholly penetrating hits

Theoretical Damage Per Minute
Nominal DPM: 2572.8
50% Crew: 2078.4
75% Crew: 2380.8
100% Crew: 2683.2
100% Crew
Vents: 2745.6
Rammer: 2980.8
Both: 3048
Both and BiA: 3115.2
Both and Max Crew %: 3249.6

Advantageous Damage Per Minute
First-shot DPM: 3052.8
50% Crew: 2558.4
75% Crew: 2860.8
100% Crew: 3163.2
100% Crew
Rammer: 3460.8
Vents: 3225.6
Both: 3528
Both and BiA: 3595.2
Both and Max Crew %: 3729.6

See here, here, or here for more information.
Damage Per Minute


|


|}}


0.33 m 

With 50% Crew: 0.409 m
With 75% Crew: 0.357 m
With 100% Crew: 0.316 m
With BiA: 0.309 m
With BiA and Vents: 0.303 m
Maximum possible: 0.29 m

For more details, see Crew


|


|}}


0.32 m 

With 50% Crew: 0.396 m
With 75% Crew: 0.346 m
With 100% Crew: 0.307 m
With BiA: 0.3 m
With BiA and Vents: 0.294 m
Maximum possible: 0.281 m

For more details, see Crew
Accuracy


|


|}}


2.3 s 

With 50% Crew: 2.849 s
With 75% Crew: 2.488 s
With 100% Crew: 2.205 s
With GLD: 2.005 s
With BiA: 2.157 s
With BiA and Vents: 2.11 s
With both and GLD: 1.918 s
Maximum possible: 1.839 s

For more details, see Crew or Equipment


|


|}}


2.3 s 

With 50% Crew: 2.849 s
With 75% Crew: 2.488 s
With 100% Crew: 2.205 s
With GLD: 2.005 s
With BiA: 2.157 s
With BiA and Vents: 2.11 s
With both and GLD: 1.918 s
Maximum possible: 1.839 s

For more details, see Crew or Equipment
Aim time
3636 deg/s Turret Traverse
360° Gun Arc
-10°/+18°-10°/+18° Elevation Arc
7272 rounds Ammo Capacity
General
2020 % Chance of Fire


400 m 

With 50% Crew: 314.3 m
With 75% Crew: 357.2 m
With 100% Crew: 400 m
With Recon and Situational Awareness: 420.2 m
With Coated Optics: 440 m
With Binocular Telescope: 500 m
Maximum possible: 572.6 m

For more details, see Skills or Equipment


410 m 

With 50% Crew: 322.1 m
With 75% Crew: 366.1 m
With 100% Crew: 410 m
With Recon and Situational Awareness: 430.7 m
With Coated Optics: 451 m
With Binocular Telescope: 512.5 m
Maximum possible: 586.9 m

For more details, see Skills or Equipment
View Range


|


|}}


550 m 

With 50% Crew: 432.1 m
With 75% Crew: 491.1 m
With 100% Crew: 550 m
With 100% Signal Boost: 660 m
When affected by 100% Relaying: 605 m
Maximum possible: 791.4 m

For more details, see Skills or Equipment


|


|}}


750 m 

With 50% Crew: 589.3 m
With 75% Crew: 669.7 m
With 100% Crew: 750 m
With 100% Signal Boost: 900 m
When affected by 100% Relaying: 825 m
Maximum possible: 1079.2 m

For more details, see Skills or Equipment
Signal Range
Values are Stock - click for Top

Additional Statistics
(Top Configuration)

Camouflage

  • Stationary: 11.7%
  • When Moving: 8.9%
  • When Firing: 2.6%


Terrain Resistance

  • On Hard Ground: 0.96
  • On Medium Ground: 1.06
  • On Soft Ground: 1.82


Dispersion Change Values

  • Turret Contribution
  • Rotation: 0.17
  • Shot Recoil: 3.84
  • Suspension Contribution
  • Acceleration: 0.17
  • Turning: 0.17


With 100% Crew

IX

AnnoGB24_Centurion_Mk3.png

3515000

The Centurion Mk. 7/1 is a British tier 9 medium tank.

This upgraded version of the Centurion was developed by Leyland Motors and featured an expanded hull, improved cabin design, larger fuel tanks, and enhanced armor.

The Centurion Mk. 7/1 was the ancestor of the MBTs (main battle tanks). It takes the features of the Mk. I, adopts them and improves upon them greatly. While its propensity for module and crew damage seems to remain, the new Centurion has somewhat tougher armor both on the hull and turret, which combines with the good gun depression and quick acceleration to make it an even fiercer hill-climber. But probably most significant is the fact that it is able to mount the Tier X 105mm caliber L7A1 cannon with access to unique HESH ammunition; the Mk. 7/1 possesses a significant edge in terms of alpha damage and penetration. Thanks to its gun, this tank is able to provide top-tier fire support, and should have no problem contributing to a team above its own tier if it hangs back slightly.

The Centurion Mk. 7/1 leads to the Centurion Action X.

Modules / Available Equipment and Consumables

Modules

Ico_gun_alpha.png

Guns

Tier Gun Penetration
(mm)
Damage
(HP)
Rate of fire
(rounds/minute)
Dispersion
(m/100m)
Aiming time
(s)
Weight
(kg)
Price
(Credits)

VIII OQF 20-pdr Gun Type A Barrel 226/258/42 230/230/280 10 0.33 2.3 1242 120000
IX OQF 20-pdr Gun Type B Barrel 226/258/42 230/230/280 10.53 0.32 1.9 1282 180000
X 105 mm Royal Ordnance L7A1 268/210/105 390/480/480 5.36 0.32 2.3 1282 290000

Ico_engine_alpha.png

Engines

Tier Engine Engine Power
(hp)
Chance of Fire on Impact
(%)
Weight
(kg)
Price
(Credits)

V Rolls-Royce Meteor Mk. IVB 650 20 744 16000
IX Rolls-Royce Meteor Mk. IVC 750 20 744 84000
X Rolls-Royce Griffon 950 20 952 100000

Ico_suspension_alpha.png

Suspensions

Tier Suspension Load Limit
(т)
Traverse Speed
(gr/sec)
Rmin Weight
(kg)
Price
(Credits)

VIII Centurion Mk. 7 51.5 30 0 11000 31500
IX Centurion Mk. 9 54 32 0 11000 63000

Ico_radio_alpha.png

Radios

Tier Radio Signal Range
(m)
Weight
(kg)
Price
(Credits)

VIII WS No. 22 700 40 25000
VIII WS No. 19 Mk. III 550 40 22000
X SR C42 750 40 54000

Compatible Equipment

Low Noise Exhaust System Class 1 Vertical Stabilizer Class 1 Medium Spall Liner Camouflage Net Class 2 Coated Optics Class 1 Commander's Vision System Stabilizing Equipment System Experimental Optics Wear-Resistant Gun Laying Drive Improved Configuration Venting System Innovative Loading System Enhanced Gun Laying Drive Class 1 Improved Hardening Class 2 Additional Grousers Class 1 Modified Configuration Class 1 Improved Radio Set Improved Rotation Mechanism Class 1 Improved Aiming Class 1 Improved Ventilation Class 2 Binocular Telescope Class 1 Gun Rammer Class 2 Turbocharger Class 1 

Compatible Consumables

Stabilizer Greasing Automatic Fire Extinguisher Natural Cover Optical Calibration Aim Tuning Experienced Firefighters 100-octane Gasoline 105-octane Gasoline Manual Fire Extinguisher Pre-Battle Maintenance Vent Purge Large First Aid Kit Large Repair Kit Duty Comes First Shell Organizer Orderly Ammo Rack Focus on Target Pudding and Tea Increased Focus Small First Aid Kit Small Repair Kit Gearbox Intricacy Steady Hand Combat Course 


Player Opinion

Pros and Cons

Pros:


  • Excellent damage, penetration, shell velocity and accuracy with the L7A1 gun
  • High penetration with both HESH and HE ammunition (L7A1 gun)
  • Strong turret face armor
  • Great gun depression (-10 degrees)
  • Excellent base viewrange


Cons:


  • Painful stock grind, 20pdr guns have insufficient firepower
  • Top L7A1 gun lacks DPM
  • Huge size (as big as a heavy tank) and poor camouflage, difficult to hide
  • Poorly armored everywhere but the turret face
  • Frequent ammo rack damage from hits to the hull front


Performance

The key to playing this tank is taking all the lessons learned from the Comet and the Centurion Mk. I and applying them to an even further extent. Using your gun depression is a great way to hide the bulky hull while still providing view range and fire power to the team. Your gun is sure to be the quickest and might even be the most hard-hitting on your entire team, and you have the ability to take cover very well, so make use of this. Unlike the Cromwell and Comet, you should not even consider acting as a scout, since your cannon is much too valuable to be lost in an early skirmish. Instead, follow the main line and set up deadly long-range fire support, using cover at every opportunity. Your gun's brilliant aim time and high muzzle velocity also make you a very effective scout-killer. For later-game encounters, one should consider utilizing the HESH rounds which will decimate soft-skinned targets and hurt those bigger, badder ones seriouly if hit in softer parts.

For players who prefer DPM over alpha damage, the 20-pounder Type B is a viable alternative to the 105 mm gun. It has nearly twice the rate of fire and the penetration of the standard ammunition, while not nearly as good as for the 105 mm, is still better than e.g. on the M46 Patton, while the penetration on the premium rounds is nearly as good as that on other tier 9 medium tanks.


Early Research

The stock suspension is very weak and does not allow for a full set of equipment, even with only stock modules mounted. If you are willing to spend the 10 gp demounting penalty it is worthwhile to mount Enhanced coil springs until you have unlocked the upgraded suspension. Both 20-pounder guns are still effective at Tier 9 and will make the grind relatively painless.

  • Suspension
  • B-barrel cannon
  • Upgraded turret
  • L7A1 cannon
  • Engine
  • Radio


Suggested Equipment


Tank Gun Rammer Vertical Stabilizer Coated Optics Improved VentilationBinocular Telescope 


External Reviews and Opinions

Gallery

Historical Info

In 1943, the Directorate of Tank Design was asked to produce a new design for a heavy cruiser tank under the General Staff designation A41. After a series of fairly marginal designs in the A series in the past, and bearing in mind the threat posed by the German 88 mm gun, the War Office demanded a major revision of the design requirements, specifically: increased durability and reliability, and the ability to withstand a direct hit from the German 88 mm gun withn a maximum weight of 40 tons. The hull was to offer more protection against mines and top speed was not vital while agility was to be equal to that of Comet. A high reverse speed was also required.

Development history

The department responded by extending the long-travel five-wheel suspension used on the Comet with the addition of a sixth wheel and an extended spacing between the second and third wheels. The Christie suspension, with vertical spring coils between side armour plates, was replaced by a Horstmann suspension with external horizontal springs. The hull was redesigned with welded, sloped armour and featured a partially cast turret with the highly regarded 17 pounder as the main gun and a 20 mm Polsten cannon in an independent mounting to its left. With a Rover-built Rolls-Royce Meteor as used on the Comet and Cromwell, the new design would have excellent performance.

Shortly after the programme commenced, it became clear that the requirement to withstand 88 mm weapons would be impossible to meet within the permitted weight. The original specification had been set so that the A41 could be carried on the existing Mark I and Mark II transport trailers, which were limited to a 40-ton load. The War Ministry decided it would be wiser to build new trailers, rather than hamper what appeared to be a superb design. Even before prototypes of the original 40-ton design were completed, the design of a heavier version was well under way. The new version carried armour equal to the heaviest infantry tanks, and cross-country performance was superior to even the early cruiser tanks. The A41 was the first British tank that could "do it all", leading to the new designation "universal tank". The design mockup built by AEC Ltd was viewed in May 1944. Subsequently twenty pilot models were ordered with various armament combinations: ten with 17 pdr and 20mm Polsten gun of which half had a Besa machine gun in the turret rear and half an escape door, five with 17pdr and forward Besa and escape door, and five with QF 77mm gun and driver-operated hull machine gun. Prototypes of the original 40-ton design, the Centurion Mark I, had 76 mm of armour in the front glacis, which was thinner than the then current infantry tank designs such as the Churchill which had 101 mm, but the glacis plate was highly sloped and so the effective thickness of the armour was very high—a design feature shared by other effective designs such as the German Panther tank and Soviet T-34. The turret was extremely well armoured at 152 mm. The tank was also highly mobile, and easily outperformed the Comet in most tests. The uparmoured Centurion Mark II soon arrived; it had a new 118 mm-thick glacis and the side and rear armourhad been increased from 38 mm to 51 mm. Only a handful of Mk I Centurions had been produced when the Mk II replaced it on the production lines. Full production began in November 1945 with an order for 800 on production lines at Leyland Motors, Lancashire the Royal Ordnance Factories at Leeds and Woolwich, and Vickers at Elswick. The tank entered service in December 1946 with the 5th Royal Tank Regiment.

Soon after the Centurion's introduction, Royal Ordnance finished work on the Ordnance QF 20 pounder (84 mm) tank gun. By this point the usefulness of the 20 mm Polsten had been called into question, it being unnecessarily large for use against troops, so it was replaced with a Besa machine gun in a completely cast turret. The new Centurion Mark III also featured a fully automatic stabilisation system for the gun, allowing it to fire accurately while on the move, dramatically improving battlefield performance. Production of the Mk 3 began in 1948. The Mk 3 was so much more powerful than the Mk 1 and Mk 2 that the earlier designs were removed from service as soon as new Mk 3s arrived, and the older tanks were then either converted into the Centurion Armoured Recovery Vehicle (ARV) Mark 1 for use by the Royal Electrical and Mechanical Engineers or upgraded to Mk 3 standards. Improvements introduced with the Mk 3 included a more powerful version of the engine and a new gunsight and gun stabiliser. The 20 pounder gun was used only for a short time, until the Royal Ordnance Factories introduced the now legendary 105 mm L7 gun. All later variants of the Centurion, from Mark 5/2 on, used the L7. Design work for the Mk 7 was completed in 1953 with production beginning soon afterwards.

The Centurion was used as the basis for a range of specialist equipment, including combat engineering variants with a 165 mm demolition gun Armoured Vehicle Royal Engineers (AVRE). It is one of the longest-serving designs of all time, serving as a battle tank for the British and Australian armies from the Korean War (1950–1953) to the Vietnam War (1961–1972), and as an AVRE during the Gulf War in January–February 1991.


Historical Gallery

Historical Accuracy Errata

The following are consensus errors or inconsistencies which have been identified with the configuration of the vehicle in question and conflict with information available on the public record. The causes for these divergences in the game are normally not disclosed and may be rooted in game balance.

The Centurion Mk. 7/1 is essentially an uparmoured Centurion Mk 7 with the original 650 hp engine. The other engine configurations are fake. More powerful engine configurations were only done by foreign users of the Centurion like South Africa and Israel, but these were diesel and not gasoline.
  • The Centurion Mk. 7/1 was equipped with the 20 pdr, while the 7/2 had the 105mm L7, but the 7/2 did not feature the armour upgrades of the 7/1. These two packages were later combined as the Mk. 9, which is what the vehicle in its top configuration represents.


UK
Light Tanks ICruiser Mk. I IIM2 IICruiser Mk. II IILight Mk. VIC IIIValentine IIIStuart I-IV IIICruiser Mk. III IVCruiser Mk. IV VCovenanter VIA46 VICrusader VIIGSR 3301 Setter VIIIFV1066 Senlac VIIILHMTV IXGSOR3301 AVR FS XManticore
Medium Tanks IVickers Medium Mk. I IIVickers Medium Mk. II IIIVickers Medium Mk. III IVMatilda IVMatilda LVT IVGrant IVAC 1 Sentinel VCavalier VValiant VSherman III VMatilda Black Prince VISherman Firefly VICromwell VIAC 4 Experimental VICromwell B VISherman VC Firefly VIIComet VIIICenturion Mk. I VIIIFV4202 VIIIChieftain/T95 VIIICenturion Mk. 5/1 RAAC VIIIChimera IXCobra IXCenturion Mk. 7/1 XCenturion Action X
Heavy Tanks VChurchill I VExcelsior VIChurchill VII VITOG II* VIIBlack Prince VIIFV201 (A45) VIIICharlemagne VIIICaliban VIIIGonsalo VIIICaernarvon VIIICaernarvon Action X IXFV4201 Chieftain Proto IXConqueror XFV215b XSuper Conqueror XT95/FV4201 Chieftain
Tank Destroyers IIUniversal Carrier 2-pdr IVValentine AT IVAlecto VArcher VAT 2 VIChurchill Gun Carrier VIAchilles VIAT 8 VIExcalibur VIIChallenger VIIAT 15A VIIAT 7 VIIIGSOR 1008 VIIIAT 15 VIIICharioteer VIIITurtle Mk. I IXTortoise IXFV4004 Conway XFV215b (183) XFV4005 Stage II XFV217 Badger
Self-Propelled Artillery IILoyd Gun Carriage IIISexton II IIISexton I IVBirch Gun VBishop VIFV304 VIICrusader 5.5-in. SP VIIIFV207 IXFV3805 XConqueror Gun Carriage
Medium Tanks
USA IIT2 Medium Tank IIIConvert. Medium Tank T3 IIIM2 Medium Tank IVT6 Medium IVM3 Lee VM4 Improved VM4A2E4 Sherman VM4A1 Sherman VRam II VIM4A3E8 Fury VIM4A3E8 Thunderbolt VII VIM4A3E8 Sherman VIM4A3E2 Sherman Jumbo VIIT26E3 Eagle 7 VIIT20 VIIT23E3 VIIIT25 Pilot Number 1 VIIITL-1 LPC VIIIT42 VIIIASTRON Rex 105 mm VIIIAMBT VIIIM46 Patton KR VIIIM26 Pershing VIIIT26E4 SuperPershing VIIIT69 VIIIT95E2 IXM46 Patton XM48A5 Patton XM60 XT95E6
UK IVickers Medium Mk. I IIVickers Medium Mk. II IIIVickers Medium Mk. III IVMatilda IVMatilda LVT IVGrant IVAC 1 Sentinel VCavalier VValiant VSherman III VMatilda Black Prince VISherman Firefly VICromwell VIAC 4 Experimental VICromwell B VISherman VC Firefly VIIComet VIIICenturion Mk. I VIIIFV4202 VIIIChieftain/T95 VIIICenturion Mk. 5/1 RAAC VIIIChimera IXCobra IXCenturion Mk. 7/1 XCenturion Action X
Germany IIIGroßtraktor - Krupp IIIPz.Kpfw. IV Ausf. A IIIPz.Kpfw. S35 739 (f) IVPz.Kpfw. III Ausf. J IVPz.Kpfw. IV Ausf. D IVVK 20.01 (D) VPz.Kpfw. III Ausf. K VTurán III prototípus VPz.Kpfw. IV Ausf. H Ankou VPz.Kpfw. III/IV VPz.Kpfw. IV hydrostat. VPz.Kpfw. V/IV VPz.Kpfw. V/IV Alpha VPz.Kpfw. IV Ausf. H VPz.Kpfw. T 25 VVK 30.01 (H) VIPz.Kpfw. IV Schmalturm VIVK 30.01 (D) VIVK 30.02 (M) VIIPanther/M10 VIIPanther VIIVK 30.02 (D) VIIIPanther mit 8,8 cm L/71 VIIIPanzer 58 VIIISchwarzpanzer 58 VIIIPanzer 58 Mutz VIIIM48A2 Räumpanzer VIIIKampfpanzer 07 RH VIIIIndien-Panzer VIIIPanther II IXE 50 IXT 55A IXKampfpanzer 50 t IXKunze Panzer IXLeopard Prototyp A XE 50 Ausf. M XLeopard 1
France IIID2 IIISomua S35 IVSARL 42 VRenault G1 VIBretagne Panther VIM4A1 FL 10 VIIIBat.-Châtillon Bourrasque VIIIAltProto AMX 30 VIIILorraine 40 t VIIIAMX Chasseur de chars VIIIM4A1 Revalorisé IXAMX 30 1er prototype IXChar Futur 4 IXBat.-Châtillon 25 t AP XBat.-Châtillon 25 t XAMX 30 B
USSR IIIT-29 IVA-32 IVT-28E with F-30 IVT-34 with L-11 IVT-28 VMatilda IV VT-34 shielded VM4-85 VT-34 VIA-43 VIT-34-85M VIT-34-85 Rudy VILoza's M4-A2 Sherman VIT-34-85 VIIA-44 VIIKV-13 VIIT-43 VIIT-44-122 VIIIObject 416 VIIIT-54 first prototype VIIIT-44-100 Igrovoy VIIIT-44-100 (R) VIIISTG VIIISTG Guard VIIIObject 274a VIIIT-44 IXObject 430 Version II IXObject 430 IXT-54 XObject 140 XObject 907 XT-22 medium XK-91 XObject 430U XT-62A
China VType T-34 VIType 58 VIIT-34-1 VIIIType 59 VIIIT-34-2 VIIIT-34-3 VIII59-Patton VIII122 TM VIIIType 59 G IXWZ-120 X121 X121B
Japan IIChi-Ni IIType 89 I-Go/Chi-Ro IVType 1 Chi-He VType 3 Chi-Nu VType 3 Chi-Nu Kai VIType 4 Chi-To VIIType 5 Chi-Ri VIIISTA-1 VIIISTA-2 IXType 61 XSTB-1
Czechoslovakia IVST vz. 39 VŠkoda T 24 VIŠkoda T 40 VIŠkoda T 25 VIIKonštrukta T-34/100 VIIITVP VTU Koncept VIIIŠkoda T 27 IXŠkoda T 50 XTVP T 50/51
Sweden IVLago VStrv m/42 VIStrv m/42-57 Alt A.2 VIStrv 74 VIILeo VIIIStrv 81 VIIIPrimo Victoria VIIILansen C VIIIUDES 14 Alt 5 IXUDES 16 XUDES 15/16
Italy IIM14/41 IIIM15/42 IVP26/40 VP.43 VIP.43 bis VIIP.43 ter VIIIProgetto M35 mod. 46 VIIIP.44 Pantera IXPrototipo Standard B XProgetto M40 mod. 65 XCarro da Combattimento 45 t
Poland V25TP KSUST II VDS PZInż VIPudel VI40TP Habicha VIT-34-85 Rudy VIB.U.G.I. VIICS-44 VIIICS-52 LIS VIIICS-53 IXCS-59 XCS-63
ja:Tank:GB24 Centurion Mk3