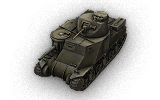
M3 Lee
M3 Lee

Mouse over "
[Client Values; Actual values in
| 126,000 |
| 47595 HP Hit Points |
| 27.87/28.78.62/29.9 t Weight Limit |
- Commander
- Gunner
- Gunner
- Driver
- Radio Operator
- Loader
| 400440 hp Engine Power |
| 38/16 km/h Speed Limit |
| 4043 deg/s Traverse |
| 14.3551.04 hp/t Power/Wt Ratio |
| YesYes Pivot |
| // mm Hull Armor |
| 50.8/0/050.8/0/0 mm Turret Armor |
AP/APCR/HE
AP/APCR/HE Shells |
56/2800/56
56/2800/56 Shell Cost |
| 110/110/175110/110/175 HP Damage |
| 90/125/3892/127/38 mm Penetration |
|
16.67 r/m ▲
20 r/m Standard Gun ▲ Rate of Fire Standard Gun |
|
1833.7 ▲
Standard Gun
▼
Standard Gun
▲
2200 Standard Gun ▲
Standard Gun
▼
Standard Gun
▲ Damage Per Minute Standard Gun |
|
0.47 m ▲
0.41 m With 50% Crew: 0.582 m ▲ Accuracy With 50% Crew: 0.508 m |
| 1.8 s 2.1 s Aim time |
| 4242 deg/s Turret Traverse |
| 30° Gun Arc |
| -9°/+20°-9°/+20° Elevation Arc |
| 7575 rounds Ammo Capacity |
| 2020 % Chance of Fire |
| 320 m 320 m View Range |
| 265 m 615 m Signal Range |
IV
126000
The M3 Lee is an American tier 4 medium tank.
A WWII-era U.S. medium tank. The vehicle was named after the Confederate General of the U.S. Civil War, R. Lee. Also, widely recognized under its U.K. designation, M3 Grant, named after the General of the federal troops U. Grant. M3 was created in 1940 on the basis of the M2 tank, and saw mass production from June 1941 through December 1942. A total of 6,258 M3 tanks of various modifications were produced.
Unfortunately for most players, this tank will be somewhat difficult to play with, particularly if you're less experienced with Tank Destroyers. The M3 Lee's gun is not mounted on a turret and as such, it plays similarly to a tank destroyer. However, it is not an effective sniper because its guns are implemented with mediocre accuracy, and its large size requires good camouflage to remain hidden when firing, which, from a single bush, will probably not be available. Additionally, the top turret (historically for a 37mm gun) sticks out of short cover and is usually fired on. Its frontal armor can also be penetrated easily, thereby putting the driver in constant danger of injury and greatly hindering survivability in a fair fight. Also, Jingles hates it.
The M3 Lee marks the end of its American medium line.
Modules / Available Equipment and Consumables
Modules

Guns
| Tier | Gun | Penetration (mm) |
Damage (HP) |
Rate of fire (rounds/minute) |
Dispersion (m/100m) |
Aiming time (s) |
Weight (kg) |
Price (
| |
|---|---|---|---|---|---|---|---|---|---|
| IV | 75 mm Gun M3 | 92/127/38 | 110/110/175 | 20 | 0.41 | 2.1 | 1437 | 30000 | |
| IV | 75 mm Gun M2 | 90/125/38 | 110/110/175 | 16.67 | 0.47 | 1.8 | 1237 | 23000 |

Engines
| Tier | Engine | Engine Power (hp) |
Chance of Fire on Impact (%) |
Weight (kg) |
Price (
| |
|---|---|---|---|---|---|---|
| IV | Wright R-975EC2 | 400 | 20 | 515 | 11600 | |
| V | Chrysler A57 | 440 | 20 | 570 | 13900 |

Suspensions
| Tier | Suspension | Load Limit (т) |
Traverse Speed (gr/sec) |
Rmin | Weight (kg) |
Price (
| |
|---|---|---|---|---|---|---|---|
| III | VVSS T41 | 28.7 | 40 | 0 | 5000 | 1870 | |
| IV | VVSS T48 | 29.9 | 43 | 0 | 5000 | 4650 |

Radios
| Tier | Radio | Signal Range (m) |
Weight (kg) |
Price (
| |
|---|---|---|---|---|---|
| IV | SCR 210 | 325 | 80 | 1980 | |
| IX | SCR 506 | 615 | 110 | 33600 | |
| II | SCR 200 | 265 | 40 | 0 |
Compatible Equipment


![]()
![]()
![]()


![]()


Compatible Consumables
![]()
![]()
![]()
![]()
![]()
![]()
![]()
![]()
![]()
![]()
![]()
![]()
![]()
![]()
![]()
![]()
![]()
![]()
![]()
![]()
![]()
Player Opinion
Pros and Cons
Pros:
- Incredible DPM value, acceptable aim time
- Good alpha for its tier
- Decent hull traverse
- Surprisingly good at ramming
- Reasonable mobility
Cons:
- Main gun is hull-mounted; as a result, cannot go hull-down and vulnerable to tracking
- Despite the TD-style gun mount, all its gun parameters except for RoF are fairly mediocre even by tier 4 mediums' standard
- Non-functional turret is a weakspot and hurts its camo rating
- HP pool is still quite low for its tier, despite its huge size
- Awful view range despite its tall height
Performance
New players who have heard of this tank may be slightly confused at not finding it on the tech tree. Once the notorious stopping block on the path to the American mediums and heavies, the Lee has been retired to Collector's status and replaced with the much more congruous T6 Medium. Those who want it can pick it up that way, and now that it is no longer required, the Lee can take its proper place as a difficult oddity with potentially high rewards for mastering it. This status change also means that it's much easier to ensure your Lee has a 100% crew before you start using it, which is a big change from how things used to be.
The M3 Lee, generally, is a poor tank, reflecting its design origins as a stopgap measure. The most notable feature is that it is quite tall--the hull alone is as tall as a Panzer III, and it features another turret on top of that (and another turret on that turret!). Compared to the now-tree T6 this height is only marginally higher--but the T6 has a turreted main gun. The Lee does not.
The Lee's 75mm gun is mounted in a hull sponson rather than a turret, which makes it a very difficult machine to control. Poking over hilltops is impossible, as the top turret will be exposed well before the main gun gets into line of sight. Additionally, the gun can only traverse 15 degrees left or right, and any tank that moves beyond that will require turning the hull to track. While the Lee's stock rotational speed of 42 degrees-per-second is definitely above average for tier 4, turning the hull is always awkward and will completely ruin your accuracy.
The Lee's survivability is also questionable. Its hitpoint pool of 480 is outright bad among tier 4 mediums, and while its 51 degrees of frontal armor is absolutely respectable, the armor elsewhere is poor--and it's a very large target. Combined with the awkwardness of firing its gun, and old hands tended to treat the Lee like a free kill. Finally, its concealment and spotting are awful considering how tall it is--320 meters view range is low for tier 4 mediums, and it effectively cannot hide.
So why play the Lee at all if it's so bad? Well, we haven't talked about the gun yet.
Because its gun is mounted in a sponson and the tank is so large, the Lee's crew has a lot of room to move and work in relative comfort. This allows for excellent soft stats on the gun. The starting M2 is no joke, but lacking in dispersion and a bit in penetration. 90mm pen can punch through basically anything at tier 4 in a hypothetical, but the shots get squirrely whenever sloped armor comes into play.
But the Lee's top gun is the M3. The stock gun for the legendary Sherman is, frankly, terrifying here. Its aiming and dispersion values are the same as on the T6; however, that extra crew room allows the M3 Lee (with a 100% crew) to fire twenty shots a minute with a reload of under 3 seconds. This produces a DM unmatched at-tier of almost 2300. This is a number that would make a tier 8 Ferdinand sit up and pay attention. Backing up this DPM is an excellent aiming time of 1.83, allowing the Lee to fire more accurately aimed shots than other tanks at-tier.
The DPM only works if you can get the shells to hit and pen, of course, but with that rate of fire and 92 pen (and a 75 round capacity), the Lee can also far more afford to miss shots. It will, however, miss more than average, because of its relatively large dispersion.
Then there are its other strong points. While it should not remotely be relied on against higher-tier tanks, the Lee's frontal armor is universally 50mm thick or more, which is quite good for its tier (the P26/40, which has a reputation for toughness, has 50). This includes on the upper turrets, though since those are frozen in place, they form a weakspot that can be easily hit. However, the Lee's quite good hull traverse means it can keep that frontal armor towards the enemy better, if at the cost of firing. Its frontal armor also features a lot of sloping, some of it very extreme, which improves the ability to bounce shots. It is also surprisingly mobile for its size, with a top speed of 38kph, and thanks to its bulk and weight this also makes it a very good rammer.
So what does this all boil down to? Make no mistake, the Lee is a very difficult tank to play, thanks to its size and layout. These flaws cannot be ignored and define the tank; you always have to consider and compensate for them. It is extremely inflexible, as all of its power is focused into one aspect (DPM). New players should avoid it until they have more experience, especially with non-turreted TDs. But the Lee can produce astonishing damage numbers if allowed to. The usual way to play the Lee is as a short-range TD; it lacks the accuracy and stealth to accurately snipe, but close to the frontline with other tanks in front of it, it can pump out rapid-fire damage that can punch through just about anything it sees at 4 or 5.
If actually at tier 4, the Lee can also function well as a second-line tank; while still a colossal target, it has just enough armor to bounce some fire, and is especially a potential nightmare for fast, machine-gun mounted light tanks like the Panzer 1C. Fights like that will turn into games of rocket tag, as the Lee is vulnerable to flanking and can be shredded alarmingly quickly through its weak side and rear armor. But its rapid-firing gun can do terrifying damage to lightweight tanks, can be kept on them surprisingly well with the Lee's hull traverse, and with so many shells spitting out, has a higher chance of blowing their tracks off, which is basically a death sentence for light tanks.
The M3 Lee has placed all its focus into a ferocious DPM, in exchange for almost everything else. It is not a flexible tank, and this inflexibility means that most players will find themselves struggling to make use of what advantages it has while fighting the various shortcomings of this low-tier underdog. However, even this under-performer still has teeth, and any player who writes it off as no threat risks receiving a hail of 75mm shells in return.
Early Research
- The radios can be researched on the tree M2 Medium Tank, so mount the SCR 506 right away.
- Research the M3 75mm gun.
- Next research the engine.
- Finally, research the suspension.
Suggested Equipment
Vents; Gun Laying Drive; Hardening; Grousers; Turbocharger; Binocs; Camo Net; Optics; Low Noise Exhaust.
Gallery


Historical Info

The Medium Tank M3 was an American tank used during World War II. In Britain the tank was called "General Lee", named after Confederate General Robert E. Lee, and the modified version built with a new turret was called the "General Grant", named after U.S. General Ulysses S. Grant. Design commenced in July 1940, and the first "Lees" were operational in late 1941. The U.S. Army needed a good tank and coupled with Great Britain's demand for 3,650 medium tanks immediately, the Lee began production by late 1940. The M3 was fast, well armed and armored for the period, but due to design flaws (high silhouette, archaic sponson mounting of the main gun) it was not satisfactory and was withdrawn from front line duty as soon as the M4 Sherman became available in large numbers.
Development history

In 1939, the U.S. Army possessed approximately 400 tanks, mostly M2 light tanks, with less than a hundred of the discontinued M2 medium tanks. The U.S. funded tank development poorly during the interwar years, and had no infrastructure for production, little experience in design, and poor doctrine to guide design efforts. The M2 series medium tank was typical of AFVs many nations produced in 1939. When the U.S. entered the war, the M2 design was obsolete with a 37 mm gun, 32 mm frontal armor, machine gun main armament, and a very-high silhouette. The Panzer III and Panzer IV's success in the French campaign led the U.S. Army to immediately order a new medium tank armed with a 75 mm gun in a turret. This would be the M4 Sherman. However, until the Sherman was in production, an interim design with a 75 mm gun was urgently needed. The M3 was the solution. The design was unusual because the main weapon; a larger caliber, low-velocity 75 mm gun, was in an offset sponson mounted in the hull with limited traverse. A small turret with a lighter, high-velocity 37 mm gun sat on the tall hull. A small cupola on top of the turret held a machine gun. The use of two main guns was seen on the French Char B, the Soviet T-35, and the Mark I version of the British Churchill tank. In each case, two weapons were mounted to give the tanks adequate capability in firing both anti-personnel high explosive ammunition and armor-piercing ammunition for anti-tank combat. The M3 differed slightly from this pattern having a main gun which could fire an armor-piercing projectile at a velocity high enough for efficiently piercing armor, as well as deliver a high-explosive shell that was large enough to be effective. Using a hull-mounted gun, the M3 design was produced quicker than if a turret mount gun had been manufactured. It was understood that the M3's design was flawed, but Britain urgently needed tanks. The M3 was tall and roomy: the power transmission ran through the crew compartment under the turret cage to the gearbox driving the front sprockets. Steering was by differential braking, with a turning circle of 37 ft (11 m). The vertical volute suspension units included a return roller made with self-contained and readily replaced units bolted to the chassis. The turret was power-traversed by an electro-hydraulic system: an electric motor providing the pressure for the hydraulic motor. This rotated the turret fully in 15 seconds. Control was from a spade grip on the gun. The same motor provided pressure for the gun stabilizing system. The 75-mm was operated by a gunner and a loader. Sighting the 75-mm gun used an M1 periscope, with an integral telescope, on the top of the sponson. The periscope rotated with the gun. The sight was marked from zero to 3,000 yd (2,700 m) with vertical markings to aid deflection shooting at a moving target. The gunner laid the gun on target through geared handwheels for traverse and elevation. The 37-mm was aimed through the M2 periscope, though this was mounted in the mantlet to the side of the gun. It also sighted the coaxial machine gun. Two range scales were provided: 0-1,500 yd (1,400 m) for the 37-mm and 0-1,000 yd (910 m) for the machine gun.
The British ordered the M3 when they were refused permission to have their tank designs (the Matilda infantry tank and Crusader cruiser tank) made by American factories. British experts had viewed the mock-up in 1940 and identified several flaws; the high profile, the hull-mounted gun, radio in the hull, smooth tracks, and the amount of armor with insufficient attention to splash-proofing the joints. The British agreed to order 1,250 M3s, to be modified to their requirements. The order was subsequently increased with the expectation that when a superior tank was available it, could replace part of the order. Contracts were arranged with three U.S. companies, but the total cost was approximately 240 million US dollars. This sum was all of the British funds in the US and it took the Lend-Lease act to solve the financial problems.
The prototype was completed in March 1941 and production models followed with the first British specification tanks in July. The British cast turret included a bustle at the back for the Wireless Set No. 19 radio. It had thicker armor than the U.S. one and removed the U.S. cupola for a simple hatch. Both U.S. and British tanks had thicker armor than first planned. The British design required one fewer crew member than the US version due to the radio in the turret. The U.S. eventually eliminated the full-time radio operator, assigning the task to the driver. The British realized that to meet their requirement for tanks, both types would be needed. The U.S. military utilized the "M" (Model) letter to designate nearly all of their equipment. When the British Army received their new M3 medium tanks from the US, confusion immediately set in, as the M3 medium tank and the M3 light tank were identically named. The British army began naming their American tanks, although the U.S. Army never used those terms until after the war. The M3 tanks with the new turret and radio setup received the name "General Grant", while the original M3s were called "General Lee", or more usually just "Grant" and "Lee". The M3 brought much-needed firepower to British forces in the African desert campaign. The chassis and running gear of the M3 design was adapted by the Canadians for their Ram tank. The hull of the M3 was also used for self-propelled artillery and recovery vehicles.
Combat history
European and Mediterranean Theaters

Of the 6,258 M3s produced by the U.S., 2,855 M3s were supplied to the British army, and about 1,368 to the Soviet Union. Consequently, one of the American M3 medium tank's first actions during the war was in 1942, during the North African Campaign. British Lees and Grants were in action against Rommel's forces at the disastrous Battle of Gazala on 27 May that year. They continued to serve in North Africa until the end of that campaign. A regiment of M3 Mediums was also used by the U.S. 1st Armored Division in North Africa. In the North African campaign, the M3 was generally appreciated for it's mechanical reliability, good armor, and heavy firepower. In all three areas, it outclassed the available British tanks and was able to fight German tanks and towed anti-tank guns. The tall silhouette and low, hull-mounted 75-mm were severe tactical drawbacks, since they prevented the tank from fighting from hull-down firing positions. The use of riveted armor led to a problem called "spalling," whereby the impact of enemy shells would cause the rivets to break off and become projectiles inside the tank. Later models were welded to eliminate this problem. The M3 was replaced by the M4 Sherman as soon as these were available, though several M3s saw limited action in the battle for Normandy as armored recovery vehicles with dummy guns. Over 1,300 diesel-engined M3A3 and M3A5s were supplied to the USSR via lend-lease in 1942-1943. All were the Lee variants, although they are sometimes referred to generically as Grants. The M3 was unpopular in the Red Army, where it's faults were shown up in engagements with enemy armor and anti-tank weapons, with the Soviets bestowing it the nickname of "coffin for seven brothers." Few were seen in combat after about mid-1943, though some M3s were used on the Arctic Front in the Red Army's offensive on the Litsa front towards Kirkenes in October 1944. The Germans had, on this front, only a relatively-few obsolete French Hotchkiss tanks that they had acquired during their occupation, consequently the M3's inferior tank-to-tank capabilities were of limited importance.
Pacific and China-Burma-India Theaters

The Pacific War was an ocean war fought primarily by the naval fleets of the U.S. and the Empire of Japan. Tank warfare would play a secondary role, the primary battles being between warships. Within the Pacific Theater of Operations (PTO), the U.S. Marine Corps deployed all six of it's tank battalions; the U.S. Army deployed only a third of it's 70 separate tank battalions, and none of it's armored divisions, in the Pacific. During the battle for Tarawa island in 1943, the U.S. Army attacked nearby Makin Island, which was considered a less-,costly operation. The army was supported by a platoon of M3A5 Lee medium tanks from the U.S. Army's 193rd Tank Battalion, making this battle the only U.S. Army combat use of the M3 in the Pacific Theater. No M3s were supplied to the U.S. Marine Corps. When the British received their new M4 Shermans from America, it quickly transferred approximately 1,700 M3s to the China-Burma-India (CBI) theater, deploying about 800 M3s to Australian forces and about 900 M3 tanks to Indian forces. British Lees and Grants were used by the British Fourteenth Army from the fall of Rangoon, performing admirably until the end of the war. In the Far East, the M3's main task was infantry support. It played a pivotal role during the Battle of Imphal, during which the Imperial Japanese Army's 14th Tank Regiment (consisting of mostly captured British M3 Stuart light tanks and their own Type 95 light tanks) encountered M3 medium tanks for the first time. Despite their lower-than-average off-road performance, the M3s performed well as they traversed the steep hillsides around Imphal. Declared obsolete in April 1944, the General Lee fought on against Japan until the end of the war. In the end, the M3 in the CBI theater performed the mission it's original designers had intended it to do: that of supporting the infantry.
Overview
Overall, the M3 was able to cope with the battlefield of 1942. It's armor and firepower were the equal or superior to most of the threats it faced. Long-range, high velocity guns were not yet common on German tanks. However, the rapid pace of tank development meant that the M3 was very quickly outclassed. By mid-1943, with the introduction of the German Panthers andTigers, the up-gunning of the Panzer IV to a long 75-mm gun, and the availability of large numbers of Shermans, the M3 was withdrawn from service in the European Theater.
Historical Gallery


Historical Accuracy Errata
Historical turret-mounted 37mm M5/M6 gun is missing. The turret with the gun is visible on the in-game model, but due to the lack of multi-turret controls in World of Tanks the gun is unusable and merely serves as a hitbox.
- Has the same Chrysler A57 engine as the Sherman Firefly. However, their horsepower and weight values are inconsistent.