Pz.Kpfw. III Ausf. J
Pz.Kpfw. III Ausf. J
Mouse over "
[Client Values; Actual values in
| 138,000 |
| 510108 HP Hit Points |
| 18.05/19.2511.81/22.65 t Weight Limit |
- Commander
- Gunner
- Driver
- Radio Operator
- Loader
| 320440 hp Engine Power |
| 64/20 km/h Speed Limit |
| 4045 deg/s Traverse |
| 17.7337.26 hp/t Power/Wt Ratio |
| NoNo Pivot |
| // mm Hull Armor |
| 30/30/3030/30/30 mm Turret Armor |
AP/APCR/HE
AP/APCR/HE Shells |
0/800/6
30/2000/18 Shell Cost |
| 36/36/4270/70/90 HP Damage |
| 40/74/1867/130/25 mm Penetration |
|
26.09 r/m ▲
24 r/m Standard Gun ▲ Rate of Fire Standard Gun |
|
939.24 ▲
Standard Gun
▼
Standard Gun
▲
1680 Standard Gun ▲
Standard Gun
▼
Standard Gun
▲ Damage Per Minute Standard Gun |
|
0.46 m ▲
0.4 m With 50% Crew: 0.57 m ▲ Accuracy With 50% Crew: 0.496 m |
| 1.7 s 2.3 s Aim time |
| 4644 deg/s Turret Traverse |
| 360° Gun Arc |
| -10°/+20°-10°/+20° Elevation Arc |
| 300140 rounds Ammo Capacity |
| 2020 % Chance of Fire |
| 330 m 330 m View Range |
| 310 m 710 m Signal Range |
IV
138000
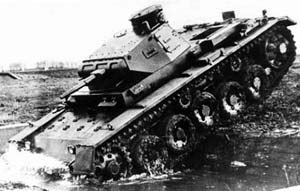
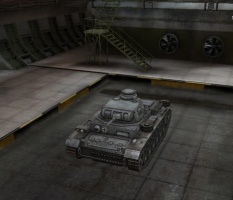
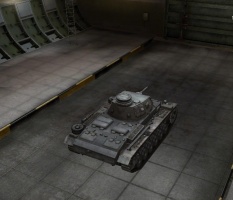
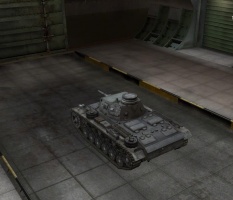
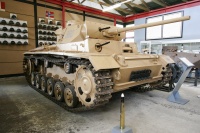
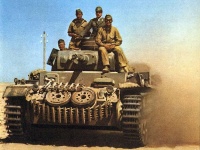
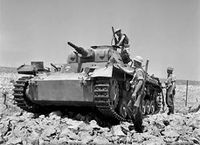
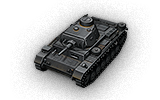
The Pz.Kpfw. III Ausf. J is a German tier 4 medium tank.
Production of the J variant started in March 1941. In addition to the enhanced armor, the vehicle received the new 50-mm KwK 38 gun, which was deemed extremely successful; 1,067 other vehicles featured the KwK 39 gun, the improved version with better penetration rate. An attempt to mount a 75-mm gun (the N variant) was recognized as a failure, and the most large-scale vehicles were the J, L, and M variants (with 50-mm guns that had an impeccable track record). A total of 5,691 vehicles were produced, among which 1,969 were equipped with long-barrel guns and 2,391 with short-barrel 50-mm guns.
Despite being a medium tank, it can be considered one of the best scout-gameplay tanks in the German tree, with excellent acceleration and turning giving a mobility rivaling the Luchs. Comparing the two, Panzer III has less maneuverability than the Luchs, potentially more firepower (but less standard penetration), thicker but flat armor. There are two guns: the 5 cm KwK 39 L/60 long-cannon with higher penetration and flanking is the best choice for newer players, but there is also an howitzer-like 7.5 cm KwK 37 L/24; with HEAT being a near-necessity and requiring some extra skills and equipment. Both guns have their place on a fully upgraded Pz.Kpfw. III, it depends on player preference and playstyle. Competing with other tanks, its agility makes it very effective against other light and medium tanks, but its guns are almost useless against heavy tanks. Be sure to avoid engaging multiple opponents - flank, use cover, and only come out to shoot when you need to. Use this tank to learn the camo, spotting, and player-distraction techniques of the Leopard line.
The Pz.Kpfw. III Ausf. J leads to the VK 30.01 (H), and the Pz.Kpfw. IV Ausf. H.
Modules / Available Equipment and Consumables
Modules
| Tier | Engine | Engine Power (hp) |
Chance of Fire on Impact (%) |
Weight (kg) |
Price (
| |
|---|---|---|---|---|---|---|
| IV | Maybach HL 108 TR | 320 | 20 | 450 | 9460 | |
| IV | Maybach HL 120 TR | 350 | 20 | 510 | 10430 | |
| IV | Maybach HL 120 TRM | 440 | 20 | 510 | 19900 |
| Tier | Suspension | Load Limit (т) |
Traverse Speed (gr/sec) |
Rmin | Weight (kg) |
Price (
| |
|---|---|---|---|---|---|---|---|
| III | Pz.Kpfw. III Ausf. J | 19.25 | 40 | B/2 | 7000 | 1900 | |
| IV | Pz.Kpfw. III Ausf. L | 22.65 | 45 | B/2 | 7000 | 4650 |
| Tier | Radio | Signal Range (m) |
Weight (kg) |
Price (
| |
|---|---|---|---|---|---|
| III | FuG 5 | 310 | 50 | 630 | |
| VI | FuG 7 | 415 | 70 | 8160 | |
| IX | FuG 12 | 710 | 150 | 43200 |
Compatible Equipment
Compatible Consumables
Player Opinion
Pros and Cons
Pros:
- Very fast speed and traverse; can easily be a scout when needed
- Upper front armor gives many at-tier enemies trouble
- Fast firing, somewhat accurate 50mm gun with ridiculous APCR pen. boost
- Some at tier and many below tier enemies fear the 75mm (espicially with HEAT loaded)
- The turret has a large mantlet that might absorb some shells; sacrifices 1° of gun depression however
Cons:
- Both the 50 and 75mm guns don't do well outside of tier IV without premium ammo
- Frontal armor is a lie, lower plate is only 50mm; can't angle well due to weak side and rear armor
- Typical Front mounted transmission, akin to many German tanks, gets destroyed by hits to the weak lower glacis
- Many players get cocky with this tanks speed and die (primarily due to subpar view range and bad reverse speed)
- Can't mount the deadly 7.5cm Kw. K 40 L/43 like the Pz.IV D; Underwhelming armory for a medium in general
Performance
The Panzer 3 is a decent flanker with speed/mobility and okay DPM. Once you purchase the Panzerkampfwagen III (or Panzer 3), you realize it is as fast as its predecessor and can be played similar to the parent Pz.Kpfw. III Ausf. E as a scout, but its view range is poorer for the tier. The addition of better armour can be 'lucky', but should only be used when necessary. In short, you will need to reevaluate your tactics against higher tier tanks.
The Panzer III's armour is an illusion. It suffers from very weak side, turret, and lower glacis armor, making it unreliable. Its frontal armor isn't sloped, which makes it insufficient against anything of equal tier or higher where penetration often exceeds 90mm. It is obvious why the Wehrmacht wanted to replace the turret: its can only fit a gun selection suited for combat against light tanks. Its best gun has 67mm of penetration and cannot penetrate any tanks above the tier IV level without premium ammo, for example having great difficulty damaging a Matilda. Therefore, it is recommended that the Pz.Kpfw. III equip the 75mm gun and load unhistorical HEAT rounds, for maximum alpha. It should be played as a flanker where aim time is not a problem, and only brawl in 1v1s; but if you have a good crew, you can be a sniper-flanker with the 5cm L60 at a longer range as well.
Hang back and spot while you evaluate your team spread at the start, while looking for deficiencies in your enemy's team composition or locations! Your spotting range won't be good enough without Commander skills and vision, which you need to work on. You are more deadly at the end of the battle when you can attack lone tanks, and can flank around into enemy TDs and SPGs: so don't try to out-duel other tanks at the start! Even if you encounter an lone enemy, do not engage from the front the tide will quickly turn against you due to your poor damage over time. Instead, poke-and-spot in under-populated lanes, harassing by secondary more hilly lanes if they are empty to support the team's pushes. If you have enough warning, your superior forwards speed allows you to retreat and avoid damage, but if you are too late your 20km/h is insufficient and you will have to deal with the enemies as they come. You are no light tank, but this is why vision equipment is vital! The Panzer III is also a great interceptor, it can destroy enemy scouts very effectively with its strong frontal hull and agility.
There are now some specific information on situations this tank can encounter:
In a game where the Pz.Kpfw. III is the top tier tank, it becomes a very deadly machine. While its speed is that of a scout tank, and thanks to its frontal armor it can prove more than a match for tier 4 and lower tier tanks head on, With the addition of better guns than the Ausf. A, you'd find yourself the most mobile and possibly the best flanking/scouting tank at your tier. Its 70mm frontal armor can deflect many shots and its speed enables it to be played very aggressively. However, be careful not to get overextended in these games because the side armor of this tank is still an issue at lower tiers. Still, with the gun selection of the tank, it is quite easy to overwhelm weaker light/medium tanks and seize objectives quickly for your allies to follow up upon.
In contrast, in a match where the Pz.Kpfw. III is at the bottom of the list, it really should be played as a scout. Due to the insuffecient gun selection, the tank should be played cautiously. Players should make use of the tank's low silhouette and speed to scout the enemy and allow their allies to do the heavy hitting. Don't underplay the tank and be too cautious though, because the Pz.Kpfw III should still take opportunities to flank enemy tanks where its weaker guns can make its mark.
The best two guns of Pz.Kpfw. III uses are the 7.5 KwK 37 L/24 and the 5 KwK 39 L/ 60. It is recommended that when equipped with the 7.5 cm KwK 37 L/24, it should only use HE rounds, since the AP rounds will have about the same penetration and less damage. A well aimed HE shot can destroy many open-top vehicles such as the Marder II or the SU-76, in a single hit. However, this gun has horrible penetration for its tier and its accuracy isn't so great when you are at top speed. The 5 cm KwK L/60 has much better penetration, but its damage is somewhat less. However, it breaches a higher DPM level on average, because it has such an extreme Rate of Fire. It's better suited for targeting critical areas on a tank such as the track or turret, or if the player has enough accuracy, the viewports and cupola.
Early Research
The Engine should be researched first (in order to fulfil your role as a scouting medium tank), for it will give plenty more acceleration followed by the Tracks, from there, research the turret and the guns, the radio can be costly to research, so save it for last.
Suggested Equipment
Gallery
Historical Info
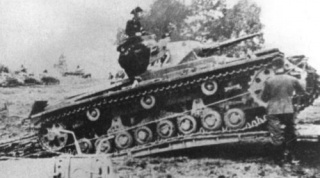
Following specifications laid down by Heinz Guderian in 1934, the Army Weapons Department drew up plans for a medium tank with a maximum weight of 24,000 kg and a top speed of 35 kilometers per hour (21.75 mph). It was intended to be the main tank of the German Panzer divisions, capable of engaging and destroying opposing tank forces. Daimler-Benz, Krupp, MAN, and Rheinmetall all produced prototypes. Testing of the prototypes took place in 1936 and 1937, leading to the Daimler-Benz design being chosen for production. The first model of the Panzer III, the Ausf A, came off the assembly line in May 1937, while mass production of the Ausf F version began in 1939. Much of the early development work on the Panzer III was a quest for a suitable suspension. Several varieties of leaf-spring suspensions were tried on Ausf A through Ausf D before the torsion-bar suspension of the Ausf E was standardized. The Panzer III, along with the Soviet KV heavy tank, was one of the first tanks to use this suspension design.
A distinct feature of the Panzer III was its three-man turret. This meant the commander was not distracted by the loader's or gunner's tasks and could fully concentrate on maintaining situational awareness. Other tanks of the time did not have this capability, providing the Panzer III with a potential combat advantage.The Panzer III was intended as the primary battle tank of the German forces. However, when it initially met KV and T-34 tanks, it proved to be inferior in both armor and gun power. To meet the growing need to counter these tanks, the Panzer III was up-gunned with a longer and more powerful 50-millimeter cannon and received more armor, although this failed to effectively address the problem caused by the KV tanks. As a result, production of self-propelled guns, as well as the up-gunning of the Panzer IV, was initiated.
In 1942, the final version of the Panzer III, the Ausf N, was created with a 75-millimeter KwK 37 L/24 cannon: a low-velocity gun designed for anti-infantry and close-support work. For defensive purposes, the Ausf N was equipped with HEAT ammunition that could penetrate 70 to 100 millimeters of armor, but these were strictly used for self-defense as this variant of the tank was not intended for an anti-tank role.
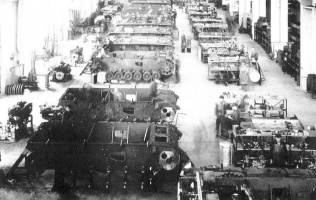
Starting with the Ausf E, from December 1938 through February 1943, a total of 4958 tanks and 321 commander's vehicles were produced.
Armour and Mobility
The Panzer III Ausf A through C had 15 millimeters of homogeneous steel armor on all sides with 10 millimeters on the top and 5 millimeters on the bottom. This was quickly determined to be insufficient, and was upgraded to 30 millimeters on the front, sides, and rear in the Ausf D, E, F, and G models, with the H model having a second 30-millimeter layer of face-hardened steel applied to the front and rear hull. The Ausf J model had a solid 50-millimeter (1.97 in) plate on the front and rear, while the Ausf J¹, L, and M models had an additional layer of 20 millimeters (0.79 in) of armor on the front hull and turret. This additional frontal armor gave the Panzer III frontal protection from most British and Soviet anti-tank guns at all but close ranges. The sides were still vulnerable to many enemy weapons, including anti-tank rifles at close ranges.
The Panzer III Ausf A through C were powered by a 250 horsepower (183.87 kW) 12-cylinder Maybach HL 108 TR engine, giving a top speed of 32 kilometers per hour (19.88 mph), and a range of 150 kilometers (93.21 mi). All later models were powered by the 300 horsepower (220.65 kW) 12-cylinder Maybach HL 120 TRM engine. Top speed varied, depending on the transmission and weight, but was around 40 kilometers per-hour. The range was generally around 155 kilometers.
Firepower
The Panzer III was intended to fight other tanks: in the initial design stage, a 50-millimeter cannon was specified. However, the infantry at the time were being equipped with the 37-millimeter PaK 36, and it was thought that in the interest of standardization, the tanks should carry the same armament. As a compromise, the turret ring was made large enough to accommodate a 50-millimeter cannon, should a future upgrade be required. This single decision would later assure the Panzer III a prolonged life in the German army. The Ausf A to early Ausf F were equipped with a 3.7 cm KwK 36 L/46.5, which proved adequate during the campaigns of 1939 and 1940. The later Ausf F to Ausf J were upgraded with the 5 cm KwK 38 L/42, and the Ausf J to M with the longer 5 cm KwK 39 L/60 cannon in response to increasingly better armed and armored opponents.
By 1942, the Panzer IV was becoming Germany's main medium tank because of its better upgrade potential. The Panzer III remained in production as a close support vehicle. The Ausf N model mounted a low-velocity 7.5 cm KwK 37 L/24 cannon, the same used by the early Panzer IV Ausf A to F models. These guns had originally been fitted to older Panzer IV Ausf A to F1 models, and had been placed into storage when those tanks had also been up-armed to longer versions of the 75mm gun.
All early models up to and including the Ausf F had two 7.92 mm MG 34 machine guns mounted coaxially with the main gun, and a similar weapon in a hull mount. Models from the Ausf G and later had a single coaxial MG34 and the hull MG34.
Combat history
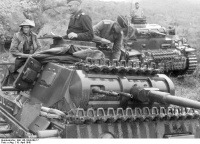
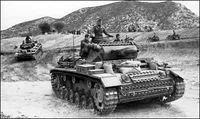
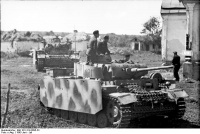
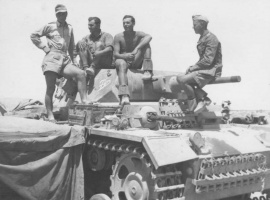
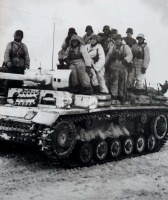
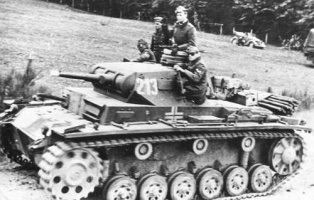
The Panzer III was extensively used in the campaigns against Poland, France, the Soviet Union, and in North Africa, while a handful were still in use in Normandy and at Arnhem in 1944. In the Polish and French campaigns, the Panzer III formed a small part of the German armored forces. Only a few hundred Ausf A through Fs were available in these campaigns: most armed with the 37-millimeter gun. They were the best medium tanks available to the Germans and outclassed most of their opponents, such as the Polish 7TP and French R-35 and H-35 light tanks.
Prior to the invasion of the Soviet Union, the Panzer III was numerically the most important German tank. At this time, the majority of the available tanks had the 50 millimeter KwK 38 L/42 cannon, which also equipped the majority of the tanks in North Africa. Initially, the Panzer IIIs were outclassed and outnumbered by Soviet T-34 and KV tanks. However, the most numerous Soviet tanks were the T-26 and BT tanks. This, along with superior German tactical skill, crew training, and the good ergonomics of the Panzer III, contributed to an approximate 6:1 favorable kill-ratio for German tanks of all types in 1941.
With the appearance of T-34 and KV tanks, re-arming the Panzer III with a longer, more powerful 50-millimeter cannon was prioritized. The T-34 was generally invulnerable in frontal engagements against the Panzer III until the 50 mm KwK 39 L/60 gun was introduced on the Panzer III Ausf J¹ in the spring of 1942. This cannon could penetrate the T-34 frontally at ranges under 500 metres. Against the KV, it was a threat if armed with special high-velocity tungsten rounds. In addition, in 1943 the Ausf L version began the use of spaced armour skirts around the turret and on the hull sides to counter anti-tank rifles. However, due to the introduction of the up-gunned and up-armoured Panzer IV, the Panzer III was relegated to secondary roles after the Battle of Kursk and replaced as the main German medium tank by the Panzer IV and the Pz.Kpfw. V Panther.
The Panzer III chassis was the basis for the turretless StuG III assault gun, one of the most successful self-propelled guns of the war, and the single most-produced German armored fighting vehicle design of World War II.
By the end of the war, the Panzer III had almost no frontline use and many had been returned to the factories for conversion into StuG assault guns, which were in high demand due to the defensive warfare style adopted by the German Army.
Historical Gallery
Historical Accuracy Errata
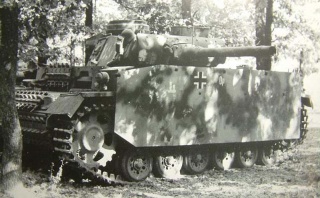
* One of the PzKpfw III's historical modifications, the Schürzen side-armour panels, are missing.
- Only the Pz.Kpfw. III Ausf. N had the 7,5cm Kw.K. 37 L/24, which was considered as a bad decision.


