Scharnhorst
| Revision as of 14:04, 21 August 2017 | Revision as of 16:11, 12 December 2017 Moved videos to appropriate section. Added date of sale information. Added Consumables section. Minor updates to Pros/Cons. Revised Upgrades section. | |||
| Line 1: | Line 1: | |||
| <!-- DO NOT EDIT OR DELETE LINES WITH COMMENTS (it's look like as this or next line) | <!-- DO NOT EDIT OR DELETE LINES WITH COMMENTS (it's look like as this or next line) | |||
| -->{{WoWs_Ship | -->{{WoWs_Ship | |||
| ? | ||||
| |Promo<!-- in case of gift or promo ship write conditions to get it. --> | |Promo<!-- in case of gift or promo ship write conditions to get it. --> | |||
| |Anno=<!-- you can write below short description for the ship. it will replace default once. --> | |Anno=<!-- you can write below short description for the ship. it will replace default once. --> | |||
| ? | A German battleship designed for raider operations and fighting cruisers, including battlecruisers. When ''Scharnhorst'' was built, she was faster than any ship of her type. The rather small caliber of her main battery guns was her main drawback, but that was offset by her higher rate of fire. | + | A German battleship designed for raider operations and fighting cruisers, including battlecruisers. When ''Scharnhorst'' was built, she was faster than any ship of her type. The rather small caliber of her main battery guns was her main drawback, but that was offset by her higher rate of fire.<br><br>''{{#var:ship_name}}'' was first released for sale on 15 August 2016 for the NA server and 21 August 2016 for the EU server. | |
| |Performance=<!-- write text about performance in battles below --> | |Performance=<!-- write text about performance in battles below --> | |||
| ? | A rather peculiar capital ship, ''Scharnhorst'' in World of Warships is officially a battleship, but frequently plays more like a battlecruiser. Her characteristics are very cruiser-like: top speed above 30 knots with a decent rudder shift time, plus a smaller-caliber main battery than other battleships that trades alpha damage and penetration for good rate of fire and muzzle velocity. These disparities set her clearly apart from from her Tier VII counterparts | + | A rather peculiar capital ship, ''Scharnhorst'' in World of Warships is officially a battleship, but frequently plays more like a battlecruiser. Her characteristics are very cruiser-like: top speed above 30 knots with a decent rudder shift time, plus a smaller-caliber main battery than other battleships that trades alpha damage and penetration for good rate of fire and muzzle velocity. These disparities set her clearly apart from from her Tier VII counterparts and sister-ship ''[[Gneisenau]]''. | |
| ? | Her unique traits present her with a plethora of roles to play. ''Scharnhorst'' performs very well as a cruiser hunter or destroyer killer | + | Her unique traits present her with a plethora of roles to play. ''Scharnhorst'' performs very well as a cruiser hunter or destroyer killer; her undersized shells will not over-penetrate as often, allowing for increased damage output per salvo against light-skinned targets. She is also adept at engaging distracted or over-extended battleships. If forced to go toe-to-toe with another battleship, she must use her superior speed to control the engagement, unique turtle-back armor style to mitigate damage, and employ her torpedoes for punishing strikes. While her frontal and citadel armor are good, her side armor is weak enough to take devastating damage from enemy salvos if presented broadside. ''Scharnhorst'' is most comfortable at mid-to-short distance engagements, where she can use her speed to stay at range and dodge oncoming shells, or close the gap to utilize her solid secondary armament suite and deck torpedo launchers to surprise her foes — further enhanced by the correct [[Ship:Commander|commander skills]]. | |
| ? | '''[https://forum.worldofwarships.com/index.php?/topic/90435-premium-ship-review-scharnhorst LittleWhiteMouse's Premium Ship Review: Scharnhorst] from the NA forums | + | {{AnnoWiki|content= | |
| ? | + | '''[https://forum.worldofwarships.com/index.php?/topic/90435-premium-ship-review-scharnhorst LittleWhiteMouse's Premium Ship Review: Scharnhorst] from the NA forums'''}} | ||
| ? | + | |||
| ? | + | |||
| ? | + | |||
| |Pros=<!-- write list of positive points below. use * as in ordinary wiki-list. --> | |Pros=<!-- write list of positive points below. use * as in ordinary wiki-list. --> | |||
| * Unrivaled reload on a battleship; practically the fastest in the game at 20 seconds. | * Unrivaled reload on a battleship; practically the fastest in the game at 20 seconds. | |||
| * Very good turret traverse, puts several cruisers and certain destroyers to shame. | * Very good turret traverse, puts several cruisers and certain destroyers to shame. | |||
| ? | * [[Ship:Gunnery_%26_Armor_Penetration#Armor-Piercing|Armor piercing]] shells have a high chance of penetrating destroyers rather than over-penetrating. Especially true when the target is angled bow or stern to | + | * [[Ship:Gunnery_%26_Armor_Penetration#Armor-Piercing|Armor piercing]] shells have a high chance of penetrating destroyers rather than over-penetrating. Especially true when the target is angled bow or stern to her. | |
| * Strong secondaries and torpedoes for close in brawling. | * Strong secondaries and torpedoes for close in brawling. | |||
| * High speed and good maneuverability feel more like a cruiser than a battleship. | * High speed and good maneuverability feel more like a cruiser than a battleship. | |||
| * Very durable; her turtleback armor scheme means she is very hard to citadel when close. | * Very durable; her turtleback armor scheme means she is very hard to citadel when close. | |||
| ? | * Exceptionally versatile. Can be played as a battlecruiser, a typical battleship, or a flanker, depending on the map | + | * Exceptionally versatile. Can be played as a battlecruiser, a typical battleship, or a flanker, depending on the map, team composition, and upgrade/commander skill configuration. | |
| ? | *Good anti-aircraft suite; when fully built for anti-air duties, she is deadly to enemy planes. | + | * Good anti-aircraft suite; when fully built for anti-air duties, she is deadly to enemy planes. | |
| ? | * Underestimating her guns can prove fatal. | + | * Underestimating her guns can prove fatal to enemy ships. | |
| ? | * Easily can counter most | + | * Easily can counter most destroyer due to fast reload and quick rudder shift time. | |
| |Cons=<!-- write list of negative points below. use * as in ordinary wiki-list. --> | |Cons=<!-- write list of negative points below. use * as in ordinary wiki-list. --> | |||
| Line 36: | Line 32: | |||
| * Turrets and torpedo tubes are incapacitated very often, especially when brawling. | * Turrets and torpedo tubes are incapacitated very often, especially when brawling. | |||
| * Bow armor can be overmatched by battleships she will encounter when up-tiered into Tier VIII and IX games. | * Bow armor can be overmatched by battleships she will encounter when up-tiered into Tier VIII and IX games. | |||
| ? | * | + | * Armor-piercing shells lose a lot of penetration value at long range, even against equal-tiered targets. | |
| |Research=<!-- write text about priority sequence of research below --> | |Research=<!-- write text about priority sequence of research below --> | |||
| Line 45: | Line 41: | |||
| |Upgrades=<!-- write text about best upgrades below --> | |Upgrades=<!-- write text about best upgrades below --> | |||
| ? | The | + | The recommended upgrades for ''{{#var:ship_name}}'' are as follows: | |
| + | * '''Slot 1''': {{Main Armaments Modification 1}}<nowiki>*</nowiki> | |||
| + | * '''Slot 2''': {{Damage Control System Modification 1}} | |||
| + | * '''Slot 3''': {{AA Guns Modification 2}}<nowiki>*</nowiki> | |||
| + | * '''Slot 4''': {{Damage Control System Modification 2}} | |||
| ? | At the other end of the spectrum, highly aggressive players will equip Secondary Battery Modification 2 in this slot; coupled with the Advanced Firing Training skill and a | + | ||
| + | The module chosen for '''Upgrade Slot 3''' will largely determine how ''Scharnhorst'' will play. Equipping {{Aiming Systems Modification 1}} is fairly common, and helps make both her main and secondary batteries more accurate. Players who take '''AA Guns Modification 2''' are hedging their bets against enemy carriers at the expense of a higher chance of off-target shots. Neither of these choices lock the ship into a particular playstyle, and leave each player plenty of options with regard to maximizing ''Scharnhorst''’s impact on the battle. | |||
| + | ||||
| + | At the other end of the spectrum, highly aggressive players will equip {{Secondary Battery Modification 2}} in this slot; coupled with the Advanced Firing Training skill and a Mike Yankee Soxisix ({{Mike Yankee Soxisix|Size=18px}}) flag, ''Scharnhorst''’s secondary battery range pushes out past 7.5km. In this configuration, ''Scharnhorst'' puts out a punishing amount of secondary fire at a very long range; however, getting the most out of such a build requires that she spend significant amounts of time in close-combat with enemy ships. Players opting for this style of build are also encouraged to equip {{Auxiliary Armaments Modification 1}} in '''Upgrade Slot 1''' to help ensure the longevity of their secondary battery guns while under enemy fire. | |||
| |CommanderSkills=<!-- write text about best set of Commander Skills below --> | |CommanderSkills=<!-- write text about best set of Commander Skills below --> | |||
| ? | ''Scharnhorst'' likes to get in close when possible; the skill points of her commander should reflect such a strategy. There are several viable choices for the Level 1 skill: Preventative Maintenance will help keep her main batteries in working order; Direction Center for Catapult Fighter, which provides 2 catapult fighters, providing additional assistance when the enemy carrier zeroes in on her (or for better spotting utility); or Priority Target, which is useful when ''Scharnhorst'' has to expose her broadside for a turn. Adrenaline Rush is an excellent pick at Level 2, as her reload can go down as low as 16 seconds. Expert Marksman is similarly useful, but ''Scharnhorst''’s naturally fast turret traverse speed means that is really only useful during extreme maneuvers. | + | ''Scharnhorst'' likes to get in close when possible; the skill points of her commander should reflect such a strategy. There are several viable choices for the Level 1 skill: Preventative Maintenance will help keep her main batteries in working order; Direction Center for Catapult Fighter, which provides 2 catapult fighters, providing additional assistance when the enemy carrier zeroes in on her (or for better spotting utility); or Priority Target, which is useful when ''Scharnhorst'' has to expose her broadside for a turn. Adrenaline Rush is an excellent pick at Level 2, as her reload can go down as low as 16 seconds; High Alert will increase her survivability by a notable margin. Expert Marksman is similarly useful, but ''Scharnhorst''’s naturally fast turret traverse speed means that is really only useful during extreme maneuvers. | |
| ? | For Level 3, Vigilance combined with | + | For Level 3, Vigilance — combined with either {{Catapult Fighter}} or {{Spotting Aircraft}} — makes her harder to hit with heavy torpedo salvos, while Basics of Survivability can also be useful for captains that prefer a tankier build in general. Superintendent and Basic Firing Training are also solid picks. At Level 4, Concealment Expert allows her to close the distance without being spotted, dropping her detection range as low as 13.1 km, comparable to some of the larger cruisers. Fire Prevention is the recommended pick for captains focused on maximizing survivability. Her weaker-than-average anti-aircraft suite can be made more potent with Manual Fire for AA Armament, as most of her AA is concentrated in her high-caliber, long-ranged AA, which benefits significantly from the skill. | |
| {{Commander Skills | {{Commander Skills | |||
| Line 64: | Line 67: | |||
| | Evasive Maneuver = | | Evasive Maneuver = | |||
| ? | | High Alert = | + | | High Alert = 3 | |
| ? | | Jack of All Trades = | + | | Jack of All Trades = 1 | |
| ? | | Expert Marksman = | + | | Expert Marksman = 1 | |
| | Torpedo Acceleration = | | Torpedo Acceleration = | |||
| | Smoke Screen Expert = | | Smoke Screen Expert = | |||
| | Expert Rear Gunner = | | Expert Rear Gunner = | |||
| | Adrenaline Rush = 3 | | Adrenaline Rush = 3 | |||
| ? | | Last Stand = | + | | Last Stand = | |
| ? | | Survivability Expert = | + | | Survivability Expert = | |
| ? | | Basics of Survivability = | + | | Basics of Survivability = 3 | |
| ? | | Torpedo Armament Expertise = | + | | Torpedo Armament Expertise = | |
| | Emergency Takeoff = | | Emergency Takeoff = | |||
| | Basic Firing Training = 2 | | Basic Firing Training = 2 | |||
| ? | | Superintendent = | + | | Superintendent = 3 | |
| | Demolition Expert = 2 | | Demolition Expert = 2 | |||
| | Vigilance = 2 | | Vigilance = 2 | |||
| | Manual Fire Control for Secondary Armament = 2 | | Manual Fire Control for Secondary Armament = 2 | |||
| ? | | Fire Prevention = | + | | Fire Prevention = 3 | |
| | Inertia Fuse for HE Shells = | | Inertia Fuse for HE Shells = | |||
| | Air Supremacy = | | Air Supremacy = | |||
| Line 89: | Line 92: | |||
| | Manual Fire Control for AA Armament = 2 | | Manual Fire Control for AA Armament = 2 | |||
| | Radio Position Finding = 1 | | Radio Position Finding = 1 | |||
| ? | | Concealment Expert = | + | | Concealment Expert = 2 | |
| }} | }} | |||
| |Consumables=<!-- write text about selection of Consumables below --> | |Consumables=<!-- write text about selection of Consumables below --> | |||
| + | ''{{#var:ship_name}}'' can equip the following consumables: | |||
| + | * '''Slot 1:''' {{Damage Control Party}} | |||
| + | * '''Slot 2:''' {{Repair Party}} | |||
| + | * '''Slot 3:''' {{Spotting Aircraft}} '''or''' {{Catapult Fighter}} | |||
| + | ||||
| + | Similar to ''[[Tirpitz]]'', ''Scharnhorst'' is most comfortable fighting enemy ships at medium and short range. At those ranges she will invariably attract a lot of attention from the enemy team; as such, investing credits (or doubloons) into {{Repair Party II}} and {{Damage Control Party II}} cannot be recommended strongly enough. {{Spotting Aircraft}} isn't all that useful given her shell performance at extreme ranges; captains are encouraged to equip {{Catapult Fighter}} to help provide additional protection from enemy aircraft. | |||
| |Camouflage=<!-- write text about useful camouflage below --> | |Camouflage=<!-- write text about useful camouflage below --> | |||
| Line 100: | Line 109: | |||
| |Signals=<!-- write text about best set of signals below --> | |Signals=<!-- write text about best set of signals below --> | |||
| {{Signal Flags | {{Signal Flags | |||
| ? | ||||
| | November Echo Setteseven = 2 | | November Echo Setteseven = 2 | |||
| | Mike Yankee Soxisix = 3 | | Mike Yankee Soxisix = 3 | |||
| Line 111: | Line 119: | |||
| | Sierra Mike = 3 | | Sierra Mike = 3 | |||
| | India Delta = 3 | | India Delta = 3 | |||
| ? | | Juliet Whiskey Unaone = | + | | Juliet Whiskey Unaone = 1 | |
| ? | | India Yankee = | + | | India Yankee = 3 | |
| ? | | Juliet Charlie = | + | | Juliet Charlie = 1 | |
| | Zulu = 2 | | Zulu = 2 | |||
| | India Bravo Terrathree = | | India Bravo Terrathree = | |||
| ? | | Equal Speed Charlie London = | + | | Equal Speed Charlie London = | |
| | Zulu Hotel = 2 | | Zulu Hotel = 2 | |||
| | Papa Papa = | | Papa Papa = | |||
| | Wyvern = 1 | | Wyvern = 1 | |||
| ? | | Red Dragon = | + | | Red Dragon = | |
| | Dragon Flag = 2 | | Dragon Flag = 2 | |||
| | Ouroboros = | | Ouroboros = | |||
| | Hydra = 2 | | Hydra = 2 | |||
| ? | ||||
| }} | }} | |||
| Line 145: | Line 152: | |||
| <h2>''Scharnhorst'', 1942</h2> | <h2>''Scharnhorst'', 1942</h2> | |||
| ====Construction==== | ====Construction==== | |||
| ? | :Wilhelmshaven Navy Yard; Wilhelmshaven, Germany | + | :Builder: Wilhelmshaven Navy Yard; Wilhelmshaven, Germany | |
| :Laid down: 16 May 1935 | :Laid down: 16 May 1935 | |||
| :Launched: 30 June 1936 | :Launched: 30 June 1936 | |||
| Line 191: | Line 198: | |||
| }} | }} | |||
| </div> | </div> | |||
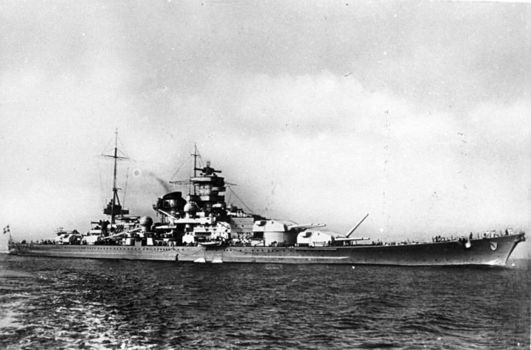
| ? | [[File:Scharnhorst,1939.jpg| | + | [[File:Scharnhorst,1939.jpg|none|frame|x350px|link=|''Scharnhorst'', circa 1939.]] | |
| === History === | === History === | |||
| ==== Design ==== | ==== Design ==== | |||
| Line 213: | Line 220: | |||
| It was not until January 1943 when ''Scharnhorst'' was finally returned to action, and she was sent to the Arctic. With the increasing presence of Allied air and sea power, ''Scharnhorst'' failed to make port in Narvik until March, her earlier attempts having been abortive. Moving to Altafjord, she remained at anchor — with the exception of a single sortie with ''[[Tirpitz]]'' — until December 1943. | It was not until January 1943 when ''Scharnhorst'' was finally returned to action, and she was sent to the Arctic. With the increasing presence of Allied air and sea power, ''Scharnhorst'' failed to make port in Narvik until March, her earlier attempts having been abortive. Moving to Altafjord, she remained at anchor — with the exception of a single sortie with ''[[Tirpitz]]'' — until December 1943. | |||
| ? | Her final voyage (which is now referred to as the Battle of the North Cape) began on Christmas Day, 1943. Ordered to intercept two Russia-bound convoys, she sortied with five destroyers under the command of ''Konteradmiral'' Erich Bey. Having intercepted one of the convoys on 26 December, ''Scharnhorst'', which had separated from her destroyer screen, was in turn intercepted by the convoy screen, which contained battleship HMS ''Duke of York'', heavy cruiser HMS ''Norfolk'', light cruisers HMS ''[[Belfast]]'', HMS ''Jamaica'', and HMS ''Sheffield'', and eight destroyers. Engaged, ''Scharnhorst'' fought against numerically superior forces | + | Her final voyage (which is now referred to as the Battle of the North Cape) began on Christmas Day, 1943. Ordered to intercept two Russia-bound convoys, she sortied with five destroyers under the command of ''Konteradmiral'' Erich Bey. Having intercepted one of the convoys on 26 December, ''Scharnhorst'', which had separated from her destroyer screen, was in turn intercepted by the convoy screen, which contained battleship HMS ''[[Duke of York]]'', heavy cruiser HMS ''Norfolk'', light cruisers HMS ''[[Belfast]]'', HMS ''Jamaica'', and HMS ''Sheffield'', and eight destroyers. Engaged, ''Scharnhorst'' fought against numerically superior forces blind, as her FuMO 27 radar was disabled early on due to shellfire from ''Norfolk''. Eventually, ''Scharnhorst'' was damaged by gunfire, then torpedoed, finally sinking with heavy loss of life. | |
| |HistoricalGallery=<!-- write below list of files with description (if necessary) separated with | --><gallery> | |HistoricalGallery=<!-- write below list of files with description (if necessary) separated with | --><gallery> | |||
| Line 220: | Line 227: | |||
| File:Scharnhorst03.jpg|''Scharnhorst'' underway, date and location unknown. | File:Scharnhorst03.jpg|''Scharnhorst'' underway, date and location unknown. | |||
| File:Scharnhorst01.jpg|''Scharnhorst'', circa 1939. | File:Scharnhorst01.jpg|''Scharnhorst'', circa 1939. | |||
| ? | ||||
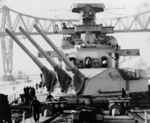
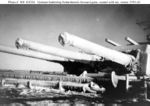
| File:Scharnhorst guns.jpg|''Scharnhorst'' in port during the winter of 1939–1940. | File:Scharnhorst guns.jpg|''Scharnhorst'' in port during the winter of 1939–1940. | |||
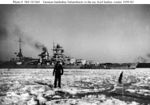
| File:Scharnport.jpg|''Scharnhorst'' in Kiel during the winter of 1939-1940. | File:Scharnport.jpg|''Scharnhorst'' in Kiel during the winter of 1939-1940. | |||
| Line 236: | Line 242: | |||
| |Video=<!-- put below video clips with using template VideoYT. You can use html-tags for formatting. --> | |Video=<!-- put below video clips with using template VideoYT. You can use html-tags for formatting. --> | |||
| + | {{VideoYT|wx_XX0Ef7Qg}} | |||
| + | {{VideoYT|l-sQsHpSaY4}} | |||
| + | {{VideoYT|ieDlY1ZmHrY}} | |||
| |Ref= <!-- write below --> | |Ref= <!-- write below --> | |||
| }}<!-- DO NOT DELETE THIS LINE. DO NOT INSERT ANYTHING BELOW THIS LINE --> | }}<!-- DO NOT DELETE THIS LINE. DO NOT INSERT ANYTHING BELOW THIS LINE --> | |||
Revision as of 16:11, 12 December 2017
| 283 mm/54.5 SK C/34 on a Drh LC/34 mount3 х 3 pcs. |
| Rate of Fire3 shots/min. |
| Reload Time20 sec. |
| Rotation Speed7.2 deg./sec. |
| 180 Degree Turn Time25 sec. |
| Firing Range19.87 km. |
| Maximum Dispersion258 m. |
| HE Shell283 mm Spr.Gr. L/4.5 Kz. |
| Maximum HE Shell Damage3,200 |
| Chance of Fire on Target Caused by HE Shell20 % |
| Initial HE Shell Velocity890 m./s. |
| HE Shell Weight315 kg. |
| AP Shell283 mm P.Spr.Gr. L/4.4 |
| Maximum AP Shell Damage7,600 |
| Initial AP Shell Velocity890 m./s. |
| AP Shell Weight330 kg. |
| 105 mm/65 SK C/33 on a Dop. L. C/31 mount7 х 2 pcs. |
| Firing Range6.3 km. |
| Rate of Fire17.91 shots/min. |
| Reload Time3.35 sec. |
| HE Shell105 mm Spr.Gr. Kz. |
| Maximum HE Shell Damage1,200 |
| Initial HE Shell Velocity900 m./s. |
| Chance of Fire on Target Caused by HE Shell5 % |
| 150 mm/55 SK C/28 on a Dop. L. C/34 mount4 х 2 pcs. |
| Firing Range6.3 km. |
| Rate of Fire8 shots/min. |
| Reload Time7.5 sec. |
| HE Shell150 mm Spr.Gr. L/4.5 |
| Maximum HE Shell Damage1,700 |
| Initial HE Shell Velocity875 m./s. |
| Chance of Fire on Target Caused by HE Shell8 % |
| 150 mm/55 SK C/28 on an MPL/35 mount4 х 1 pcs. |
| Firing Range6.3 km. |
| Rate of Fire8 shots/min. |
| Reload Time7.5 sec. |
| HE Shell150 mm Spr.Gr. L/4.5 |
| Maximum HE Shell Damage1,700 |
| Initial HE Shell Velocity875 m./s. |
| Chance of Fire on Target Caused by HE Shell8 % |
| 533 mm Drilling2 х 3 pcs. |
| Rate of Fire0.88 shots/min. |
| Reload Time68 sec. |
| Rotation Speed25 deg./sec. |
| 180 Degree Turn Time7.2 sec. |
| TorpedoG7a T1 |
| Maximum Damage13,700 |
| Torpedo Speed64 knot |
| Torpedo Range6 km. |
| 105 mm/65 SK C/33 on a Dop. L. C/31 mount7 х 2 pcs. |
| . . . Average Damage per Second116.2 |
| . . . Firing Range4.5 km. |
| 20 mm/65 C/38 on a Flak 35 Vierling L/38 mount5 х 4 pcs. |
| . . . Average Damage per Second30 |
| . . . Firing Range2.01 km. |
| 37 mm/83 SK C/30 on a Dopp LC/30 mount8 х 2 pcs. |
| . . . Average Damage per Second20.8 |
| . . . Firing Range3.51 km. |
| 20 mm/65 C/38 on an L/30 single mount10 х 1 pcs. |
| . . . Average Damage per Second30 |
| . . . Firing Range2.01 km. |
| Maximum Speed30 knot |
| Turning Circle Radius800 m. |
| Rudder Shift Time14.5 sec. |
| Surface Detectability Range15.19 km. |
| Air Detectability Range9.94 km. |
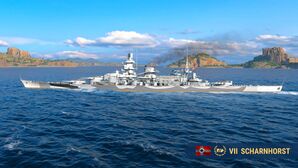
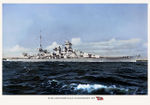
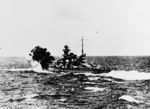
Scharnhorst — German special premium Tier VII battleship.
A German battleship designed for raider operations and fighting cruisers, including battlecruisers. When Scharnhorst was built, she was faster than any ship of her type. The rather small caliber of her main battery guns was her main drawback, but that was offset by her higher rate of fire.
Scharnhorst was first released for sale on 15 August 2016 for the NA server and 21 August 2016 for the EU server.
Modules
 |
Rate of Fire (shots/min) | Torpedo Tubes Reload Time (sec) | 180° Turn Time (sec) | Maximum Damage (HP) | Torpedo Speed (knot) | Torpedo Range (km) |
Research price (exp) |
Purchase price ( | |
|---|---|---|---|---|---|---|---|---|---|
| G7a T1 | 0.9 | 68 | 7.2 | 13,700 | 64 | 6 | 0 | 0 |
Compatible Upgrades
| Slot 1 |
|||||
|---|---|---|---|---|---|
| Slot 2 |
|||||
| Slot 3 |
|||||
| Slot 4 |
Player Opinion
Performance
A rather peculiar capital ship, Scharnhorst in World of Warships is officially a battleship, but frequently plays more like a battlecruiser. Her characteristics are very cruiser-like: top speed above 30 knots with a decent rudder shift time, plus a smaller-caliber main battery than other battleships that trades alpha damage and penetration for good rate of fire and muzzle velocity. These disparities set her clearly apart from from her Tier VII counterparts and sister-ship Gneisenau.
Her unique traits present her with a plethora of roles to play. Scharnhorst performs very well as a cruiser hunter or destroyer killer; her undersized shells will not over-penetrate as often, allowing for increased damage output per salvo against light-skinned targets. She is also adept at engaging distracted or over-extended battleships. If forced to go toe-to-toe with another battleship, she must use her superior speed to control the engagement, unique turtle-back armor style to mitigate damage, and employ her torpedoes for punishing strikes. While her frontal and citadel armor are good, her side armor is weak enough to take devastating damage from enemy salvos if presented broadside. Scharnhorst is most comfortable at mid-to-short distance engagements, where she can use her speed to stay at range and dodge oncoming shells, or close the gap to utilize her solid secondary armament suite and deck torpedo launchers to surprise her foes — further enhanced by the correct commander skills.
Pros:
- Unrivaled reload on a battleship; practically the fastest in the game at 20 seconds.
- Very good turret traverse, puts several cruisers and certain destroyers to shame.
- Armor piercing shells have a high chance of penetrating destroyers rather than over-penetrating. Especially true when the target is angled bow or stern to her.
- Strong secondaries and torpedoes for close in brawling.
- High speed and good maneuverability feel more like a cruiser than a battleship.
- Very durable; her turtleback armor scheme means she is very hard to citadel when close.
- Exceptionally versatile. Can be played as a battlecruiser, a typical battleship, or a flanker, depending on the map, team composition, and upgrade/commander skill configuration.
- Good anti-aircraft suite; when fully built for anti-air duties, she is deadly to enemy planes.
- Underestimating her guns can prove fatal to enemy ships.
- Easily can counter most destroyer due to fast reload and quick rudder shift time.
Cons:
- Lower alpha strike potential and penetration compared to her larger-gunned peers.
- Low gun caliber prevents overmatching in most cases, leading to more bounces as well as non-penetrations than most battleships.
- Large turning radius.
- Turrets and torpedo tubes are incapacitated very often, especially when brawling.
- Bow armor can be overmatched by battleships she will encounter when up-tiered into Tier VIII and IX games.
- Armor-piercing shells lose a lot of penetration value at long range, even against equal-tiered targets.
Research
Optimal Configuration
Upgrades
The recommended upgrades for Scharnhorst are as follows:
- Slot 1: Main Armaments Modification 1
 *
*
- Slot 2: Damage Control System Modification 1

- Slot 3: AA Guns Modification 2 (
 )*
)*
- Slot 4: Damage Control System Modification 2

The module chosen for Upgrade Slot 3 will largely determine how Scharnhorst will play. Equipping Aiming Systems Modification 1 ![]() is fairly common, and helps make both her main and secondary batteries more accurate. Players who take AA Guns Modification 2 are hedging their bets against enemy carriers at the expense of a higher chance of off-target shots. Neither of these choices lock the ship into a particular playstyle, and leave each player plenty of options with regard to maximizing Scharnhorst’s impact on the battle.
is fairly common, and helps make both her main and secondary batteries more accurate. Players who take AA Guns Modification 2 are hedging their bets against enemy carriers at the expense of a higher chance of off-target shots. Neither of these choices lock the ship into a particular playstyle, and leave each player plenty of options with regard to maximizing Scharnhorst’s impact on the battle.
At the other end of the spectrum, highly aggressive players will equip Secondary Battery Modification 1 (![]() ) in this slot; coupled with the Advanced Firing Training skill and a Mike Yankee Soxisix (
) in this slot; coupled with the Advanced Firing Training skill and a Mike Yankee Soxisix (![]() ) flag, Scharnhorst’s secondary battery range pushes out past 7.5km. In this configuration, Scharnhorst puts out a punishing amount of secondary fire at a very long range; however, getting the most out of such a build requires that she spend significant amounts of time in close-combat with enemy ships. Players opting for this style of build are also encouraged to equip Auxiliary Armaments Modification 1
) flag, Scharnhorst’s secondary battery range pushes out past 7.5km. In this configuration, Scharnhorst puts out a punishing amount of secondary fire at a very long range; however, getting the most out of such a build requires that she spend significant amounts of time in close-combat with enemy ships. Players opting for this style of build are also encouraged to equip Auxiliary Armaments Modification 1 ![]() in Upgrade Slot 1 to help ensure the longevity of their secondary battery guns while under enemy fire.
in Upgrade Slot 1 to help ensure the longevity of their secondary battery guns while under enemy fire.
Commander Skills
Scharnhorst likes to get in close when possible; the skill points of her commander should reflect such a strategy. There are several viable choices for the Level 1 skill: Preventative Maintenance will help keep her main batteries in working order; Direction Center for Catapult Fighter, which provides 2 catapult fighters, providing additional assistance when the enemy carrier zeroes in on her (or for better spotting utility); or Priority Target, which is useful when Scharnhorst has to expose her broadside for a turn. Adrenaline Rush is an excellent pick at Level 2, as her reload can go down as low as 16 seconds; High Alert will increase her survivability by a notable margin. Expert Marksman is similarly useful, but Scharnhorst’s naturally fast turret traverse speed means that is really only useful during extreme maneuvers.
For Level 3, Vigilance — combined with either Catapult Fighter ![]() or Spotting Aircraft
or Spotting Aircraft ![]() — makes her harder to hit with heavy torpedo salvos, while Basics of Survivability can also be useful for captains that prefer a tankier build in general. Superintendent and Basic Firing Training are also solid picks. At Level 4, Concealment Expert allows her to close the distance without being spotted, dropping her detection range as low as 13.1 km, comparable to some of the larger cruisers. Fire Prevention is the recommended pick for captains focused on maximizing survivability. Her weaker-than-average anti-aircraft suite can be made more potent with Manual Fire for AA Armament, as most of her AA is concentrated in her high-caliber, long-ranged AA, which benefits significantly from the skill.
— makes her harder to hit with heavy torpedo salvos, while Basics of Survivability can also be useful for captains that prefer a tankier build in general. Superintendent and Basic Firing Training are also solid picks. At Level 4, Concealment Expert allows her to close the distance without being spotted, dropping her detection range as low as 13.1 km, comparable to some of the larger cruisers. Fire Prevention is the recommended pick for captains focused on maximizing survivability. Her weaker-than-average anti-aircraft suite can be made more potent with Manual Fire for AA Armament, as most of her AA is concentrated in her high-caliber, long-ranged AA, which benefits significantly from the skill.
| Recommended Commander Skills | ||||||||
|---|---|---|---|---|---|---|---|---|
| Cost (points) |
Endurance | Attack | Support | Versatility | ||||
| 1 |
★★ |
★★ |
★ |
|
|
|
★ |
|
| 2 |
★★★ |
★ |
★ |
|
|
|
★★★ |
|
| 3 |
★★★ |
|
|
|
★★ |
★★★ |
★★ |
★★ |
| 4 |
★★ |
★★★ |
|
|
★★ |
|
★ |
★★ |
| Key: ★★★ - Extremely Useful ★★ - Frequently Useful ★ - Occasionally Useful No stars - Meh Χ - Not recommended | ||||||||
Consumables
Scharnhorst can equip the following consumables:
- Slot 1: Damage Control Party

- Slot 2: Repair Party

- Slot 3: Spotting Aircraft
 or Catapult Fighter
Similar to Tirpitz, Scharnhorst is most comfortable fighting enemy ships at medium and short range. At those ranges she will invariably attract a lot of attention from the enemy team; as such, investing credits (or doubloons) into Repair Party II (![]() ) and Damage Control Party II (
) and Damage Control Party II (![]() ) cannot be recommended strongly enough. Spotting Aircraft
) cannot be recommended strongly enough. Spotting Aircraft ![]() isn't all that useful given her shell performance at extreme ranges; captains are encouraged to equip Catapult Fighter
isn't all that useful given her shell performance at extreme ranges; captains are encouraged to equip Catapult Fighter ![]() to help provide additional protection from enemy aircraft.
to help provide additional protection from enemy aircraft.
Camouflage
As a premium ship, Scharnhorst comes included with Type 10 camouflage that lowers her detection radius, reduces the accuracy of incoming shells, and increases the amount of experience she earns.
Signals
Recommended Signal Flags 
| |||||
|---|---|---|---|---|---|
| Combat | |||||

|

|
 ★★★ |
 ★ |
 ★ |
 ★ |
 ★ |
 ★★★ |
 ★★ |
 ★★★ |
 ★★ |
 ★★★ |

|

| ||||
Gallery
Scharnhorst moves on to its' next target after destroying an enemy Amagi.
A Mikhail Kutuzov joins the Amagi in Davy Jones's Locker.
Scharnhorst attacks her next victim after destroying an enemy Colorado.
Scharnhorst scrambles a catapult fighter in an attempt to fight off enemy aircraft after destroying an enemy Colorado.
Historical Info
Historical Gallery
Video
