Rahmat
| Revision as of 03:50, 17 February 2022 | Revision as of 05:40, 8 November 2023 12.10 | |||
7 intermediate revisions by 3 users not shown | ||||
| Line 11: | Line 11: | |||
| See the [https://wiki.wargaming.net/en/Ship:Style_Guide Style Guide]. --> | See the [https://wiki.wargaming.net/en/Ship:Style_Guide Style Guide]. --> | |||
| ? | + | ''{{#var:ship_name}}'' represents a what-if transfer of a ''Dido''-class cruiser to the Royal Malaysian Navy. As such, she shares many similarities to her premium British cousin VI ''[[Dido]]'', presented in a Pan-Asian package. | ||
| ? | + | |||
| ? | + | |||
| ? | + | |||
| ? | + | |||
| ? | + | |||
| ? | + | |||
| ? | + | |||
| ? | + | |||
| ? | + | |||
| ? | + | ''{{#var:ship_name}}'' gives players their first taste of the path future Pan-Asian cruisers will follow — AA cruisers with destroyer-caliber guns, and a strong torpedo armament. | ||
| ? | + | |||
| ? | + | |||
| ? | + | |||
| ? | + | |||
| ? | + | |||
| ? | + | |||
| ? | + | |||
| ? | + | |||
| ? | + | |||
| + | ==== Armament ==== | |||
| + | ''{{#var:ship_name}}'' joins the small group of ships in-game featuring two different sets of main battery guns. She mounts five twin turrets, three in front and two to the rear, with fast traverse and average reload. Her stock guns are the QF 4.5 inch (113 mm) guns used by two ''Dido''-class cruisers, while her upgraded guns are the same 133 mm/QF 50 Mk.I guns originally designed for the class (and carried by ''[[Dido]]''). Her 7.5 second reload is decent for Tier VI, and her 18 second turret traverse is among the fastest in her tier. But her main battery range is painfully low — her 11.4 km stock range is the second lowest in her entire matchmaking spread, and her upgraded 12.5 km range is still lower than even many Tier V cruisers. Her shells are also floaty, meaning she has to get even closer to threats to effectively engage them. | |||
| + | Her stock 113 mm guns are underwhelming. Both her 113 mm HE and AP shells deal little damage and have low theoretical DPM, and their low caliber and penetration leave her with even lower effective DPM. The HE shells also have a very low fire chance and only penetrate 19 mm of plating; she can still penetrate most destroyers and cruisers in her tier, but will struggle against battleships and higher tier targets. The AP shells do have the same short fuse times as those used by Jutland and Daring. | |||
| + | Her upgraded 133 mm guns are still small for the tier, but offer some welcome improvements. Her 133 mm HE and AP shells still have low damage, but she has high HE DPM and decent AP DPM for a Tier VI cruiser, and her 8% fire chance increases the number of fires she can set per minute. They still lack the penetration of most other cruisers, but are much less limited than her stock 113 mm guns. | |||
| + | ||||
| + | Like ''[[Chungking]]'', ''{{#var:ship_name}}'' carries deepwater torpedoes. She mounts two triple launchers, one per side. Their 9.4 km range is high for a Tier VI cruiser, and when running the <u>Concealment Expert</u> commander skill she has a 0.4 km stealth torpedo window. Being deepwater torpedoes, they have a high flood chance and deal massive damage, nearly 16,000 maximum per torpedo. They also reload quickly at just 72 seconds, although the single rack per side limits her DPM when not kiting. Their 61 knot base speed is average for the tier, but is offset by their low detection — without Hydroacoustic Search or prior spotting, her target has less than five seconds to react before they hit. | |||
| + | ||||
| + | Her torpedoes aren’t strong enough to become a primary damage source yet, but they still act as a painful deterrent against cruisers or battleships pushing too close to her. As with other deepwater torpedoes, they are much stealthier than normal torpedoes, giving enemies much less time to react and dodge. But they cannot hit destroyers or submarines. | |||
| + | ||||
| + | ==== Consumables ==== | |||
| + | ||||
| + | ''{{#var:ship_name}}'' features a fairly standard consumable suite for the Pan-Asian tech tree cruisers. In addition to the normal cruiser Damage Control Party, she carries the normal cruiser Defensive AA Fire consumable in its own slot, as well as a Smoke Generator. Unlike most other cruisers, Rahmat does not have access to the Hydroacoustic Search consumable, leaving her more vulnerable to enemy torpedoes and requiring team support for detecting stealthy targets. | |||
| + | ||||
| + | Like the smokescreens found on the Pan-Asian destroyers, ''{{#var:ship_name}}'s'' has an average action and dispersion time but a shorter cooldown. Although she lacks the extended action time characteristic of US smokescreens, the shorter cooldown means less waiting for the next if she has to abandon one early. However, she’s limited to three charges by default, so players must be selective about when they use one. | |||
| + | ||||
| + | ==== Maneuverability ==== | |||
| + | ||||
| + | ''{{#var:ship_name}}'' is surprisingly agile for a cruiser, at the expense of speed. Her 6.5 second rudder shift is tied for best in tier, and her 580 m turning circle is excellent, only 10 m larger than ''[[Ship:Huanghe|Huanghe’s]]'' best-in-tier 570 m. However, her top speed is only 32.2 knots. Although she can still outrun most battleships, she will lag behind many cruisers and all destroyers in her game. She will struggle to keep up with any pushes or retreats on her flank, so she must be cautious when committing to one side. | |||
| + | ||||
| + | ==== Survivability ==== | |||
| + | ||||
| + | Just as with ''Chungking'', ''{{#var:ship_name}}'' is squishy even for a mid-tier cruiser. She lacks both the armor to resist incoming damage and the health to tank it. Players need to be able to dodge incoming fire if they wish to remain in the battle. | |||
| + | ||||
| + | ''{{#var:ship_name}}'s'' armor is the same as other super light cruisers like ''Chungking'' and ''[[Leander]]''. She’s coated in 13 mm plating everywhere, and her superstructure is even thinner at just 10 mm. Every HE shell she faces will penetrate with no issues, and both battleships and heavy cruisers with 190 mm guns or larger will overmatch regardless of angle. Her 25 mm deck can shatter smaller HE and bounce AP smaller than 381 mm, but it’s mostly covered by her thin superstructure and really only protects against overmatching her citadel roof. | |||
| + | ||||
| + | ''{{#var:ship_name}}'s'' belt armor is slightly better but still rather weak. The 89 mm upper belt under her smokestacks can shatter HE and bounce AP when properly angled, but will fuse any AP shell that doesn’t bounce. Her citadel is particularly vulnerable, just 89 mm thick and extending well above the water from her forward superstructure to her X turret. She has a small chunk of 25 mm plating above her rudder that will bounce or shatter the occasional shell when kiting, but shouldn’t be relied on for any meaningful protection. Torpedoes are also a significant threat; she has some torpedo protection, but at only 4% it won’t do much in practice. | |||
| + | ||||
| + | Her health pool is also severely lacking. At 21,200 HP stock and 23,600 with the upgraded hull, she has the smallest health pool of any Tier VI cruiser. Combined with her weak armor, she dislikes being shot at. | |||
| + | ||||
| + | ''{{#var:ship_name}}'s'' good concealment will help her stay alive when she can’t find cover. With the <u>Concealment Expert</u> skill, she can get her surface detection down to 9 km. Although every destroyer in her matchmaking range will still outspot her, she will be one of the stealthiest cruisers in her game. Her 5.8 km air detection is average for her tier, but still low enough that she can avoid unwanted plane spotting. | |||
| + | ||||
| + | ==== Anti-aircraft ==== | |||
| + | ||||
| + | As will be the case for future Pan-Asian tech tree cruisers, ''{{#var:ship_name}}'' actually has decent AA defenses for a Tier VI cruiser. Her long-range mounts reach out to 5.8 km, while her mid- and short-range mounts are more normal. Her long- and mid-range mounts produce decent continuous DPS, but her short-range DPS is one of the lowest in tier. She only produces two flak clouds, but uses the same increased damage flak found on ''Dido'', ''[[Pensacola]]'', and ''Huanghe''. With the <u>Concealment Expert</u> skill, her air detection and AA ranges are the same, meaning planes cannot spot her without taking damage. | |||
| + | ||||
| + | Further increasing her AA defenses, ''{{#var:ship_name}}'' carries the Defensive AA Fire consumable in its own slot, which increases both her continuous and flak damage. Although it still isn’t enough to completely prevent strikes, it is a guaranteed damage boost where most other cruisers have to sacrifice Hydroacoustic Search for it. | |||
| + | ||||
| + | Players should note that ''{{#var:ship_name}}'s'' upgraded 133 mm main guns actually provide slightly less long-range DPS. It is still worth upgrading them, though, as the increased damage, penetration, and fire chance are worth the slight AA reduction. | |||
| + | ||||
| + | ==== Battle performance ==== | |||
| + | ||||
| + | ''{{#var:ship_name}}'' bridges the gap between the more traditional light cruiser play style of ''Chungking'' and the “super-light” cruisers that follow her. Although she lacks the high torpedo power and fast main battery reload of future Pan-Asian cruisers, she brings many welcome improvements over Chungking. | |||
| + | ||||
| + | Players should play around island cover near caps to provide fire support for allied destroyers. With her high shell arcs, she can fire over her protective island armor, and she can use her smokescreens to provide an “island” on demand when necessary. But with no Hydroacoustic Search and limited charges, she is vulnerable to torpedoes when sitting inside it and can quickly run out. If island cover is available, that should take priority. She must avoid overcommitting to a flank, though, as her slow speed will be an issue if she has to run away. | |||
| + | ||||
| + | ''{{#var:ship_name}}'s'' torpedoes still aren’t strong enough to be a primary weapon, but the threat of high damage and low detection can deter enemies from pushing too close. When it’s safe to do so, she can use them to attack stationary cruisers and battleships, but they are best used when kiting. With comfortable firing angles and a fast reload — but only one launcher per side — she can alternate sides while running and leave a stream of painful, stealthy torpedoes in her wake. | |||
| + | ||||
| + | Although she sits in the awkward spot between a true gun-focused light cruiser and a strong torpedo cruiser, she offers many helpful lessons for players that continue up the line. | |||
| + | ||||
| + | ||||
| + | |Pros=<!-- write list of positive points below. use * as in ordinary wiki-list. --> | |||
| + | * High HE DPM on her upgraded guns | |||
| + | * Long range torpedoes, with fast reload and high damage | |||
| + | * Can stealth torpedo | |||
| + | * Decent AA defenses for a Tier VI cruiser | |||
| + | * Excellent agility | |||
| + | * Stealthy | |||
| + | * Carries the Smoke Generator Consumable | |||
| + | * Defensive AA Fire consumable in its own slot | |||
| + | ||||
| + | ||||
| + | |Cons=<!-- write list of negative points below. use * as in ordinary wiki-list. --> | |||
| + | * Poor survivability | |||
| + | * Low main battery range | |||
| + | * Low HE and AP penetration | |||
| + | * Floaty shells | |||
| + | * Deepwater torpedoes cannot hit destroyers or submarines | |||
| + | * Slow | |||
| + | * No Hydroacoustic Search consumable | |||
| + | * Limited Smoke Generator charges | |||
| |Research=<!-- write text about priority sequence of research below --> | |Research=<!-- write text about priority sequence of research below --> | |||
| ? | + | Availability of researchable upgrades for ''{{#var:ship_name}}'' is as follows: | ||
| ? | * '''Main Battery:''' Upgrade to | + | * '''Main Battery:''' Upgrade to Upgrade to 133 mm/50 QF Mk I for increased fire chance, penetration, and shell damage | |
| ? | * '''Hull:''' Upgrade to | + | * '''Hull:''' Upgrade to ''{{#var:ship_name}}'' (B) for more health, improved maneuverability, and AA (see above for cost). Research of this module unlocks progression to ''[[Chumphon]]''. | |
| ? | * '''Gun Fire Control System:''' Upgrade to Mk VI mod. 2 for an extra 10% range | + | * '''Gun Fire Control System:''' Upgrade to Mk VI mod. 2 for an extra 10% main battery range. | |
| + | ||||
| + | As with most cruisers, upgrading the hull should be the first priority, for the increased health and AA it provides. The next upgrade should actually be her range rather than her main battery; although her upgraded guns are much more effective than her stock 113 mm main battery, ''{{#var:ship_name}}'' needs the extra distance between herself and her targets. | |||
| + | ||||
| + | Players that often find themselves uncomfortably close to return fire may even opt to upgrade her range first, although the extra health provides more early benefits when not uptiered. | |||
| + | '''Note:''' ''{{#var:ship_name}}'s'' upgraded guns deal slightly less long range AA damage | |||
| |OptimalConfiguration=<!-- write some general text about selection of optimal configuration/builds below (optional)--> | |OptimalConfiguration=<!-- write some general text about selection of optimal configuration/builds below (optional)--> | |||
| + | ||||
| + | Like ''[[Chungking]]'', ''{{#var:ship_name}}'' sits in an awkward spot between the gun-focused light cruisers of other nations and the strong torpedo cruisers her successors will become. Both her main battery and torpedoes are usable weapons, but both will also leave players wanting more at times. Either option is valid, but players looking to progress further up the line should also consider how they want to build future ships. | |||
| |Upgrades=<!-- write text about best upgrades below, add * after upgrade link to designate that another upgrade may be viable --> | |Upgrades=<!-- write text about best upgrades below, add * after upgrade link to designate that another upgrade may be viable --> | |||
| Line 52: | Line 111: | |||
| * '''Slot 2''': {{Engine Room Protection}} '''or''' {{Defensive AA Fire Modification 1}} | * '''Slot 2''': {{Engine Room Protection}} '''or''' {{Defensive AA Fire Modification 1}} | |||
| * '''Slot 3''': {{Aiming Systems Modification 1}} '''or''' {{Torpedo Tubes Modification 1}} | * '''Slot 3''': {{Aiming Systems Modification 1}} '''or''' {{Torpedo Tubes Modification 1}} | |||
| ? | * '''Slot 4''': {{Propulsion Modification 1}} | + | * '''Slot 4''': {{Propulsion Modification 1}} '''or''' {{Steering Gears Modification 1}} | |
| + | ||||
| + | In slot 2, the coal {{Defensive AA Fire Modification 1}} is available which increases her Defensive AA Fire consumable action time and reduces its cooldown. In slot 3, the coal {{Smoke Generator Modification 1}} is also available, which increases the action time and reduces the dispersion time of her Smoke Generator consumable. Both are valid options for ''{{#var:ship_name}}'', although players with limited coal reserves should save it for the {{Defensive AA Fire Modification 1}} upgrade on later ships. | |||
| + | Slots 3 and 4 are player preference. In slot 3, {{Aiming Systems Modification 1}} is recommended to increase ''{{#var:ship_name}}’s'' main battery accuracy, as her torpedoes are not quite strong enough to be a primary weapon yet. In slot 4, {{Propulsion Modification 1}} is recommended for speed juking and to quickly pick up speed when exiting her smokescreen, but {{Steering Gears Modification 1}} is also viable for players that prefer to play her in the open and dodge with her rudder. | |||
| |CommanderSkills=<!-- write text about best set of Commander Skills below --> | |CommanderSkills=<!-- write text about best set of Commander Skills below --> | |||
| + | As with future tech tree ships, players have the option of building into main guns, torpedoes, or a combination of both. Players that wish to focus entirely on torpedoes should select the three torpedo skills instead of main battery skills, while those looking to emphasize her main battery should select skills like <u>Heavy HE and SAP Shells</u> and <u>Demolition Expert</u>. <u>Heavy HE and SAP Shells</u> is particularly useful, as it provides a 10% damage boost with no downside due to her smaller gun caliber (on either main battery option). | |||
| + | ||||
| + | [[Ship:Unique_Commanders|Special commanders]] Da Rong and Quan Rong are a particularly good fit for ''{{#var:ship_name}}'' and the remainder of the Pan-Asian cruiser line, thanks to their improved <u>Survivability Expert</u> skill. In general, the Pan-Asian cruiser is characterized by weak armor and low health, so every bit of extra health they can get is sorely needed. Players that wish to build into her main battery may also appreciate their improved <u>Demolition Expert</u> skill. | |||
| + | ||||
| + | Unique Commander Sa Zhebing can also work well in the Pan-Asian cruisers, as his <u>Torpedo Attack Expert</u> talent is fairly easy for them to activate. It provides increased torpedo speed as well as an extra charge and reduced cooldown for the Torpedo Reload Boost consumable after achieving six torpedo hits. However, players that wish to create a dedicated captain for Rahmat should save Sa Zhebing for another ship, as his <u>Torpedo Attack Expert</u> talent is better suited for later cruisers with more torpedoes and the Torpedo Reload Boost consumable. | |||
| + | ||||
| + | <u>'''Main Battery-focused build'''</u> | |||
| {{Commander Skills 3 CR | {{Commander Skills 3 CR | |||
| <!-- Ratings 1,2,3 are legit. Others are ignored. Zero might be used to remind other editors that the skill has no effect on this ship. --> | <!-- Ratings 1,2,3 are legit. Others are ignored. Zero might be used to remind other editors that the skill has no effect on this ship. --> | |||
| | rating11 = 1 <!-- Grease the Gears --> | | rating11 = 1 <!-- Grease the Gears --> | |||
| ? | | rating12 = | + | | rating12 = <!-- Swift Fish --> | |
| ? | | rating13 = | + | | rating13 = <!-- Consumables Specialist --> | |
| | rating14 = 1 <!-- Gun Feeder --> | | rating14 = 1 <!-- Gun Feeder --> | |||
| ? | | rating15 = | + | | rating15 = 1 <!-- Incoming Fire Alert --> | |
| ? | | rating16 = | + | | rating16 = 3 <!-- Last Stand --> | |
| ? | | rating21 = | + | | rating21 = 2 <!-- Demolition Expert --> | |
| ? | | rating22 = | + | | rating22 = <!-- Fill the Tubes --> | |
| | rating23 = 1 <!-- Consumables Enhancements --> | | rating23 = 1 <!-- Consumables Enhancements --> | |||
| | rating24 = 0 <!-- Eye in the Sky --> | | rating24 = 0 <!-- Eye in the Sky --> | |||
| ? | | rating25 = | + | | rating25 = 3 <!-- Priority Target --> | |
| ? | | rating26 = | + | | rating26 = 1 <!-- Focus Fire Training --> | |
| ? | | rating31 = 3 <!-- Heavy HE and SAP Shells --> | + | | rating31 = 2 <!-- Heavy HE and SAP Shells --> | |
| + | | rating32 = <!-- Enhanced Torpedo Explosive Charge --> | |||
| + | | rating33 = 3 <!-- Adrenaline Rush --> | |||
| + | | rating34 = 0 <!-- Heavy AP Shells --> | |||
| + | | rating35 = 2 <!-- Superintendent --> | |||
| + | | rating36 = 3 <!-- Survivability Expert --> | |||
| + | ||||
| + | | rating41 = 2 <!-- Top Grade Gunner --> | |||
| + | | rating42 = <!-- Outnumbered --> | |||
| + | | rating43 = 2 <!-- Radio Location --> | |||
| + | | rating44 = 2 <!-- Inertial Fuse for HE Shells --> | |||
| + | | rating45 = 3 <!-- Concealment Expert --> | |||
| + | | rating46 = <!-- AA Defense & ASW Expert --> | |||
| + | }} | |||
| + | ||||
| + | <u>'''Torpedo-focused build'''</u> | |||
| + | {{Commander Skills 3 CR | |||
| + | <!-- Ratings 1,2,3 are legit. Others are ignored. Zero might be used to remind other editors that the skill has no effect on this ship. --> | |||
| + | ||||
| + | | rating11 = 1 <!-- Grease the Gears --> | |||
| + | | rating12 = 2 <!-- Swift Fish --> | |||
| + | | rating13 = <!-- Consumables Specialist --> | |||
| + | | rating14 = <!-- Gun Feeder --> | |||
| + | | rating15 = 1 <!-- Incoming Fire Alert --> | |||
| + | | rating16 = 3 <!-- Last Stand --> | |||
| + | ||||
| + | | rating21 = <!-- Demolition Expert --> | |||
| + | | rating22 = 2 <!-- Fill the Tubes --> | |||
| + | | rating23 = <!-- Consumables Enhancements --> | |||
| + | | rating24 = 0 <!-- Eye in the Sky --> | |||
| + | | rating25 = 3 <!-- Priority Target --> | |||
| + | | rating26 = 1 <!-- Focus Fire Training --> | |||
| + | ||||
| + | | rating31 = <!-- Heavy HE and SAP Shells --> | |||
| | rating32 = 2 <!-- Enhanced Torpedo Explosive Charge --> | | rating32 = 2 <!-- Enhanced Torpedo Explosive Charge --> | |||
| | rating33 = 3 <!-- Adrenaline Rush --> | | rating33 = 3 <!-- Adrenaline Rush --> | |||
| Line 81: | Line 183: | |||
| | rating36 = 3 <!-- Survivability Expert --> | | rating36 = 3 <!-- Survivability Expert --> | |||
| ? | | rating41 = | + | | rating41 = 1 <!-- Top Grade Gunner --> | |
| ? | | rating42 = | + | | rating42 = <!-- Outnumbered --> | |
| | rating43 = 1 <!-- Radio Location --> | | rating43 = 1 <!-- Radio Location --> | |||
| + | | rating44 = <!-- Inertial Fuse for HE Shells --> | |||
| + | | rating45 = 3 <!-- Concealment Expert --> | |||
| + | | rating46 = <!-- AA Defense & ASW Expert --> | |||
| + | }} | |||
| + | ||||
| + | <u>'''Hybrid build'''</u> | |||
| + | {{Commander Skills 3 CR | |||
| + | <!-- Ratings 1,2,3 are legit. Others are ignored. Zero might be used to remind other editors that the skill has no effect on this ship. --> | |||
| + | ||||
| + | | rating11 = 1 <!-- Grease the Gears --> | |||
| + | | rating12 = 2 <!-- Swift Fish --> | |||
| + | | rating13 = <!-- Consumables Specialist --> | |||
| + | | rating14 = <!-- Gun Feeder --> | |||
| + | | rating15 = 1 <!-- Incoming Fire Alert --> | |||
| + | | rating16 = 3 <!-- Last Stand --> | |||
| + | ||||
| + | | rating21 = 2 <!-- Demolition Expert --> | |||
| + | | rating22 = 1 <!-- Fill the Tubes --> | |||
| + | | rating23 = <!-- Consumables Enhancements --> | |||
| + | | rating24 = 0 <!-- Eye in the Sky --> | |||
| + | | rating25 = 3 <!-- Priority Target --> | |||
| + | | rating26 = 1 <!-- Focus Fire Training --> | |||
| + | ||||
| + | | rating31 = 2 <!-- Heavy HE and SAP Shells --> | |||
| + | | rating32 = 1 <!-- Enhanced Torpedo Explosive Charge --> | |||
| + | | rating33 = 3 <!-- Adrenaline Rush --> | |||
| + | | rating34 = 0 <!-- Heavy AP Shells --> | |||
| + | | rating35 = 2 <!-- Superintendent --> | |||
| + | | rating36 = 3 <!-- Survivability Expert --> | |||
| + | ||||
| + | | rating41 = 1 <!-- Top Grade Gunner --> | |||
| + | | rating42 = <!-- Outnumbered --> | |||
| + | | rating43 = 2 <!-- Radio Location --> | |||
| | rating44 = 1 <!-- Inertial Fuse for HE Shells --> | | rating44 = 1 <!-- Inertial Fuse for HE Shells --> | |||
| | rating45 = 3 <!-- Concealment Expert --> | | rating45 = 3 <!-- Concealment Expert --> | |||
| ? | | rating46 = | + | | rating46 = <!-- AA Defense & ASW Expert --> | |
| }} | }} | |||
| Line 92: | Line 227: | |||
| ''{{#var:ship_name}}'' equips the following consumables: | ''{{#var:ship_name}}'' equips the following consumables: | |||
| * '''Slot 1:''' {{Damage Control Party}} | * '''Slot 1:''' {{Damage Control Party}} | |||
| ? | * '''Slot 2:''' {{Smoke Generator}} | + | * '''Slot 2:''' {{Smoke Generator}} — 3 charges | |
| ? | * '''Slot 3:''' {{Defensive AA Fire}} | + | * '''Slot 3:''' {{Defensive AA Fire}} — 3 charges | |
| |Camouflage=<!-- write text about useful camouflage below --> | |Camouflage=<!-- write text about useful camouflage below --> | |||
| ? | ||||
| ? | + | {{TT Ship Camo Insert|shiptier=6}} | ||
| ? | + | |||
| ? | + | |||
| |Signals=<!-- write text about best set of signals below --> | |Signals=<!-- write text about best set of signals below --> | |||
| Line 107: | Line 240: | |||
| <!-- The usual 1,2,3 rating; others ignored. Zero may be useful to other editors to remind that the signal has no effect on the ship. --> | <!-- The usual 1,2,3 rating; others ignored. Zero may be useful to other editors to remind that the signal has no effect on the ship. --> | |||
| ? | | | + | | Juliet Charlie = 3 <!-- No Detonate --> | |
| ? | | | + | | India Yankee = 1 <!-- -20% Fire duration --> | |
| ? | | | + | | Hotel Yankee = <!-- ram someone --> | |
| ? | | Juliet | + | | Juliet Yankee Bissotwo = 1 <!-- -20% flood duration --> | |
| ? | | Victor Lima | + | | Victor Lima = 3 <!-- +1/0.5% (160mm) fire, +4% flood --> | |
| ? | | | + | | India X-Ray = 3 <!-- +1/0.5% (160mm) fire, +5% you detonate --> | |
| ? | | | + | | Juliet Whiskey Unaone = 2 <!-- +15% flood, +5% you detonate --> | |
| ? | | | + | | Mike Yankee Soxisix = 0 <!-- Secondaries: +5% range, -5% reload, -5% dispersion--> | |
| ? | | | + | | November Echo Setteseven= 2 <!-- +5% AA damage --> | |
| ? | | | + | | Sierra Mike = 3 <!-- +5% speed --> | |
| ? | | | + | | November Foxtrot = 2 <!-- -5% Consumables reload --> | |
| ? | | | + | | India Delta = 0 <!-- +20% HP from Repair Party --> | |
| ? | | X-Ray Papa Unaone = | + | | X-Ray Papa Unaone = 2 <!-- +15% Smoke Gen action time --> | |
| ? | | Sierra Bravo | + | | Sierra Bravo = 1 <!-- +10% Hydro action time; -10% DFAA reload time --> | |
| ? | + | |||
| ? | + | |||
| ? | + | |||
| ? | + | |||
| ? | + | |||
| ? | + | |||
| ? | + | |||
| ? | + | |||
| ? | + | |||
| ? | + | |||
| ? | + | |||
| ? | + | |||
| ? | + | |||
| ? | + | |||
| ? | + | |||
| ? | + | |||
| }} | }} | |||
| Line 148: | Line 265: | |||
| <div class="thumb tright"> | <div class="thumb tright"> | |||
| {{AnnoWiki|content= | {{AnnoWiki|content= | |||
| ? | <h2>'' | + | <h2>''Rahmat''</h2> | |
| ? | + | ===Specifications (As built)=== | ||
| ? | + | :5600 tons displacement, standard | ||
| ? | + | :156m length | ||
| ? | + | :15.39m beam | ||
| ? | + | :4.3m draft (mean) | ||
| ? | + | |||
| ? | ===Specifications=== | + | ||
| ? | : | + | ||
| ? | : | + | ||
| ? | : | + | ||
| ? | : | + | ||
| ---- | ---- | |||
| ====Machinery==== | ====Machinery==== | |||
| ? | : | + | :4 × geared steam turbines, 4 × Admiralty 3-drum boilers, 4 × shafts | |
| + | ||||
| ---- | ---- | |||
| ====Performance==== | ====Performance==== | |||
| ? | : | + | :32.25 knots at 62,000 shaft horsepower | |
| ? | : | + | :4,240nm range at 16 knots | |
| ---- | ---- | |||
| ====Armor==== | ====Armor==== | |||
| ? | :Main belt: | + | :Main belt: 76mm | |
| ? | + | :Decks: 25mm main deck | ||
| ? | :Decks: | + | ||
| ? | + | |||
| ? | + | |||
| ---- | ---- | |||
| ====Armament==== | ====Armament==== | |||
| =====Main===== | =====Main===== | |||
| ? | : | + | :10 (5x2) 133mm dual purpose rifles | |
| ? | ===== | + | =====Torpedoes===== | |
| ? | : | + | :6 (2x3) 533mm torpedo tubes | |
| =====Anti-Aircraft===== | =====Anti-Aircraft===== | |||
| ? | : | + | :8 (2x4) 2-pounder Pom-pom guns | |
| ? | + | :11 (4x2),(3x1) 20mm Oerlikon cannon | ||
| ? | : | + | ||
| ---- | ---- | |||
| ? | + | }}</div><br> | ||
| ? | :Three | + | ||
| ? | + | |||
| + | <h4>Ship Design</h4> | |||
| + | ||||
| + | The ''Dido'' class consisted of sixteen ships built in four groups that were commissioned between 1940 and 1944. The ships were built with different armaments based on weapon availability at their time of construction and wartime experience. They were designed as fleet escorts to protect heavier units from surface forces and air attack, particularly in the Mediterranean Sea. Their design was influenced by the ''Arethusa'' class cruiser, and their main battery was intended to use the 133mm secondary armament found on the ''King George V'' battleships as a dual-purpose weapon mounted in five twin turrets. | |||
| + | ||||
| + | [[File:Dido ONS Manual.jpeg|none|frame|x250px|link=File:Dido_ONS_Manual.jpeg|]] | |||
| + | ||||
| + | A shortage of available guns meant that the first three ships completed only mounted four turrets of the intended 133mm gun armament, and the "Q" position in front of the bridge received a single QF MkV 102mm gun instead. The second group were finished with their intended armament of ten 133mm guns. The third group received an armament of four twin 113mm guns and featured enlarged accommodation for use as flagships of carrier strike groups. The final group returned to an armament of just eight 133mm guns, but design modifications and technological advancements meant their weapons could be radar controlled. | |||
| + | ||||
| + | In World War II, the Dido class saw much action, notably being involved at the Battle of Cape Matapan, the Second Battle of Sirte, Operation Torch, Operation Overlord and the Battle of Okinawa, with five of the class lost. Their small size and cramped design meant that there was little space available for post-war modernisation, even if funds had been available during the post-war defense cuts. Three ships were loaned to New Zealand for varying amounts of time and ''Diadem'' was sold to Pakistan in 1956. ''Royalist'' was the only member of the class to undergo significant modernisation as part of a plan to counter the Soviet ''Sverdlov''-class cruisers, but she was instead loaned to New Zealand after her refit was finished. The Royal Navy scrapped the remaining ships by 1960. ''Royalist'' remained in service with the Royal New Zealand Navy until 1968 until she too was scrapped. | |||
| + | ||||
| + | ||||
| + | <h4>Rahmat</h4> | |||
| + | As she represents as “what-if” scenario, ''Rahmat'' does not represent any particular ship and appears to be a generic representation of a Dido class ship. Few of the Royal Navy ships were completed with all five of their intended main turrets, several of the ships which were built as such had their “C” turret removed during the war to reduce problems with excessive top weight. | |||
| + | ||||
| ===Historical Inaccuracies=== | ===Historical Inaccuracies=== | |||
| * The Royal Malaysian Navy had never received any cruiser in service. | * The Royal Malaysian Navy had never received any cruiser in service. | |||
| ? | * ''Rahmat'' was | + | * ''Rahmat'' was the name of a frigate instead of a cruiser. | |
| * The 113mm-armed ''Dido''-class cruisers only had ''four'' twin turrets, not five. | * The 113mm-armed ''Dido''-class cruisers only had ''four'' twin turrets, not five. | |||
| ? | + | |||
| |HistoricalGallery=<!-- write below list of files with description (if necessary) separated with | --><gallery> | |HistoricalGallery=<!-- write below list of files with description (if necessary) separated with | --><gallery> | |||
| Line 229: | Line 351: | |||
| **Minor corrections to geometry and textures of the ship. | **Minor corrections to geometry and textures of the ship. | |||
| *Introduced into the game as a researchable ship in Update 0.11.2. | *Introduced into the game as a researchable ship in Update 0.11.2. | |||
| + | *Update 12.10: | |||
| + | **Main battery reload time reduced from 7.5 to 7 s. | |||
| + | **Researchable Gun Fire Control System main battery firing range increased from 12.5 to 13.5 km; the stock module’s main battery firing range has been increased accordingly. | |||
| + | **Main battery shell ballistics have been changed; the trajectory will now be flatter. | |||
| }} | }} | |||
| }}<!-- DO NOT DELETE THIS LINE. DO NOT INSERT ANYTHING BELOW THIS LINE --> | }}<!-- DO NOT DELETE THIS LINE. DO NOT INSERT ANYTHING BELOW THIS LINE --> | |||
Revision as of 05:40, 8 November 2023

| Research price36000 exp |
| Purchase price3,000,000 |
| Hit Points21,200 |
| 113 mm/45 Mk.III on a Mk.IIIUD mount5 х 2 pcs. |
| Rate of Fire8.57 shots/min. |
| Reload Time7 sec. |
| Rotation Speed10 deg./sec. |
| 180 Degree Turn Time18 sec. |
| Firing Range12.27 km. |
| Maximum Dispersion126 m. |
| HE Shell113 mm HE Mk XVI |
| Maximum HE Shell Damage1,600 |
| Chance of Fire on Target Caused by HE Shell7 % |
| Initial HE Shell Velocity746 m./s. |
| HE Shell Weight25 kg. |
| AP Shell113 mm AP Mk XVI |
| Maximum AP Shell Damage2,100 |
| Initial AP Shell Velocity746 m./s. |
| AP Shell Weight25 kg. |
| 533 mm TR Mk IV2 х 3 pcs. |
| Rate of Fire0.83 shots/min. |
| Reload Time72 sec. |
| Rotation Speed25 deg./sec. |
| 180 Degree Turn Time7.2 sec. |
| TorpedoIDS_PZPT033_533_MKIX2 |
| Maximum Damage15,867 |
| Torpedo Speed61 knot |
| Torpedo Range9.46 km. |
| 113 mm/45 Mk.III on a Mk.IIIUD mount5 х 2 pcs. |
| . . . Average Damage per Second44.5 |
| . . . Firing Range5.01 km. |
| IDS_PZGM113_5_25IN_50_QF_MK_I5 х 2 pcs. |
| . . . Average Damage per Second40.5 |
| . . . Firing Range4.5 km. |
| 40 mm Vickers 2-pdr. Mk VIII on a Mk.VII mount2 х 4 pcs. |
| . . . Average Damage per Second25.8 |
| . . . Firing Range2.49 km. |
| IDS_PZGA118_20MM_OERLIKON_MK41 х 1 pcs. |
| . . . Average Damage per Second3.6 |
| . . . Firing Range2.01 km. |
| 20 mm Oerlikon on a Mk.4 mount2 х 1 pcs. |
| . . . Average Damage per Second7.2 |
| . . . Firing Range2.01 km. |
| 20 mm Oerlikon on a Mk.24 mount4 х 2 pcs. |
| . . . Average Damage per Second24.4 |
| . . . Firing Range2.01 km. |
| Maximum Speed32.3 knot |
| Turning Circle Radius580 m. |
| Rudder Shift Time9.1 sec. |
| Surface Detectability Range9.96 km. |
| Air Detectability Range6.44 km. |

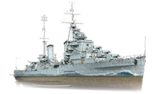
Rahmat — Pan-Asian Tier VI cruiser.
British Dido-class cruisers were built primarily to provide anti-aircraft defenses for task forces. For these purposes, twin mounts of dual-purpose 5.25-inch guns were chosen as their main armament. In total, 11 ships of this class were constructed, along with another 5 cruisers built under an improved project. In the 1940s and 1950s, some of the ships were sold to New Zealand and Pakistan, while the rest were sold for scrap. After the war, the Malaysian Navy received several ships, including from Great Britain. It's conceivable that Malaysia might have also considered purchasing these ships.
Modules
 |
Rate of Fire (shots/min) | 180° Turn Time (sec) | Maximum Dispersion (m) | Maximum HE Shell Damage (HP) | Chance of Fire on Target Caused by HE Shell (%) | Maximum AP Shell Damage (HP) |
Research price (exp) |
Purchase price ( | |
|---|---|---|---|---|---|---|---|---|---|
| 113 mm/45 Mk.III on a Mk.IIIUD mount | 8.6 | 18 | 126 | 1,600 | 7 | 2,100 | 0 | 300,000 | |
| 133 mm/50 QF Mk.I on a Mk.II mount | 8.6 | 18 | 126 | 1,900 | 8 | 2,550 | 9,000 | 540,000 |
 |
Hit Points (HP) | Armor (mm) | Armor (mm) | Main Turrets (pcs.) | Secondary Gun Turrets (pcs.) | AA Mounts (pcs.) | Torpedo Tubes (pcs.) | Hangar Capacity (pcs.) |
Research price (exp) |
Purchase price ( | |
|---|---|---|---|---|---|---|---|---|---|---|---|
| Rahmat (A) | 21,200 | 10 | 89 | 5 | 3/4/2/5 | 2 | 0 | 450,000 | |||
| Rahmat (B) | 23,600 | 10 | 89 | 5 | 5 | 2 | 13,500 | 810,000 |
 |
Rate of Fire (shots/min) | Torpedo Tubes Reload Time (sec) | 180° Turn Time (sec) | Maximum Damage (HP) | Torpedo Speed (knot) | Torpedo Range (km) |
Research price (exp) |
Purchase price ( | |
|---|---|---|---|---|---|---|---|---|---|
| 533 mm Mk IX** | 0.8 | 72 | 7.2 | 0 | 300,000 |
 |
IDS_SHIP_PARAM_SUO_INCREASE_DIST (%) | Maximum Firing Range (km) |
Research price (exp) |
Purchase price ( | |
|---|---|---|---|---|---|
| Mk VI mod. 1 | 0 | 0 | 300,000 | ||
| Mk VI mod. 2 | 0 | 9,000 | 540,000 |
 |
Maximum Speed (knot) |
Research price (exp) |
Purchase price ( | |
|---|---|---|---|---|
| Propulsion: 62,000 hp | 32.3 | 0 | 300,000 |
Compatible Upgrades
| Slot 1 |
|||||
|---|---|---|---|---|---|
| Slot 2 |
|||||
| Slot 3 |
|||||
| Slot 4 |
Player Opinion
Performance
Refer to the in-game Port screens for more useful data.
Rahmat represents a what-if transfer of a Dido-class cruiser to the Royal Malaysian Navy. As such, she shares many similarities to her premium British cousin VI Dido, presented in a Pan-Asian package.
Rahmat gives players their first taste of the path future Pan-Asian cruisers will follow — AA cruisers with destroyer-caliber guns, and a strong torpedo armament.
Armament
Rahmat joins the small group of ships in-game featuring two different sets of main battery guns. She mounts five twin turrets, three in front and two to the rear, with fast traverse and average reload. Her stock guns are the QF 4.5 inch (113 mm) guns used by two Dido-class cruisers, while her upgraded guns are the same 133 mm/QF 50 Mk.I guns originally designed for the class (and carried by Dido). Her 7.5 second reload is decent for Tier VI, and her 18 second turret traverse is among the fastest in her tier. But her main battery range is painfully low — her 11.4 km stock range is the second lowest in her entire matchmaking spread, and her upgraded 12.5 km range is still lower than even many Tier V cruisers. Her shells are also floaty, meaning she has to get even closer to threats to effectively engage them.
Her stock 113 mm guns are underwhelming. Both her 113 mm HE and AP shells deal little damage and have low theoretical DPM, and their low caliber and penetration leave her with even lower effective DPM. The HE shells also have a very low fire chance and only penetrate 19 mm of plating; she can still penetrate most destroyers and cruisers in her tier, but will struggle against battleships and higher tier targets. The AP shells do have the same short fuse times as those used by Jutland and Daring.
Her upgraded 133 mm guns are still small for the tier, but offer some welcome improvements. Her 133 mm HE and AP shells still have low damage, but she has high HE DPM and decent AP DPM for a Tier VI cruiser, and her 8% fire chance increases the number of fires she can set per minute. They still lack the penetration of most other cruisers, but are much less limited than her stock 113 mm guns.
Like Chungking, Rahmat carries deepwater torpedoes. She mounts two triple launchers, one per side. Their 9.4 km range is high for a Tier VI cruiser, and when running the Concealment Expert commander skill she has a 0.4 km stealth torpedo window. Being deepwater torpedoes, they have a high flood chance and deal massive damage, nearly 16,000 maximum per torpedo. They also reload quickly at just 72 seconds, although the single rack per side limits her DPM when not kiting. Their 61 knot base speed is average for the tier, but is offset by their low detection — without Hydroacoustic Search or prior spotting, her target has less than five seconds to react before they hit.
Her torpedoes aren’t strong enough to become a primary damage source yet, but they still act as a painful deterrent against cruisers or battleships pushing too close to her. As with other deepwater torpedoes, they are much stealthier than normal torpedoes, giving enemies much less time to react and dodge. But they cannot hit destroyers or submarines.
Consumables
Rahmat features a fairly standard consumable suite for the Pan-Asian tech tree cruisers. In addition to the normal cruiser Damage Control Party, she carries the normal cruiser Defensive AA Fire consumable in its own slot, as well as a Smoke Generator. Unlike most other cruisers, Rahmat does not have access to the Hydroacoustic Search consumable, leaving her more vulnerable to enemy torpedoes and requiring team support for detecting stealthy targets.
Like the smokescreens found on the Pan-Asian destroyers, Rahmat's has an average action and dispersion time but a shorter cooldown. Although she lacks the extended action time characteristic of US smokescreens, the shorter cooldown means less waiting for the next if she has to abandon one early. However, she’s limited to three charges by default, so players must be selective about when they use one.
Maneuverability
Rahmat is surprisingly agile for a cruiser, at the expense of speed. Her 6.5 second rudder shift is tied for best in tier, and her 580 m turning circle is excellent, only 10 m larger than Huanghe’s best-in-tier 570 m. However, her top speed is only 32.2 knots. Although she can still outrun most battleships, she will lag behind many cruisers and all destroyers in her game. She will struggle to keep up with any pushes or retreats on her flank, so she must be cautious when committing to one side.
Survivability
Just as with Chungking, Rahmat is squishy even for a mid-tier cruiser. She lacks both the armor to resist incoming damage and the health to tank it. Players need to be able to dodge incoming fire if they wish to remain in the battle.
Rahmat's armor is the same as other super light cruisers like Chungking and Leander. She’s coated in 13 mm plating everywhere, and her superstructure is even thinner at just 10 mm. Every HE shell she faces will penetrate with no issues, and both battleships and heavy cruisers with 190 mm guns or larger will overmatch regardless of angle. Her 25 mm deck can shatter smaller HE and bounce AP smaller than 381 mm, but it’s mostly covered by her thin superstructure and really only protects against overmatching her citadel roof.
Rahmat's belt armor is slightly better but still rather weak. The 89 mm upper belt under her smokestacks can shatter HE and bounce AP when properly angled, but will fuse any AP shell that doesn’t bounce. Her citadel is particularly vulnerable, just 89 mm thick and extending well above the water from her forward superstructure to her X turret. She has a small chunk of 25 mm plating above her rudder that will bounce or shatter the occasional shell when kiting, but shouldn’t be relied on for any meaningful protection. Torpedoes are also a significant threat; she has some torpedo protection, but at only 4% it won’t do much in practice.
Her health pool is also severely lacking. At 21,200 HP stock and 23,600 with the upgraded hull, she has the smallest health pool of any Tier VI cruiser. Combined with her weak armor, she dislikes being shot at.
Rahmat's good concealment will help her stay alive when she can’t find cover. With the Concealment Expert skill, she can get her surface detection down to 9 km. Although every destroyer in her matchmaking range will still outspot her, she will be one of the stealthiest cruisers in her game. Her 5.8 km air detection is average for her tier, but still low enough that she can avoid unwanted plane spotting.
Anti-aircraft
As will be the case for future Pan-Asian tech tree cruisers, Rahmat actually has decent AA defenses for a Tier VI cruiser. Her long-range mounts reach out to 5.8 km, while her mid- and short-range mounts are more normal. Her long- and mid-range mounts produce decent continuous DPS, but her short-range DPS is one of the lowest in tier. She only produces two flak clouds, but uses the same increased damage flak found on Dido, Pensacola, and Huanghe. With the Concealment Expert skill, her air detection and AA ranges are the same, meaning planes cannot spot her without taking damage.
Further increasing her AA defenses, Rahmat carries the Defensive AA Fire consumable in its own slot, which increases both her continuous and flak damage. Although it still isn’t enough to completely prevent strikes, it is a guaranteed damage boost where most other cruisers have to sacrifice Hydroacoustic Search for it.
Players should note that Rahmat's upgraded 133 mm main guns actually provide slightly less long-range DPS. It is still worth upgrading them, though, as the increased damage, penetration, and fire chance are worth the slight AA reduction.
Battle performance
Rahmat bridges the gap between the more traditional light cruiser play style of Chungking and the “super-light” cruisers that follow her. Although she lacks the high torpedo power and fast main battery reload of future Pan-Asian cruisers, she brings many welcome improvements over Chungking.
Players should play around island cover near caps to provide fire support for allied destroyers. With her high shell arcs, she can fire over her protective island armor, and she can use her smokescreens to provide an “island” on demand when necessary. But with no Hydroacoustic Search and limited charges, she is vulnerable to torpedoes when sitting inside it and can quickly run out. If island cover is available, that should take priority. She must avoid overcommitting to a flank, though, as her slow speed will be an issue if she has to run away.
Rahmat's torpedoes still aren’t strong enough to be a primary weapon, but the threat of high damage and low detection can deter enemies from pushing too close. When it’s safe to do so, she can use them to attack stationary cruisers and battleships, but they are best used when kiting. With comfortable firing angles and a fast reload — but only one launcher per side — she can alternate sides while running and leave a stream of painful, stealthy torpedoes in her wake.
Although she sits in the awkward spot between a true gun-focused light cruiser and a strong torpedo cruiser, she offers many helpful lessons for players that continue up the line.Pros:
- High HE DPM on her upgraded guns
- Long range torpedoes, with fast reload and high damage
- Can stealth torpedo
- Decent AA defenses for a Tier VI cruiser
- Excellent agility
- Stealthy
- Carries the Smoke Generator Consumable
- Defensive AA Fire consumable in its own slot
Cons:
- Poor survivability
- Low main battery range
- Low HE and AP penetration
- Floaty shells
- Deepwater torpedoes cannot hit destroyers or submarines
- Slow
- No Hydroacoustic Search consumable
- Limited Smoke Generator charges
Research
Availability of researchable upgrades for Rahmat is as follows:
- Main Battery: Upgrade to Upgrade to 133 mm/50 QF Mk I for increased fire chance, penetration, and shell damage
- Hull: Upgrade to Rahmat (B) for more health, improved maneuverability, and AA (see above for cost). Research of this module unlocks progression to Chumphon.
- Gun Fire Control System: Upgrade to Mk VI mod. 2 for an extra 10% main battery range.
As with most cruisers, upgrading the hull should be the first priority, for the increased health and AA it provides. The next upgrade should actually be her range rather than her main battery; although her upgraded guns are much more effective than her stock 113 mm main battery, Rahmat needs the extra distance between herself and her targets.
Players that often find themselves uncomfortably close to return fire may even opt to upgrade her range first, although the extra health provides more early benefits when not uptiered.
Note: Rahmat's upgraded guns deal slightly less long range AA damageOptimal Configuration
Like Chungking, Rahmat sits in an awkward spot between the gun-focused light cruisers of other nations and the strong torpedo cruisers her successors will become. Both her main battery and torpedoes are usable weapons, but both will also leave players wanting more at times. Either option is valid, but players looking to progress further up the line should also consider how they want to build future ships.
Upgrades
The recommended upgrades are:
- Slot 1: Main Armaments Modification 1

- Slot 2: Engine Room Protection
 or Defensive AA Fire Modification 1
- Slot 3: Aiming Systems Modification 1
 or Torpedo Tubes Modification 1
- Slot 4: Propulsion Modification 1
 or Steering Gears Modification 1
In slot 2, the coal Defensive AA Fire Modification 1 ![]() is available which increases her Defensive AA Fire consumable action time and reduces its cooldown. In slot 3, the coal Smoke Generator Modification 1
is available which increases her Defensive AA Fire consumable action time and reduces its cooldown. In slot 3, the coal Smoke Generator Modification 1 ![]() is also available, which increases the action time and reduces the dispersion time of her Smoke Generator consumable. Both are valid options for Rahmat, although players with limited coal reserves should save it for the Defensive AA Fire Modification 1
is also available, which increases the action time and reduces the dispersion time of her Smoke Generator consumable. Both are valid options for Rahmat, although players with limited coal reserves should save it for the Defensive AA Fire Modification 1 ![]() upgrade on later ships.
upgrade on later ships.
Slots 3 and 4 are player preference. In slot 3, Aiming Systems Modification 1 ![]() is recommended to increase Rahmat’s main battery accuracy, as her torpedoes are not quite strong enough to be a primary weapon yet. In slot 4, Propulsion Modification 1
is recommended to increase Rahmat’s main battery accuracy, as her torpedoes are not quite strong enough to be a primary weapon yet. In slot 4, Propulsion Modification 1 ![]() is recommended for speed juking and to quickly pick up speed when exiting her smokescreen, but Steering Gears Modification 1
is recommended for speed juking and to quickly pick up speed when exiting her smokescreen, but Steering Gears Modification 1 ![]() is also viable for players that prefer to play her in the open and dodge with her rudder.
is also viable for players that prefer to play her in the open and dodge with her rudder.
Commander Skills
As with future tech tree ships, players have the option of building into main guns, torpedoes, or a combination of both. Players that wish to focus entirely on torpedoes should select the three torpedo skills instead of main battery skills, while those looking to emphasize her main battery should select skills like Heavy HE and SAP Shells and Demolition Expert. Heavy HE and SAP Shells is particularly useful, as it provides a 10% damage boost with no downside due to her smaller gun caliber (on either main battery option).
Special commanders Da Rong and Quan Rong are a particularly good fit for Rahmat and the remainder of the Pan-Asian cruiser line, thanks to their improved Survivability Expert skill. In general, the Pan-Asian cruiser is characterized by weak armor and low health, so every bit of extra health they can get is sorely needed. Players that wish to build into her main battery may also appreciate their improved Demolition Expert skill.
Unique Commander Sa Zhebing can also work well in the Pan-Asian cruisers, as his Torpedo Attack Expert talent is fairly easy for them to activate. It provides increased torpedo speed as well as an extra charge and reduced cooldown for the Torpedo Reload Boost consumable after achieving six torpedo hits. However, players that wish to create a dedicated captain for Rahmat should save Sa Zhebing for another ship, as his Torpedo Attack Expert talent is better suited for later cruisers with more torpedoes and the Torpedo Reload Boost consumable.
Main Battery-focused build
| Recommended Commander Skills | ||||||
|---|---|---|---|---|---|---|
| Cost (points) |
Attack | Defense | ||||
| 1 |
★ |
|
|
★ |
★ |
★★★ |
| 2 |
★★ |
|
★ |
|
★★★ |
★ |
| 3 |
★★ |
|
★★★ |
|
★★ |
★★★ |
| 4 |
★★ |
|
★★ |
★★ |
★★★ |
|
| Key: ★★★ - Extremely Useful ★★ - Frequently Useful ★ - Occasionally Useful No stars - Not Useful | ||||||
Torpedo-focused build
| Recommended Commander Skills | ||||||
|---|---|---|---|---|---|---|
| Cost (points) |
Attack | Defense | ||||
| 1 |
★ |
★★ |
|
|
★ |
★★★ |
| 2 |
|
★★ |
|
|
★★★ |
★ |
| 3 |
|
★★ |
★★★ |
|
★ |
★★★ |
| 4 |
★ |
|
★ |
|
★★★ |
|
| Key: ★★★ - Extremely Useful ★★ - Frequently Useful ★ - Occasionally Useful No stars - Not Useful | ||||||
Hybrid build
| Recommended Commander Skills | ||||||
|---|---|---|---|---|---|---|
| Cost (points) |
Attack | Defense | ||||
| 1 |
★ |
★★ |
|
|
★ |
★★★ |
| 2 |
★★ |
★ |
|
|
★★★ |
★ |
| 3 |
★★ |
★ |
★★★ |
|
★★ |
★★★ |
| 4 |
★ |
|
★★ |
★ |
★★★ |
|
| Key: ★★★ - Extremely Useful ★★ - Frequently Useful ★ - Occasionally Useful No stars - Not Useful | ||||||
Consumables
Rahmat equips the following consumables:
- Slot 1: Damage Control Party

- Slot 2: Smoke Generator
 — 3 charges
- Slot 3: Defensive AA Fire
 — 3 charges
Signals
Recommended Signal Flags 
| |||||
|---|---|---|---|---|---|
| Combat | |||||

|
 ★ |
 ★ |

|
 ★★★ |
 ★★★ |
 ★★ |

|
 ★★ |
 ★★★ |
 ★★ |

|
 ★★ |
 ★ | ||||
Gallery
Historical Info

Historical Gallery
References
Ship Change Log
See here for links to Update notes.
- Available for testing by supertesters in the game starting from Update 0.10.10.
Testing Changes
- DevBlog 220:
- Preliminary characteristics.
- DevBlog 242:
- Stock guns' AP and HE shell ballistics became more arcing.
- DevBlog 247:
- In order to achieve a more consistent progression of ship's artillery, the 133 mm main battery guns became a separate researchable module that is compatible with either of the equipped hulls. Note: This change was not applied til the live release of the ship, and was never implemented correctly during the entire testing phase.
- 133 mm main battery guns reload time decreased from 7 to 6.5 s.
- 113 mm main battery guns reload time increased from 5.3 to 6 s.
- 180-degree turn time for the 113 mm turrets increased from 9 to 18 s.
- DevBlog 257:
- Reload time of stock main battery guns increased from 6 to 7 s.
- Reload time of researchable main battery guns increased from 6.5 to 7.5 s.
- DevBlog 264:
- Main battery reload time increased from 7 to 7.5 s.
- Smoke Generator consumable cooldown time increased from 100 to 110 s.
- Sigma parameter decreased from 2.05 to 2.
- Update 0.11.0:
- Available from sequential bundle #2 of the Pan-Asian Cruisers event (for Pan-Asian Tokens).
- Update 0.11.1:
- Minor corrections to geometry and textures of the ship.
- Introduced into the game as a researchable ship in Update 0.11.2.
- Update 12.10:
- Main battery reload time reduced from 7.5 to 7 s.
- Researchable Gun Fire Control System main battery firing range increased from 12.5 to 13.5 km; the stock module’s main battery firing range has been increased accordingly.
- Main battery shell ballistics have been changed; the trajectory will now be flatter.
| Destroyers | II Longjiang • III Phra Ruang • IV Shenyang • V Jianwei • VI Fushun • VI Anshan |
| Cruisers | I Chengan • III Ning Hai |
| Battleships | VII Teng She |
| Aircraft Carriers | VIII Sanzang |