Caledon
| Revision as of 09:27, 20 October 2016 | Revision as of 21:04, 20 October 2016 Added Performance, Pros/Cons, Commander Skills, Upgrades, Camouflage, and Research sections. | |||
| Line 5: | Line 5: | |||
| |Performance=<!-- write text about performance in battles below --> | |Performance=<!-- write text about performance in battles below --> | |||
| + | Tier III's ''Caledon'' introduces British cruiser captains to something that the cruisers of most other nations don't see until Tier V or VI: multiple centerline mounted turrets. It gives her a lot of flexibility in her firing arcs; flexibility that she will need, since she only mounts five 152mm rifles (compared to ''[[St. Louis]]''’ fourteen or ''[[Bogatyr]]''’s sixteen). ''Caledon'' is badly under-gunned against most of the opponents she will face off against. As is typical of vessels of the era, her anti-aircraft suite is pathetic, and she won't be shooting down many planes (if any) from enemy carriers. | |||
| + | ||||
| + | As compensation for woeful AA and a sub-par main battery, she has solid top speed and good handling characteristics: her quick rudder shift and good turning radius can go a long way towards avoiding incoming fire. She also sports two twin-tube torpedo launchers on each side, with generous firing arcs and quick reload times that give her a potent punch should she find herself at close range of enemy vessels. Finding — or making — opportunities to use her torpedoes is key for players looking for high damage games out of ''Caledon''. She also gains access to something very unique for a low tier cruiser: the [[Ship:Consumables#Repair Party|Repair Party]] consumable. Cruisers of other nations have to wait until Tier VIII or IX to be able to repair damage already taken in a match, but the British start the trend here at Tier III and carry it all the way up the line. | |||
| |Pros=<!-- write list of positive points below. use * as in ordinary wiki-list. --> | |Pros=<!-- write list of positive points below. use * as in ordinary wiki-list. --> | |||
| + | * Main battery guns traverse quickly enough to keep up with radical maneuvering, even without [[Crew_(WoWS)#2nd_Row_Skills|Expert Marksman]]. | |||
| + | * Double twin-tube torpedo launchers on each side. | |||
| + | * Longest firing range of non-all Tier III cruisers. | |||
| + | * Has access to the [[Ship:Consumables#Repair Party|Repair Party]] consumable, long before the cruisers of other nations do. | |||
| |Cons=<!-- write list of negative points below. use * as in ordinary wiki-list. --> | |Cons=<!-- write list of negative points below. use * as in ordinary wiki-list. --> | |||
| + | * Torpedo range is only 6.0 km. | |||
| + | * Only five barrels with a mediocre rate of fire leaves ''Caledon'' badly under-gunned against opponents such as ''[[Bogatyr]]'' and ''[[St. Louis]]''. | |||
| + | * Low health and armor combine to make ''Caledon'' very fragile under concentrated fire. | |||
| |Research=<!-- write text about priority sequence of research below --> | |Research=<!-- write text about priority sequence of research below --> | |||
| + | Like ''[[Weymouth]]'', the Fire Control System upgrade is less expensive than Hull (B) and is a significant boost to ''Caledon''’s range. Invest experience there first, then pick up the second hull. | |||
| + | ||||
| + | |OptimalConfiguration=<!-- write some general text about selection of optimal configuration below (optional)--> | |||
| + | ||||
| + | |Upgrades=<!-- write text about best upgrades below --> | |||
| + | ''Caledon'' has access to [[Ship:Upgrades#Tier_III.2B_Equipment_.28Slot_4.29|Upgrade Slot 4]], giving her additional upgrade choices from ''[[Weymouth]]''. Main Armaments Modification 1 is still the best choice in [[Ship:Upgrades#Tier_I.2B_Equipment_.28Slot_1.29|Upgrade Slot 1]]. | |||
| + | ||||
| + | |CommanderSkills=<!-- write text about best set of Commander Skills below --> | |||
| + | Though ''Caledon'' may encounter enemy aircraft carriers, her AA is not worth sinking commander skill points into. Focus on survivability skills; Survivability Expert at Tier 4 buffs not only her overall health pool, but makes her [[Ship:Consumables#Repair Party|Repair Party]] heal more potent. | |||
| + | ||||
| + | {{Commander Skills | |||
| + | | Expert Loader= | |||
| + | | Basic Firing Training=1 | |||
| + | | Basics of Survivability=3 | |||
| + | | Expert Rear Gunner= | |||
| + | ||||
| + | | Expert Marksman=3 | |||
| + | | Torpedo Armament Expertise= | |||
| + | | Fire Prevention=2 | |||
| + | | Incoming Fire Alert=2 | |||
| + | | Last Stand=1 | |||
| + | ||||
| + | | Torpedo Acceleration= | |||
| + | | High Alert=2 | |||
| + | | Vigilance=2 | |||
| + | | Dogfighting Expert = | |||
| + | | Superintendent=3 | |||
| + | ||||
| + | | Demolition Expert= | |||
| + | | Advanced Firing Training=1 | |||
| + | | Survivability Expert=3 | |||
| + | | Aircraft Servicing Expert= | |||
| + | | Manual Fire Control for AA Armament= | |||
| + | ||||
| + | | Last Chance=1 | |||
| + | | Manual Fire Control for Secondary Armament= | |||
| + | | Preventative Maintenance=1 | |||
| + | | Concealment Expert=3 | |||
| + | | Air Supremacy= | |||
| + | | Jack of All Trades=2 | |||
| + | }} | |||
| + | ||||
| + | |Consumables=<!-- write text about selection of Consumables below --> | |||
| + | ||||
| + | ||||
| + | |Camouflage=<!-- write text about useful camouflage below --> | |||
| + | [[Ship:Camouflage#Standard Camouflage|Type 1, 2, or 5 camouflage]] can be equipped for credits; Types 2 or 5 are recommended at a minimum to reduce the accuracy of incoming shells. | |||
| + | ||||
| + | |Signals=<!-- write text about best set of signals below --> | |||
| |Gallery=<!-- write below list of files with description (if necessary) separated with | --><gallery> | |Gallery=<!-- write below list of files with description (if necessary) separated with | --><gallery> | |||
| Line 22: | Line 81: | |||
| ===Construction=== | ===Construction=== | |||
| ? | Place of Construction: Cammell Laird Shipbuilding Company<br /> | + | Place of Construction: Cammell Laird Shipbuilding Company; Birkenhead, England, United Kingdom<br /> | |
| Laid down: 17 March 1916<br /> | Laid down: 17 March 1916<br /> | |||
| Launched: 25 November 1916<br /> | Launched: 25 November 1916<br /> | |||
Revision as of 21:04, 20 October 2016

| Research price1900 exp |
| Purchase price256,000 |
| Hit Points17,500 |
| 152 mm/45 Mk.XII on a PXIII* mount5 х 1 pcs. |
| Rate of Fire7.5 shots/min. |
| Reload Time8 sec. |
| Rotation Speed10 deg./sec. |
| 180 Degree Turn Time18 sec. |
| Firing Range10.75 km. |
| Maximum Dispersion107 m. |
| Chance of Fire on Target Caused by HE Shell0 % |
| AP Shell152 mm AP 4crh |
| Maximum AP Shell Damage2,900 |
| Initial AP Shell Velocity853 m./s. |
| AP Shell Weight45.36 kg. |
| 533 mm DR Mk II4 х 2 pcs. |
| Rate of Fire1.46 shots/min. |
| Reload Time41 sec. |
| Rotation Speed25 deg./sec. |
| 180 Degree Turn Time7.2 sec. |
| Torpedo533 mm Mk II |
| Maximum Damage10,000 |
| Torpedo Speed53 knot |
| Torpedo Range6 km. |
| 40 mm/39 Vickers QF Mk.II on a single mount2 х 1 pcs. |
| . . . Average Damage per Second11.2 |
| . . . Firing Range2.01 km. |
| 76.2 mm/45 QF HA Mk.I on an HA Mk.IV mount2 х 1 pcs. |
| . . . Average Damage per Second4.2 |
| . . . Firing Range3 km. |
| Maximum Speed29 knot |
| Turning Circle Radius580 m. |
| Rudder Shift Time7.8 sec. |
| Surface Detectability Range9.78 km. |
| Air Detectability Range3.89 km. |

Caledon — British Tier III cruiser.
In 1911, requirements for a "fleet scout" that could maintain high speed in the North Sea took shape. The Caledon class was built between 1916 and 1917, taking military experience into account: She was distinguished by a more extended forecastle and the positioning of her torpedo launchers. After entering service in 1917, HMS Caledon participated in the intervention of the British Fleet in the Baltic. The ship was part of the Atlantic Fleet until 1926 and served in the Mediterranean Fleet between 1927 and 1931. In 1933, she was sent to the reserve but resumed active service with the outbreak of World War II.
Modules
 |
Rate of Fire (shots/min) | 180° Turn Time (sec) | Maximum Dispersion (m) | Maximum HE Shell Damage (HP) | Chance of Fire on Target Caused by HE Shell (%) | Maximum AP Shell Damage (HP) |
Research price (exp) |
Purchase price ( | |
|---|---|---|---|---|---|---|---|---|---|
| 152 mm/45 Mk.XII on a PXIII* mount | 9.4 | 18 | 107 | 2,300 | 0 | 22,000 |
 |
Hit Points (HP) | Armor (mm) | Armor (mm) | Main Turrets (pcs.) | Secondary Gun Turrets (pcs.) | AA Mounts (pcs.) | Torpedo Tubes (pcs.) | Hangar Capacity (pcs.) |
Research price (exp) |
Purchase price ( | |
|---|---|---|---|---|---|---|---|---|---|---|---|
| Caledon (A) | 17,500 | 6 | 152 | 5 | 2/2 | 4 | 0 | 60,000 | |||
| Caledon (B) | 19,000 | 6 | 152 | 5 | 2 | 4 | 1,300 | 125,000 |
 |
Rate of Fire (shots/min) | Torpedo Tubes Reload Time (sec) | 180° Turn Time (sec) | Maximum Damage (HP) | Torpedo Speed (knot) | Torpedo Range (km) |
Research price (exp) |
Purchase price ( | |
|---|---|---|---|---|---|---|---|---|---|
| 533 mm Mk II | 1.5 | 41 | 7.2 | 10,000 | 53 | 6 | 0 | 45,000 |
 |
IDS_SHIP_PARAM_SUO_INCREASE_DIST (%) | Maximum Firing Range (km) |
Research price (exp) |
Purchase price ( | |
|---|---|---|---|---|---|
| Mk III mod. 1 | 0 | 0 | 20,000 | ||
| Mk III mod. 2 | 0 | 500 | 50,000 |
 |
Maximum Speed (knot) |
Research price (exp) |
Purchase price ( | |
|---|---|---|---|---|
| Propulsion: 40,000 hp | 29 | 0 | 19,000 |
Compatible Upgrades
| Slot 1 |
|||
|---|---|---|---|
| Slot 2 |
Player Opinion
Performance
Tier III's Caledon introduces British cruiser captains to something that the cruisers of most other nations don't see until Tier V or VI: multiple centerline mounted turrets. It gives her a lot of flexibility in her firing arcs; flexibility that she will need, since she only mounts five 152mm rifles (compared to St. Louis’ fourteen or Bogatyr’s sixteen). Caledon is badly under-gunned against most of the opponents she will face off against. As is typical of vessels of the era, her anti-aircraft suite is pathetic, and she won't be shooting down many planes (if any) from enemy carriers.
As compensation for woeful AA and a sub-par main battery, she has solid top speed and good handling characteristics: her quick rudder shift and good turning radius can go a long way towards avoiding incoming fire. She also sports two twin-tube torpedo launchers on each side, with generous firing arcs and quick reload times that give her a potent punch should she find herself at close range of enemy vessels. Finding — or making — opportunities to use her torpedoes is key for players looking for high damage games out of Caledon. She also gains access to something very unique for a low tier cruiser: the Repair Party consumable. Cruisers of other nations have to wait until Tier VIII or IX to be able to repair damage already taken in a match, but the British start the trend here at Tier III and carry it all the way up the line.Pros:
- Main battery guns traverse quickly enough to keep up with radical maneuvering, even without Expert Marksman.
- Double twin-tube torpedo launchers on each side.
- Longest firing range of non-all Tier III cruisers.
- Has access to the Repair Party consumable, long before the cruisers of other nations do.
Cons:
Research
Optimal Configuration
Upgrades
Caledon has access to Upgrade Slot 4, giving her additional upgrade choices from Weymouth. Main Armaments Modification 1 is still the best choice in Upgrade Slot 1.
Commander Skills
Though Caledon may encounter enemy aircraft carriers, her AA is not worth sinking commander skill points into. Focus on survivability skills; Survivability Expert at Tier 4 buffs not only her overall health pool, but makes her Repair Party heal more potent.
| Recommended Commander Skills | ||||||||
|---|---|---|---|---|---|---|---|---|
| Cost (points) |
Endurance | Attack | Support | Versatility | ||||
| 1 |
|
★ |
|
|
|
|
★★ |
|
| 2 |
★★ |
★★ |
★★★ |
|
|
|
|
★ |
| 3 |
★★★ |
★★★ |
|
|
★ |
★★★ |
|
★★ |
| 4 |
|
★★ |
|
|
★ |
|
|
★★★ |
| Key: ★★★ - Extremely Useful ★★ - Frequently Useful ★ - Occasionally Useful No stars - Meh Χ - Not recommended | ||||||||
Camouflage
Type 1, 2, or 5 camouflage can be equipped for credits; Types 2 or 5 are recommended at a minimum to reduce the accuracy of incoming shells.Gallery
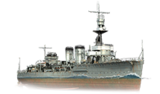
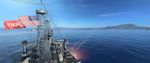
Caledon prepares for battle.
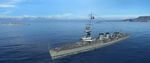
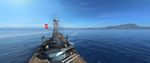
Caledon fires a broadside of armor piercing shells.
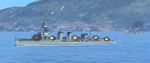
Caledon borrows smoke and fires at an enemy St. Louis class cruiser.
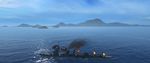
Armor piercing shells from the Caledon break apart upon contact with Arkansas Beta armor.
Armor piercing shells do manage to penetrate the superstructure of the Arkansas Beta.


Historical Info
Historical Gallery
.jpg)


