Aoba
| Revision as of 21:23, 14 July 2016 | Latest revision as of 09:56, 19 May 2024 Changed protection level for "Ship:Aoba" ([Edit=Allow only administrators] (indefinite) [Move=Allow only administrators] (indefinite)) | |||
53 intermediate revisions by 28 users not shown | ||||
| Line 1: | Line 1: | |||
| <!-- DO NOT EDIT OR DELETE LINES WITH COMMENTS (it's look like as this or next line) | <!-- DO NOT EDIT OR DELETE LINES WITH COMMENTS (it's look like as this or next line) | |||
| ? | -->{{WoWs_Ship|Promo= | + | --> | |
| + | {{WoWs_Ship | |||
| + | |Promo= | |||
| ? | |Anno=<!-- you can write below short description for the ship. it will replace default | + | |Anno=<!-- you can write below short description for the ship. it will replace default one. --> | |
| ? | + | <!-- <br><br>{{Model3DViewer|448123bb936f4eb0a2ff82dedca40dbb}}--> | ||
| ? | + | |||
| ? | + | |Performance={{AA Sidebar Warning Insert}} | ||
| + | Tier VI ''Aoba'' is an evolution of her predecessor. In general, she does the same things that ''[[Furutaka]]'' does, but slightly more. A little bit stealthier, a little bit faster, dealing a little bit more damage. She also emphasizes the weaknesses of ''Furutaka'', weak AA defenses and slow main battery operation. | |||
| ? | + | <h4>The Ship</h4> | ||
| ? | + | Her top speed of 35 knots makes ''Aoba'' one of the faster cruisers at her tier, allowing her to move about the battlefield with relative ease. Although her turning radius of 710 meters is far from the tightest, she has a fast rudder shift time of 6.5 seconds. ''Aoba'' will start turning quickly, but she needs space to make her maneuvers which makes operating in confined waters uncomfortable. Her concealment of 11.7 km can be reduced down to 10.5 km with <u>Concealment Expert</u>, which further helps her to safely relocate. | ||
| + | ||||
| + | ''Aoba'' mounts a standard cruiser {{Damage Control Party}}, which is active for 5 seconds with a 60 second cool down. Her second slot has a choice of consumables – a {{Hydroacoustic Search}} or {{Defensive AA Fire}}. Hydroacoustic Search is the optimal choice, this will detect torpedoes at 3 km and ships at 4 km for 100 seconds. The Defensive AA Fire will provide a 50% boost to her continuous AA damage, but the weakness of her AA means the benefits are rather limited. In her third slot, Aoba carries a {{Catapult Fighter}} which launches a pair of fighters which patrol around the ship for up to 1 minute. Finally, she mounts a {{Submarine Surveillance}} which will detect submerged submarines at 5 km range for 20 seconds. | |||
| + | ||||
| + | <h4>Survivability</h4> | |||
| + | With 16 mm of plating, Aoba’s bow and stern can bounce heavy cruiser AP if sufficiently angled, although she is vulnerable to all calibers of HE. Her citadel runs for most of the length of the ship with a large raised section between her bridge and rear structure, although the sections below her turrets are submerged and difficult to hit. With 76 mm of armor and a large area to hit, she is vulnerable to taking citadel damage. There is also some extra protection provided by the presence of torpedo bulges along the length of her citadel, which can result in shells detonating before penetrating the main armor belt. ''Aoba'' has a rather small health pool for a heavy cruiser, with no way to replenish lost hit points players must be careful not to throw their health away. | |||
| + | ||||
| + | <h4>Armament</h4> | |||
| + | ''Aoba'' mounts a small main battery of six 203 mm guns in three twin turrets, with the standard Japanese slow turret traverse time – only ''[[Pensacola]]'' has slower turrets. With 14.9 km of range and no way of improving it her main battery range can sometimes feel lacking, particularly when she is downtiered. Her guns have a reload of 11 seconds which allows Aoba to remain somewhat competitive with other heavy cruisers but she will not be able to match the DPM of lighter armed ships. To offset this disadvantage, her guns use destroyer dispersion rather than the usual cruiser dispersion. This means that shells will tend to group closer to the aiming point and helps to compensate for her small main battery. | |||
| + | ||||
| + | On a per shell basis ''Aoba'' has some of the best HE at her tier. The shells hit hard, 3,300 damage is the highest at her tier, and have a good fire chance of 17% as well as the ability to penetrate battleship plating. In ideal conditions, players couldcan expect to set 5-6 fires per minute with sustained firing. Whilst this trails behind the potential of 152 mm armed ships, the direct damage that ''Aoba'' can do will help to offset this. | |||
| + | Her AP shells | |||
| + | ||||
| + | ''Aoba'' carries a quad torpedo launcher on each side, with hard hitting and long range torpedoes. With a 10 km range they can be used against targets at a distance. Although they hit hard, the torpedoes travel rather slowly and have a large detection range. Targets will have 9.5 seconds of reaction time to take avoiding action. These are effectively the same weapons that Furutaka mounts, but with a longer reload. Additionally, ''Aoba'' introduces players to another key feature of Japanese cruisers – restricted torpedo arcs. Her forward angles are non-existent, although she has very good angles to the rear. | |||
| + | ||||
| + | <h4>Anti-Air</h4> | |||
| + | ''Aoba'' has weak AA defenses. She has some long-range AA guns which reach out to 5.2 km, but she only puts out a single flak cloud that is unlikely to pose much threat to enemy aircraft. Much of ''Aoba’s'' continuous DPS comes from her short-range weapons, which are limited to 2.5 km range and will not engage enemy aircraft until they are already established on an attack run. | |||
| + | The addition of her Patrol Fighter consumable continues this trend. In theory her fighters can provide some additional protection, in reality they are just as likely to watch enemy aircraft fly past without interfering. | |||
| + | ||||
| + | <h4>Anti-Submarine</h4> | |||
| + | ''Aoba'' carries an ASW airstrike with a range of 6 km, this drops a single depth charge per attack with 20 seconds between uses. Although it only launches a single aircraft, it does allow ''Aoba'' to engage enemy submarines with a degree of safety. Her Submarine Surveillance and Hydroacoustic Search consumables can also be an important asset to her team, allowing players to track enemy submarines for nearby allies to attack. | |||
| + | ||||
| + | <h4>Battle Performance</h4> | |||
| + | Players will need to use effective positioning and ammunition selection in order to compensate for ''Aoba’s'' low base damage output. A well-aimed salvo can potentially cripple an enemy cruiser or destroyer, if the right ammunition is selected. For this reason, the Gun Feeder captain skill is recommended as it will allow players to more quickly switch ammunition types. | |||
| + | ||||
| + | ''Aoba'' is not suited to close range fighting, where her long reload and slow turret traverse will make combat difficult. At medium ranges she will be able to use her concealment to reach good firing positions, which will combine with her improved dispersion to allow some accurate attacks. Against enemy cruisers, remaining bow-in can be a viable tactic, as she can bounce the AP rounds of most same-tier cruisers. With two-thirds of her firepower forward, she will not lose much potential DPM this way. Enemy cruisers that attempt to unmask more guns or launch torpedoes will need to risk showing broadside. Against destroyers or angled targets, HE rounds should be the usual choice. | |||
| + | ||||
| + | Although her torpedoes can be devastating, their slow speed and high reaction time mean that they cannot be relied on to regularly land serious hits. Their poor launch angles also mean they are dangerous to use at close ranges. But their long range and relatively slow speed make them good area denial weapons and they can be effective weapons when kiting away or engaging targets which are closing to engage. | |||
| |Pros=<!-- write list of positive points below. use * as in ordinary wiki-list. --> | |Pros=<!-- write list of positive points below. use * as in ordinary wiki-list. --> | |||
| ? | * | + | * Guns are very accurate | |
| ? | * | + | * Can overmatch Tier IV and V cruiser plating | |
| ? | + | * Torpedoes have high damage | ||
| ? | * | + | * Decent concealment | |
| ? | * | + | * Has access to Hydroacoustic Search consumable | |
| ? | * | + | ||
| ? | + | |||
| ? | + | |||
| |Cons=<!-- write list of negative points below. use * as in ordinary wiki-list. --> | |Cons=<!-- write list of negative points below. use * as in ordinary wiki-list. --> | |||
| ? | * | + | * Low DPM | |
| ? | * | + | * Low health pool | |
| ? | + | * Poor fire starting potential | ||
| ? | * | + | * Poor AA defenses | |
| + | ||||
| + | |Research=<!-- write text about priority sequence of research below --> | |||
| + | Captains should first research ''Aoba's'' second hull for the increase in health and maneuverability it provides. Lastly, captains should research the upgraded Gun Fire Control System to increase the ship's maximum firing range. | |||
| + | ||||
| + | |OptimalConfiguration=<!-- write some general text about selection of optimal configuration below (optional)--> | |||
| + | ||||
| + | |Upgrades=<!-- write text about best upgrades below --> | |||
| + | Slot 1 & 2 are both fairly standard choices for a cruiser, Main Armaments Modification 1 will keep her main battery firing - an important consideration with her small number of guns. Engine Room Protection helps to keep her moving, a stationary cruiser in open water is a tempting target for all enemies in range. | |||
| + | Slot 3 & 4 offer some options. In slot 3, Aiming Systems Modification 1 is the safe choice and will further improve Aoba’s good accuracy. An alternative is to take Main battery Modification 2 to improve her poor turret traverse. | |||
| + | Propulsion Modification 1 or Steering Gears Modification 1 can both be viable options for slot 4. Players who want to use their throttle to avoid incoming fire will want the propulsion mod. Using the Steering Gears mod will make changes of direction easier. | |||
| + | ||||
| + | * Slot 1: {{Main Armaments Modification 1}} | |||
| + | * Slot 2: {{Engine Room Protection}} | |||
| + | * Slot 3: {{Aiming Systems Modification 1}} -or- {{Main Battery Modification 2}} | |||
| + | * Slot 4: {{Propulsion Modification 1}} -or- {{Steering Gears Modification 1}} | |||
| + | ||||
| + | ||||
| + | |CommanderSkills=<!-- write text about best set of Commander Skills below --> | |||
| + | If players have a trained captain for Furutaka, they will be a good match for Aoba and the rest of this line (apart from 155 mm Mogami). | |||
| + | ||||
| + | {{Commander Skills 3 CR | |||
| + | <!-- Ratings 1,2,3 are legit. Others are ignored.--> | |||
| + | | rating11 = 2<!-- Grease the Gears --> | |||
| + | | rating12 = <!-- Swift Fish --> | |||
| + | | rating13 = <!-- Consumables Specialist --> | |||
| + | | rating14 = 2 <!-- Gun Feeder --> | |||
| + | | rating15 = <!-- Incoming Fire Alert --> | |||
| + | | rating16 = 3 <!-- Last Stand --> | |||
| + | ||||
| + | | rating21 = 1 <!-- Pyrotechnician --> | |||
| + | | rating22 = <!-- Fill the Tubes --> | |||
| + | | rating23 = <!-- Consumables Enhancements --> | |||
| + | | rating24 = <!-- Eye in the Sky --> | |||
| + | | rating25 = 3 <!-- Priority Target --> | |||
| + | | rating26 = <!-- Expert AA Marksman --> | |||
| + | ||||
| + | | rating31 = <!-- Heavy HE and SAP Shells --> | |||
| + | | rating32 = <!-- Enhanced Torpedo Explosive Charge/ already does 17K+ --> | |||
| + | | rating33 = 3 <!-- Adrenaline Rush --> | |||
| + | | rating34 = <!-- Heavy AP Shells --> | |||
| + | | rating35 = 1 <!-- Superintendent --> | |||
| + | | rating36 = 2 <!-- Survivability Expert --> | |||
| + | ||||
| + | | rating41 = 1 <!-- Top Grade Gunner --> | |||
| + | | rating42 = <!-- Outnumbered --> | |||
| + | | rating43 = 1 <!-- Radio Location --> | |||
| + | | rating44 = <!-- Inertial Fuse for HE Shells --> | |||
| + | | rating45 = 3 <!-- Concealment Expert --> | |||
| + | | rating46 = <!-- AA Gunner --> | |||
| + | }} | |||
| + | ||||
| + | |Consumables=<!-- write text about selection of Consumables below --> | |||
| + | ''{{#var:ship_name}}'' can equip the following consumables: | |||
| + | * '''Slot 1:''' {{Damage Control Party}} | |||
| + | * '''Slot 2:''' {{Defensive AA Fire}} – 3 charges or {{Hydroacoustic Search}} – 3 charges | |||
| + | * '''Slot 3:''' {{Catapult Fighter}} – 3 charges | |||
| + | * '''Slot 4:''' {{Submarine Surveillance}} – 3 charges | |||
| + | ||||
| + | |Camouflage=<!-- write text about useful camouflage below --> | |||
| + | ||||
| + | {{TT Ship Camo Insert|shiptier=6}} | |||
| + | ||||
| + | |Signals=<!-- write text about best set of signals below --> | |||
| + | ||||
| + | {{Signal Flags | |||
| + | | November Echo Setteseven = 2 | |||
| + | | Mike Yankee Soxisix = 1 | |||
| + | | India X-Ray = 2 | |||
| + | | Juliet Whiskey Unaone = 1 | |||
| + | | Victor Lima = 3 | |||
| + | | Hotel Yankee = 1 | |||
| + | ||||
| + | | November Foxtrot = 2 | |||
| + | | Sierra Mike = 3 | |||
| + | | India Delta = | |||
| + | | Juliet Yankee Bissotwo = | |||
| + | | India Yankee = 2 | |||
| + | | Juliet Charlie = 1 | |||
| + | ||||
| + | | X-Ray Papa Unaone = | |||
| + | | Sierra Bravo = | |||
| + | ||||
| + | }} | |||
| + | ||||
| + | |Gallery=<!-- write below list of files without tags. description (if necessary) for each should be separated with | --><gallery> | |||
| + | ||||
| + | ||||
| + | </gallery> | |||
| + | ||||
| + | |History=<!-- write text below --> | |||
| + | <div class="thumb tright"> | |||
| + | {{AnnoWiki|content= | |||
| + | <h2> ''{{#var:ship_name}}'', 1927</h2> | |||
| + | ====Construction==== | |||
| + | :Builder: Mitsubishi Heavy Industries,<br> Nagasaki, Japan | |||
| + | :Laid down: 4th February 1924 | |||
| + | :Launched: 25th September 1926 | |||
| + | :Commissioned: 20th September 1927 | |||
| + | ---- | |||
| + | ====Specifications==== | |||
| + | :7,100 tons displacement, standard | |||
| + | :185.2m length | |||
| + | :15.8m beam | |||
| + | :5.8m draft | |||
| + | ---- | |||
| + | ====Machinery==== | |||
| + | :10 Kanpon oil-fired boilers | |||
| + | :2 Kanpon mixed-firing boilers | |||
| + | :4 Parsons geared turbines | |||
| + | :1,400 tons of oil, 400 tons of coal | |||
| + | ---- | |||
| + | ====Performance==== | |||
| + | :35 knots at 106,000 shaft horsepower | |||
| + | :6,000nm at 14 knots | |||
| + | ---- | |||
| + | ====Armor==== | |||
| + | :Main belt: 76mm | |||
| + | :Decks: 48mm | |||
| + | :Conning Tower: 25mm | |||
| + | :Turrets: 25mm | |||
| + | :Fore and Aft Plating: 16mm | |||
| + | ---- | |||
| + | ====Armament==== | |||
| + | =====Main===== | |||
| + | :Six (3x2 20cm/50 3rd Year Type No.1 guns | |||
| + | =====Secondary===== | |||
| + | :Four (4x1) 12cm/45 10th Year Type guns | |||
| + | =====Anti-aircraft===== | |||
| + | :Two (1x1) 7.7mm machine guns | |||
| + | =====Torpedoes===== | |||
| + | :Twelve (6x2) 61cm Type 8 no. 2 Torpedoes | |||
| + | ====Aircraft Facilities==== | |||
| + | :1 Kawanishi E7K1 “Alf” floatplane | |||
| + | :1 aircraft catapult | |||
| + | ||||
| + | ---- | |||
| + | ====Complement==== | |||
| + | :45 officers, 577 sailors | |||
| + | }} | |||
| + | {{AnnoWiki|content= | |||
| + | <h2> ''{{#var:ship_name}}'', 1945</h2> | |||
| + | ====Specifications==== | |||
| + | :8,900 tons displacement, standard | |||
| + | :183.5m length | |||
| + | :17.6m beam | |||
| + | :5.6m draft | |||
| + | ---- | |||
| + | ====Armament==== | |||
| + | =====Main===== | |||
| + | :Six (3x2) 20.3cm 3rd Year Type No.2 guns | |||
| + | =====Secondary===== | |||
| + | :Four (4x1) 12cm/45 10th Year Type guns | |||
| + | =====Anti-aircraft===== | |||
| + | :Thirty-six (2x3, 15x2) 25mm Type 96 AA guns | |||
| + | =====Torpedoes===== | |||
| + | :Eight (2x4) 61cm Type 93 mod 2 Torpedoes | |||
| + | ====Aircraft Facilities==== | |||
| + | :2 Aichi E13A “Jake” seaplanes | |||
| + | :1 aircraft catapult | |||
| + | }} | |||
| + | </div> | |||
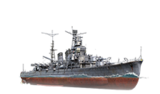
| ? | + | [[File:Nh97727.jpg|none|frame|x260px|link=|''Aoba'' soon after completion]] | ||
| ? | File:Nh97727.jpg | + | ||
| ? | + | |||
| ? | + | ===History=== | ||
| he Aoba-class cruisers (青葉型巡洋艦 Aoba-gata jun'yōkan?) were a class of two Japanese heavy cruisers which saw service during World War II. | he Aoba-class cruisers (青葉型巡洋艦 Aoba-gata jun'yōkan?) were a class of two Japanese heavy cruisers which saw service during World War II. | |||
| |HistoricalGallery=<!-- write below list of files without tags. description (if necessary) for each should be separated with template {{!}} --><gallery> | |HistoricalGallery=<!-- write below list of files without tags. description (if necessary) for each should be separated with template {{!}} --><gallery> | |||
| + | File:Nh97727.jpg|Aoba soon after completion. | |||
| + | File:Aoba class cruiser;h97733.jpg|WW-2 recognition drawing of Aoba class cruisers. | |||
| + | File:AobaTrial.jpg|Aoba out on sea trials. | |||
| + | </gallery> | |||
| ? | + | |Video=<!-- put below video clips with using template VideoYT. You can use html-tags for formatting. --> | ||
| |Ref= <!-- write below --> | |Ref= <!-- write below --> | |||
| + | <references /> | |||
| + | # [https://en.wikipedia.org/wiki/Japanese_cruiser_Aoba Japanese cruiser ''Aoba'' - Wikipedia] | |||
| + | # [https://en.wikipedia.org/wiki/Aoba-class_cruiser ''Aoba''-class cruiser - Wikipedia] | |||
| + | {{WoWS Ship Changelog Insert|1= | |||
| + | *Added to the game in Update 0.1.4 (alpha version). | |||
| + | *Update 0.5.0: | |||
| + | **The Experience and Credit earnings were reduced by a value in the range of 5-10%. | |||
| + | *Update 0.5.2: | |||
| + | **Experience earnings increased by 3%. | |||
| + | **Credit earnings increased by 5%. | |||
| + | *Update 0.5.6: | |||
| + | :*Hulls (A) and (B): The 4х1 120mm/40 10th Year Type mod. B2 AA mounts were replaced with 4х1 120mm/40 10th Year Type mod. B2/C mounts. As a result, the average AA damage within the 4.5km AA engagement area radius increased by 10 points (from 10 to 20 points). | |||
| + | :*Hull (A): the ship's HP was increased by 4,200 (from 26,300 to 30,500). | |||
| + | :*Hull (B): the ship's HP was increased by 1,400 (from 30,500 to 31,900). | |||
| + | *Update 0.5.8: | |||
| + | **The armor model of the hull was refined. | |||
| + | *Update 0.6.2: | |||
| + | **The national flag was moved from the stern to the mast. | |||
| + | *Update 0.6.7: | |||
| + | **Credit earnings increased by 5%. | |||
| + | *Update 0.6.12: | |||
| + | **Detectability when firing main guns in smoke changed to 6.79 km. | |||
| + | *Update 0.6.13: | |||
| + | **Fire extinguishing time now 30 s instead of 60 s. | |||
| + | **Improved display of thin elements. | |||
| + | *Update 0.6.15: | |||
| + | **A bonus was added to the "Type 16" permanent camouflage: a -10% discount to the cost of post-battle maintenance. | |||
| + | *Update 0.7.2: | |||
| + | **Players who have collected the "Uniform Elements" sub-collection of the "Yamomoto Isoroku" collection can use an alternate permanent camouflage color. | |||
| + | *Update 0.7.6: | |||
| + | **Improved display of thin elements on the hull. | |||
| + | *Update 0.7.10: | |||
| + | **The range of the Hydroacoustic Search consumable was unified: 4 km for detecting ships, 3 km for detecting torpedoes. | |||
| + | *Update 0.7.11: | |||
| + | **Accuracy of the main battery was improved to be similar to that of Zao. | |||
| + | *Update 0.9.2: | |||
| + | **Fixed an issue which excluded one of the 25 mm/60 Type96 guns from the short-range AA defenses for Tier VI Aoba's Hull (B). | |||
| + | **The Central armor plating was reinforced from 16 mm to 25 mm. | |||
| + | *Update 0.10.0 : | |||
| + | **The firing range of the secondary battery was increased to 4.95 km. | |||
| + | *Update 13.1: | |||
| + | **Added the Submarine Surveillance consumable with the following characteristics: | |||
| + | ***Range: 5 km. | |||
| + | ***Reload: 120 s. | |||
| + | ***Number of charges: 3. | |||
| + | ***Action time: 20 s. | |||
| + | }} | |||
| }}<!-- DO NOT DELETE THIS LINE. DO NOT INSERT ANYTHING BELOW THIS LINE --> | }}<!-- DO NOT DELETE THIS LINE. DO NOT INSERT ANYTHING BELOW THIS LINE --> | |||
Latest revision as of 09:56, 19 May 2024

| Research price30000 exp |
| Purchase price2,660,000 |
| Hit Points30,500 |
| 203 mm/50 3rd Year Type No.2 in a Model C turret3 х 2 pcs. |
| Rate of Fire5.45 shots/min. |
| Reload Time11 sec. |
| Rotation Speed5 deg./sec. |
| 180 Degree Turn Time36 sec. |
| Firing Range13.55 km. |
| Maximum Dispersion116 m. |
| HE Shell203 mm HE Type0 |
| Maximum HE Shell Damage3,300 |
| Chance of Fire on Target Caused by HE Shell17 % |
| Initial HE Shell Velocity840 m./s. |
| HE Shell Weight125.85 kg. |
| AP Shell203 mm AP Type91 |
| Maximum AP Shell Damage4,700 |
| Initial AP Shell Velocity840 m./s. |
| AP Shell Weight125.85 kg. |
| 120 mm/45 10th Year Type on a Model B2 mount4 х 1 pcs. |
| Firing Range4.96 km. |
| Rate of Fire10 shots/min. |
| Reload Time6 sec. |
| HE Shell120 mm HE Type0 |
| Maximum HE Shell Damage2,000 |
| Initial HE Shell Velocity825 m./s. |
| Chance of Fire on Target Caused by HE Shell8 % |
| 610 mm Quad2 х 4 pcs. |
| Rate of Fire0.59 shots/min. |
| Reload Time102 sec. |
| Rotation Speed25 deg./sec. |
| 180 Degree Turn Time7.2 sec. |
| TorpedoType8 mod. 2 |
| Maximum Damage16,267 |
| Torpedo Speed59 knot |
| Torpedo Range9.99 km. |
| 120 mm/45 10th Year Type on a Model B2 mount4 х 1 pcs. |
| . . . Average Damage per Second20.4 |
| . . . Firing Range4.5 km. |
| 13 mm/76 Type 93 on a twin mount15 х 2 pcs. |
| . . . Average Damage per Second30 |
| . . . Firing Range1.2 km. |
| 25 mm/60 Type 96 on a twin mount2 х 2 pcs. |
| . . . Average Damage per Second5.4 |
| . . . Firing Range2.49 km. |
| Maximum Speed35 knot |
| Turning Circle Radius710 m. |
| Rudder Shift Time8.4 sec. |
| Surface Detectability Range11.7 km. |
| Air Detectability Range5.78 km. |

Aoba — Japanese Tier VI cruiser.
The Aoba-class cruisers were originally intended to be identical to the Furutaka class, but a number of changes were made to the design by the order of the Navy's General Staff. New 120 mm anti-aircraft guns were mounted instead of 76 mm ones, and a catapult for seaplanes was added between the stern superstructure and the turret. Aoba actively participated in World War II: She landed troops on Guam and Wake, escorted convoys, and fought in the Battles of the Coral Sea, Savo Island, and Cape Esperance. On July 24, 1945, she was sunk in Kure Harbor by an Allied bomber force.
Modules
 |
Rate of Fire (shots/min) | 180° Turn Time (sec) | Maximum Dispersion (m) | Maximum HE Shell Damage (HP) | Chance of Fire on Target Caused by HE Shell (%) | Maximum AP Shell Damage (HP) |
Research price (exp) |
Purchase price ( | |
|---|---|---|---|---|---|---|---|---|---|
| 203 mm/50 3rd Year Type No.2 in a Model C turret | 5.5 | 36 | 116 | 3,300 | 17 | 4,700 | 0 | 240,000 |
 |
Hit Points (HP) | Armor (mm) | Armor (mm) | Main Turrets (pcs.) | Secondary Gun Turrets (pcs.) | AA Mounts (pcs.) | Torpedo Tubes (pcs.) | Hangar Capacity (pcs.) |
Research price (exp) |
Purchase price ( | |
|---|---|---|---|---|---|---|---|---|---|---|---|
| Aoba (A) | 30,500 | 6 | 105 | 3 | 4 | 15/2/4 | 2 | 0 | 380,000 | ||
| Aoba (B) | 31,900 | 6 | 105 | 3 | 4 | 15/2/4 | 2 | 14,000 | 980,000 |
 |
Rate of Fire (shots/min) | Torpedo Tubes Reload Time (sec) | 180° Turn Time (sec) | Maximum Damage (HP) | Torpedo Speed (knot) | Torpedo Range (km) |
Research price (exp) |
Purchase price ( | |
|---|---|---|---|---|---|---|---|---|---|
| Type8 mod. 2 | 0.6 | 102 | 7.2 | 16,266 | 59 | 10 | 0 | 400,000 |
 |
IDS_SHIP_PARAM_SUO_INCREASE_DIST (%) | Maximum Firing Range (km) |
Research price (exp) |
Purchase price ( | |
|---|---|---|---|---|---|
| Type6 mod. 1 | 0 | 0 | 240,000 | ||
| Type6 mod. 2 | 0 | 6,000 | 520,000 |
 |
Maximum Speed (knot) |
Research price (exp) |
Purchase price ( | |
|---|---|---|---|---|
| Propulsion: 102,000 hp | 35 | 0 | 180,000 |
Compatible Upgrades
| Slot 1 |
||||||
|---|---|---|---|---|---|---|
| Slot 2 |
||||||
| Slot 3 |
||||||
| Slot 4 |
Player Opinion
Performance
Refer to the in-game Port screens for more useful data.
Tier VI Aoba is an evolution of her predecessor. In general, she does the same things that Furutaka does, but slightly more. A little bit stealthier, a little bit faster, dealing a little bit more damage. She also emphasizes the weaknesses of Furutaka, weak AA defenses and slow main battery operation.
The Ship
Her top speed of 35 knots makes Aoba one of the faster cruisers at her tier, allowing her to move about the battlefield with relative ease. Although her turning radius of 710 meters is far from the tightest, she has a fast rudder shift time of 6.5 seconds. Aoba will start turning quickly, but she needs space to make her maneuvers which makes operating in confined waters uncomfortable. Her concealment of 11.7 km can be reduced down to 10.5 km with Concealment Expert, which further helps her to safely relocate.
Aoba mounts a standard cruiser Damage Control Party ![]() , which is active for 5 seconds with a 60 second cool down. Her second slot has a choice of consumables – a Hydroacoustic Search
, which is active for 5 seconds with a 60 second cool down. Her second slot has a choice of consumables – a Hydroacoustic Search ![]() or Defensive AA Fire
or Defensive AA Fire ![]() . Hydroacoustic Search is the optimal choice, this will detect torpedoes at 3 km and ships at 4 km for 100 seconds. The Defensive AA Fire will provide a 50% boost to her continuous AA damage, but the weakness of her AA means the benefits are rather limited. In her third slot, Aoba carries a Catapult Fighter
. Hydroacoustic Search is the optimal choice, this will detect torpedoes at 3 km and ships at 4 km for 100 seconds. The Defensive AA Fire will provide a 50% boost to her continuous AA damage, but the weakness of her AA means the benefits are rather limited. In her third slot, Aoba carries a Catapult Fighter ![]() which launches a pair of fighters which patrol around the ship for up to 1 minute. Finally, she mounts a Submarine Surveillance
which launches a pair of fighters which patrol around the ship for up to 1 minute. Finally, she mounts a Submarine Surveillance ![]() which will detect submerged submarines at 5 km range for 20 seconds.
which will detect submerged submarines at 5 km range for 20 seconds.
Survivability
With 16 mm of plating, Aoba’s bow and stern can bounce heavy cruiser AP if sufficiently angled, although she is vulnerable to all calibers of HE. Her citadel runs for most of the length of the ship with a large raised section between her bridge and rear structure, although the sections below her turrets are submerged and difficult to hit. With 76 mm of armor and a large area to hit, she is vulnerable to taking citadel damage. There is also some extra protection provided by the presence of torpedo bulges along the length of her citadel, which can result in shells detonating before penetrating the main armor belt. Aoba has a rather small health pool for a heavy cruiser, with no way to replenish lost hit points players must be careful not to throw their health away.
Armament
Aoba mounts a small main battery of six 203 mm guns in three twin turrets, with the standard Japanese slow turret traverse time – only Pensacola has slower turrets. With 14.9 km of range and no way of improving it her main battery range can sometimes feel lacking, particularly when she is downtiered. Her guns have a reload of 11 seconds which allows Aoba to remain somewhat competitive with other heavy cruisers but she will not be able to match the DPM of lighter armed ships. To offset this disadvantage, her guns use destroyer dispersion rather than the usual cruiser dispersion. This means that shells will tend to group closer to the aiming point and helps to compensate for her small main battery.
On a per shell basis Aoba has some of the best HE at her tier. The shells hit hard, 3,300 damage is the highest at her tier, and have a good fire chance of 17% as well as the ability to penetrate battleship plating. In ideal conditions, players couldcan expect to set 5-6 fires per minute with sustained firing. Whilst this trails behind the potential of 152 mm armed ships, the direct damage that Aoba can do will help to offset this. Her AP shells
Aoba carries a quad torpedo launcher on each side, with hard hitting and long range torpedoes. With a 10 km range they can be used against targets at a distance. Although they hit hard, the torpedoes travel rather slowly and have a large detection range. Targets will have 9.5 seconds of reaction time to take avoiding action. These are effectively the same weapons that Furutaka mounts, but with a longer reload. Additionally, Aoba introduces players to another key feature of Japanese cruisers – restricted torpedo arcs. Her forward angles are non-existent, although she has very good angles to the rear.
Anti-Air
Aoba has weak AA defenses. She has some long-range AA guns which reach out to 5.2 km, but she only puts out a single flak cloud that is unlikely to pose much threat to enemy aircraft. Much of Aoba’s continuous DPS comes from her short-range weapons, which are limited to 2.5 km range and will not engage enemy aircraft until they are already established on an attack run. The addition of her Patrol Fighter consumable continues this trend. In theory her fighters can provide some additional protection, in reality they are just as likely to watch enemy aircraft fly past without interfering.
Anti-Submarine
Aoba carries an ASW airstrike with a range of 6 km, this drops a single depth charge per attack with 20 seconds between uses. Although it only launches a single aircraft, it does allow Aoba to engage enemy submarines with a degree of safety. Her Submarine Surveillance and Hydroacoustic Search consumables can also be an important asset to her team, allowing players to track enemy submarines for nearby allies to attack.
Battle Performance
Players will need to use effective positioning and ammunition selection in order to compensate for Aoba’s low base damage output. A well-aimed salvo can potentially cripple an enemy cruiser or destroyer, if the right ammunition is selected. For this reason, the Gun Feeder captain skill is recommended as it will allow players to more quickly switch ammunition types.
Aoba is not suited to close range fighting, where her long reload and slow turret traverse will make combat difficult. At medium ranges she will be able to use her concealment to reach good firing positions, which will combine with her improved dispersion to allow some accurate attacks. Against enemy cruisers, remaining bow-in can be a viable tactic, as she can bounce the AP rounds of most same-tier cruisers. With two-thirds of her firepower forward, she will not lose much potential DPM this way. Enemy cruisers that attempt to unmask more guns or launch torpedoes will need to risk showing broadside. Against destroyers or angled targets, HE rounds should be the usual choice.
Although her torpedoes can be devastating, their slow speed and high reaction time mean that they cannot be relied on to regularly land serious hits. Their poor launch angles also mean they are dangerous to use at close ranges. But their long range and relatively slow speed make them good area denial weapons and they can be effective weapons when kiting away or engaging targets which are closing to engage.Pros:
- Guns are very accurate
- Can overmatch Tier IV and V cruiser plating
- Torpedoes have high damage
- Decent concealment
- Has access to Hydroacoustic Search consumable
Cons:
- Low DPM
- Low health pool
- Poor fire starting potential
- Poor AA defenses
Research
Optimal Configuration
Upgrades
Slot 1 & 2 are both fairly standard choices for a cruiser, Main Armaments Modification 1 will keep her main battery firing - an important consideration with her small number of guns. Engine Room Protection helps to keep her moving, a stationary cruiser in open water is a tempting target for all enemies in range. Slot 3 & 4 offer some options. In slot 3, Aiming Systems Modification 1 is the safe choice and will further improve Aoba’s good accuracy. An alternative is to take Main battery Modification 2 to improve her poor turret traverse. Propulsion Modification 1 or Steering Gears Modification 1 can both be viable options for slot 4. Players who want to use their throttle to avoid incoming fire will want the propulsion mod. Using the Steering Gears mod will make changes of direction easier.
- Slot 1: Main Armaments Modification 1

- Slot 2: Engine Room Protection

- Slot 3: Aiming Systems Modification 1
 -or- Main Battery Modification 2
- Slot 4: Propulsion Modification 1
 -or- Steering Gears Modification 1
Commander Skills
If players have a trained captain for Furutaka, they will be a good match for Aoba and the rest of this line (apart from 155 mm Mogami).
| Recommended Commander Skills | ||||||
|---|---|---|---|---|---|---|
| Cost (points) |
Attack | Defense | ||||
| 1 |
★★ |
|
|
★★ |
|
★★★ |
| 2 |
★ |
|
|
|
★★★ |
|
| 3 |
|
|
★★★ |
|
★ |
★★ |
| 4 |
★ |
|
★ |
|
★★★ |
|
| Key: ★★★ - Extremely Useful ★★ - Frequently Useful ★ - Occasionally Useful No stars - Not Useful | ||||||
Consumables
Aoba can equip the following consumables:
- Slot 1: Damage Control Party

- Slot 2: Defensive AA Fire
 – 3 charges or Hydroacoustic Search
  – 3 charges
- Slot 3: Catapult Fighter
 – 3 charges
- Slot 4: Submarine Surveillance
 – 3 charges
Signals
Recommended Signal Flags 
| |||||
|---|---|---|---|---|---|
| Combat | |||||

|

|
 ★★ |
 ★ |
 ★★★ |
 ★★ |
 ★ |
 ★ |
 ★★ |
 ★★★ |
 ★★ |

|

|

| ||||
Gallery
Historical Info
Historical Gallery


References
Ship Change Log
See here for links to Update notes.
- Added to the game in Update 0.1.4 (alpha version).
- Update 0.5.0:
- The Experience and Credit earnings were reduced by a value in the range of 5-10%.
- Update 0.5.2:
- Experience earnings increased by 3%.
- Credit earnings increased by 5%.
- Update 0.5.6:
- Hulls (A) and (B): The 4х1 120mm/40 10th Year Type mod. B2 AA mounts were replaced with 4х1 120mm/40 10th Year Type mod. B2/C mounts. As a result, the average AA damage within the 4.5km AA engagement area radius increased by 10 points (from 10 to 20 points).
- Hull (A): the ship's HP was increased by 4,200 (from 26,300 to 30,500).
- Hull (B): the ship's HP was increased by 1,400 (from 30,500 to 31,900).
- Update 0.5.8:
- The armor model of the hull was refined.
- Update 0.6.2:
- The national flag was moved from the stern to the mast.
- Update 0.6.7:
- Credit earnings increased by 5%.
- Update 0.6.12:
- Detectability when firing main guns in smoke changed to 6.79 km.
- Update 0.6.13:
- Fire extinguishing time now 30 s instead of 60 s.
- Improved display of thin elements.
- Update 0.6.15:
- A bonus was added to the "Type 16" permanent camouflage: a -10% discount to the cost of post-battle maintenance.
- Update 0.7.2:
- Players who have collected the "Uniform Elements" sub-collection of the "Yamomoto Isoroku" collection can use an alternate permanent camouflage color.
- Update 0.7.6:
- Improved display of thin elements on the hull.
- Update 0.7.10:
- The range of the Hydroacoustic Search consumable was unified: 4 km for detecting ships, 3 km for detecting torpedoes.
- Update 0.7.11:
- Accuracy of the main battery was improved to be similar to that of Zao.
- Update 0.9.2:
- Fixed an issue which excluded one of the 25 mm/60 Type96 guns from the short-range AA defenses for Tier VI Aoba's Hull (B).
- The Central armor plating was reinforced from 16 mm to 25 mm.
- Update 0.10.0 :
- The firing range of the secondary battery was increased to 4.95 km.
- Update 13.1:
- Added the Submarine Surveillance consumable with the following characteristics:
- Range: 5 km.
- Reload: 120 s.
- Number of charges: 3.
- Action time: 20 s.
- Added the Submarine Surveillance consumable with the following characteristics:
| Destroyers | II Tachibana |
| Cruisers | I Hashidate • II Chikuma • III Tenryū • III Katori |
| Battleships | II Mikasa |
| Aircraft Carriers | IV [[Ship:Hōshō (< 23.01.2019)|Hōshō (< 23.01.2019)]] • IV Hōshō • V [[Ship:Zuihō (< 23.01.2019)|Zuihō (< 23.01.2019)]] • VI [[Ship:Ryūjō (< 23.01.2019)|Ryūjō (< 23.01.2019)]] • VI Ryūjō • VII [[Ship:Hiryū (< 23.01.2019)|Hiryū (< 23.01.2019)]] • VII [[Ship:Kaga (< 23.01.2019)|Kaga (< 23.01.2019)]] • VIII [[Ship:Shōkaku (< 23.01.2019)|Shōkaku (< 23.01.2019)]] • VIII Shōkaku • VIII Kaga |